
At the start of a new year, there’s often a bumper crop of enthusiastic new camera owners who are dying to upgrade their skills and portfolios, and get extremely excited about creating all sorts of beautifully lit looks. Then the realization hits, that often, those looks are materialized with pricey, specialized lighting kits, and their bank balance quietly reminds them to calm down and figure out a workaround. This is where DIY comes in, and there are some phenomenal DIY projects out there to help you create all sorts of gear; ranging from the easy and dirt cheap to the challenging and more pricey, but still far less than paying for professional gear whilst giving rewarding results. You can safely add to that list the following DIY project from Phlearn.
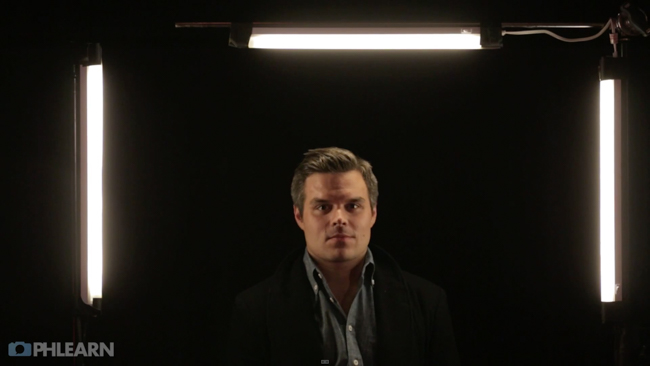
You may associate Phlearn and the beard-face Aaron Nace as the crew who bring to you the intricacies of Photoshop manipulation in simple to understand and follow along tutorials, but the team does much more. In this instance, Aaron shows how to build a really inexpensive 3 continuous light set-up for under $50, and shoot an impactful portrait with it. Along the way, he breaks down some basic lighting terms, the difference between a main/key light, fill light, and accent light, how the angle of light affects the image, and gives pointers on how to work with your subject to achieve a great portrait.


The equipment being used, aside from your camera, are few and basic. You’ll need the three lights which were bought on Amazon for under $50 all together, a dark backdrop, and of course, your camera. The lights are linkable in the video, but it’s not a necessity, and are continuous lights to assist beginners in seeing just how the light interacts with the subject. They are also low heat lights, so your subject suffers less, and you’re more able to add gels and modifiers without concern.
Lights
GE Slimline 23-Inch Linkable Fluorescent Under-Cabinet Light Fixture
Good Earth, 12.5 Inch linking Fluorescent Light Fixture
Not included in that $50 are the stands which you may or may not have. In this video, the lights were simply fastened to basic C-Stands using inexpensive gaffer tape.

[REWIND: Packing Small & Shooting Big: Professional Results With Speedlights | Joseph W. Carey]
For beginners, the information within and basic instruction is highly valuable, and the set-up, even for those more experienced, may be too good and inexpensive not to try. Aaron is always easy to listen to and in this tutorial is no different – particularly enjoy the exquisite moment when he tells his subject, he’ll be ‘tearin’ Tinder up.’

In an episode soon to follow, Aaron will return to his Small Intuos Pro, and break down how to edit one of the headshots from this session. As always, if you are a fan of Aaron’s teachings (and who isn’t?), be sure to check back here for updates, and follow along with Aaron on YouTube and Phlearn. You should also consider becoming quickly adept at Photoshop with the Phlearn Photoshop 101 & 201 sets as they are extremely comprehensive, and will have you quickly doing things with Photoshop you may have otherwise thought too complex, or didn’t even know you could do.


