We’ve teamed up with Adorama to bring you a series of photography tutorials called “Master Your Craft” to be featured on their Youtube Channel. Subscribe to see more of our videos on their channel that covers all things photography-related from lighting and posing to editing to help you hone your skills and master your craft and don’t forget to check out our playlist to watch the entire series!
Video: 3 Simple Techniques to Clean Up Your Background in Photoshop
It quite common for things end up in the background of our images that we didn’t intend on capturing, especially when we’re working in fast-paced environments. This is when Adobe Photoshop comes in handy to remove those unwelcome distractions and in this article/video, I’ll be showing you my top three techniques for cleaning up your backgrounds.
In addition, while I often use my tablet while editing in Photoshop, for today’s tutorial, I’ll be demonstrating all the methods with only a mouse, since many of us may be on the go when we find ourselves needing to clean up our backgrounds.
Before we jump in, make sure to download the exercise files and follow along as we hop into Photoshop and edit our images.
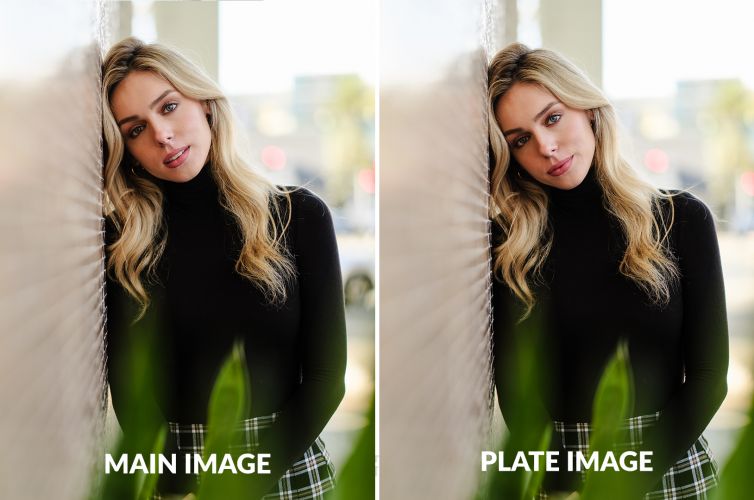
Technique #1: The Plate Method
The plate method is quite straight forward: Choose another image that’s similar and has a clean background, and use it to simply cover up the object in the original using a mask.
Before we get there, let’s make our quick adjustments to the image in Lightroom. I’ve laid out the settings below using the Modern > Soft Light preset from our Visual Flow Lightroom Presets.
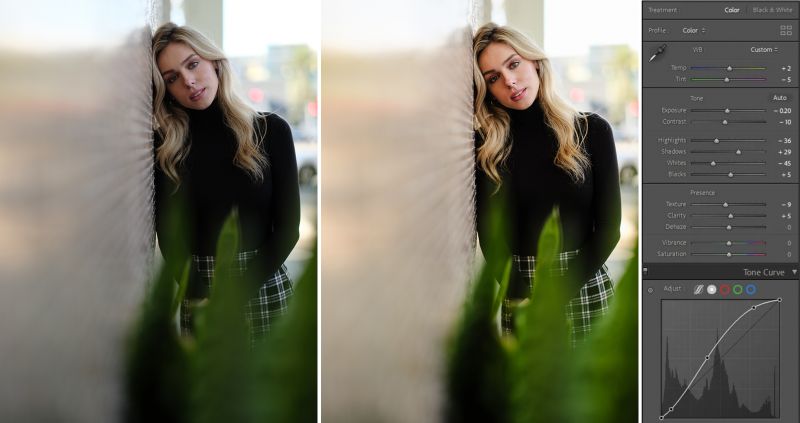
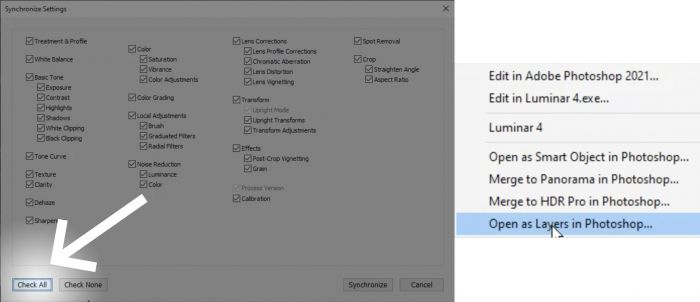
Synchronize the settings to the other image by selecting both images, pressing Ctrl/Cmd + Shift, check all the settings, and the images should look identical. Then, let’s take the images into Photoshop by selecting Edit In > Open as Layers In Photoshop.
Once you’re in Photoshop, line up the images, in this case, I did so manually, by lowering the opacity of the top layer to help line up the shoulder, and then create a black mask by holding Alt/Option + Mask.

As we know, you paint white if you want to reveal and black if you want to conceal, so I’m going to paint right in the area that the car is which will expose the clean layer in just that area.

Related Reading: Simple Compositing Techniques In Lightroom & Photoshop
Technique #2: Content Aware Fill
Content aware fill uses Photoshop’s software to determine how to automatically fill in a selected area based on what’s around it. We’ll edit our next image with Pastel > Hard Light and send it off to Photoshop.
Content aware works in easily-selectable areas away from areas of contrast. In this image, I want to just get rid of the bright white sky above the mountain so I’ll make a rough selection with my lasso tool. Most professionals will recommend that you create a new layer at this point.

Press Shift + Backspace to bring up the fill menu, and select Content Aware from the dropdown menu. Since we simply want to fill in the color in the sky, we’ll turn on Color Adaptation.
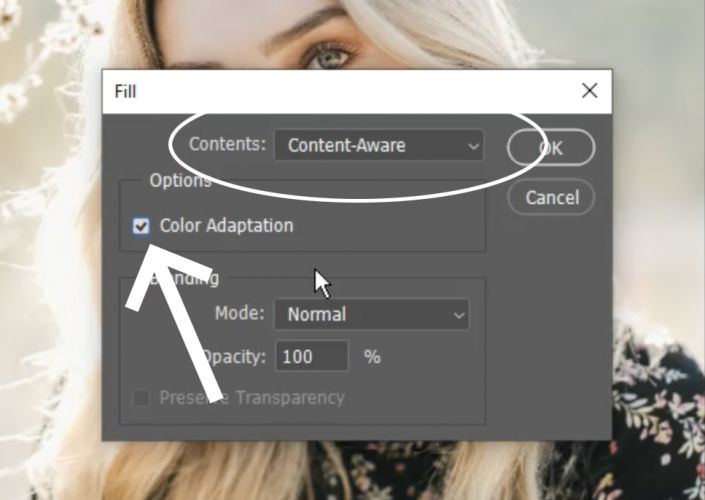
If we’re more concerned about matching the texture, we’ll leave this option off and Photoshop will prioritize the texture, but in our case, we want Photoshop to prioritize the color.

You can fix the little pieces that Photoshop may have missed by using the lasso to select that little piece, press Shift+J for the patch tool, and drag the selection over a nearby area.
Technique #3: Moderate Opacity Clone Stamp
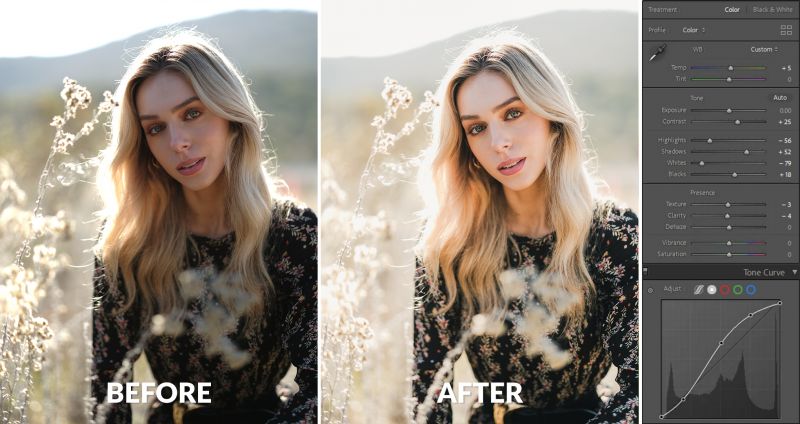
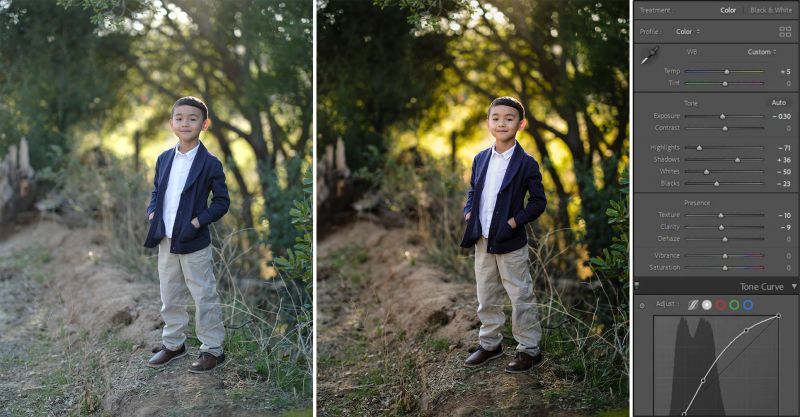
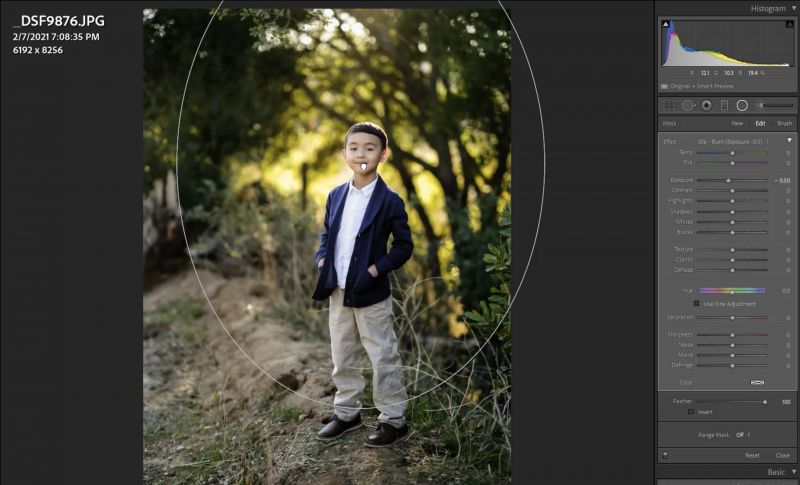
Starting in Lightroom, I’m going to apply the Modern > Backlit preset and add a Radial Filter from the Visual Flow Retouching Toolkit. You can see the final settings below.
Start by duplicating the layer with Ctrl/Cmd + J. It’s good practice to edit on a separate layer. I’m going to select the Clone Stamp tool by pressing S. The key to this technique lies in the “flow” of the brush. You can think of “Flow” like controlling the water pressure of a hose. You can have water come out a little bit at a time or let it pour out by increasing the “flow.” Opacity on the other hand, is the maximum amount that the effect can be painted in. We’re going to select a lower flow and leave opacity at 100.

This technique works best over slightly blurry and textured areas in the background. Find your sample point by holding down Alt/Option and with the brush roughly the size of whatever you want to fix, just softly paint over the distractions.

The moderate flow makes for a very convincing overall effect by allowing you to paint over the objects slowly to ensure a smooth blend with the original background. Repeat this technique for all the areas you want to fix.

Conclusion
I hope you enjoyed this article/video on how to clean up your background using Photoshop. Both Lightroom and Photoshop can be great tools for retouching your images and getting to that final look you’re looking for.
To learn all about Lightroom and its plethora of powerful editing features, be sure to check out Mastering Lightroom workshop, the complete A-Z Lightroom tutorial which is available on its own or as a part of the full Premium Subscription . In addition, you can expand your Lightroom toolbox using our collection of Visual Flow Presets as well as our Visual Flow Retouching Toolkit.
Don’t miss our next episode of Mastering Your Craft on Adorama’s YouTube channel next week! If you want to catch up on all the episodes, make sure you check out our playlist!


Get Connected!