Shoot Background
At Lin and Jirsa Photography, our primary photography business is wedding, family and couples portraiture. However, we often have the need to shoot headshots. Often times it is for our own staff, while other times it is one of our clients requesting headshots for their business use.
Since our main business really isn’t shooting headshots, we don’t have the need to invest in expensive lighting setups such as Kino Flo constant light systems. A set of these lights like the ones that Peter Hurley uses for his headshot lighting can easily set you back more than $5,000. Since we can’t justify that expense from a business standpoint, my goal was to find a cheaper way to mimic the clean square lighting look a la Peter Hurley. So, we will be creating our lighting setup with a simple strobe and a few reflectors.
Just as a note, I am sure Peter Hurley wasn’t the first photographer to use this square lighting setup. But it is a look that has become synonymous with his name and awesome style of headshot photography. Hence, we are going to dub it “Peter Hurley Square Lighting.” While this tutorial is going to give you a simple and approachable way of lighting your headshots, I still can’t say enough good things about the Art of the Headshot workshop on DVD. Lighting is simple, learning to pose and instruct clients to coax out amazing expressions is what sets apart the good photographer from the great ones like Peter Hurley.
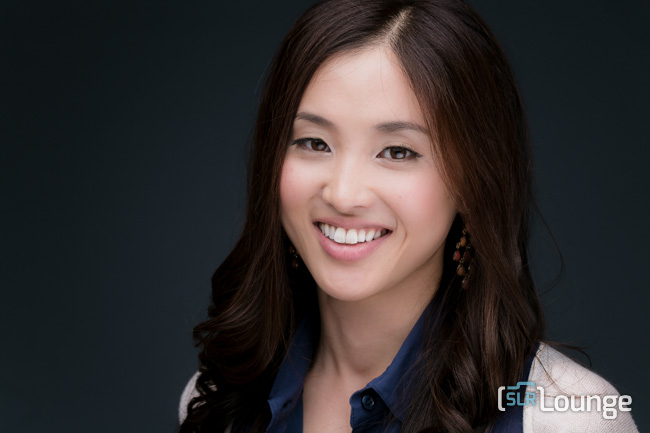
Here is a quick preview of one of our final shots.

Watch the behind the scenes video, and then read the article below for more details on equipment, lighting, production and more!
Watch the Behind the Scenes Video
Equipment & Software Used
Camera: Canon 5D Mark III
Lens: Canon 24-70mm f/2.8 Mark II
Primary Light: Einstein with Parabolic Modifier
Primary Light Stand: Matthews C Stand
Background Light (Optional): Bare Einstein
Modifiers: Westcott 40-inch 5 in 1 Reflector (Silver Side)
Modifier Stands: 2x Manfrotto Reflector Holder
Raw Processing: Lightroom 5 + SLR Lounge Lightroom Presets v5.
How We Shot It
The goal of the shoot was quite simple. I wanted to create a large amount of light, and direct most of it forward and into our subject’s face while using large light modifiers to create a softer look to our light.
Keep in mind, I could have used a smaller pocket strobe such as a Canon 580EX II attached to an umbrella for my primary light source. However, the Einstein and parabolic was already setup, and I was also concerned with just having more space to work with. So, if budget or equipment is a concern, then just grab a pocket strobe and an umbrella for your main light.
In the image below, you can see the 3-reflector setup with our parabolic feeding the light into the entire scene.

Another option would have been to use the softer white side of the Westcott 5 in 1 Reflectors. This would create a light with less overall contrast and specular highlights. But, I dug the higher contrast look of the silver side so I went with that look instead.
I added an optional background light which I mentioned in the behind the scenes video above. I felt like the background light, when used at a very low power setting, added a nice little “kiss of light” to the background giving us a natural radial highlight and vignette to the image, which in-turn drew attention into our subject. Again, we don’t need to be using an Einstein for this background light, any small strobe will work just fine. In the image below, you can see the placement of the background light right behind our model.

We are using a gray seamless for this shoot, just to give it a slightly different look from the typical white background in a Peter Hurley headshot.
At 1/200th of a second, F/8 and ISO 100 we took each of the following shots on our Canon 5D Mark III equipped with the Canon 24-70mm f/2.8 Mark II lens.
At F/8 and ISO 100, we are maximizing lens detail and the color/dynamic range of the camera’s sensor.
Post Production
Post production was quite simple. Since we aren’t blowing these images up into huge prints, we just stuck with standard raw processing and retouch within Adobe Lightroom 4/5 using the SLR Lounge Lightroom Presets v5.
We actually have recorded a full Lightroom retouch of one of these headshots which we will be releasing soon. So we will include that tutorial below as well as soon as it is available.
Final Images
Here are a few more shots using this same setup:


Conclusion
In conclusion, while I had a blast trying to come up with a cheaper way of achieving Peter’s lighting and look, I’ll be honest and say posing for headshots is so much different from anything else I have done. In between sessions, I found myself pulling out my Art of the Headshot DVD to listen to Peter’s coaching and advice when it comes to posing. It is an amazing workshop on DVD, and you can check out SLR Lounge’s full review of Art of the Headshot here.
We hope you enjoyed this article and tutorial! For more information on the Peter Hurley Headshot DVD and the SLR Lounge Lightroom Presets v5, please click any of the links in this article.