Photoshop is just one of those programs that, once learned, is hard to do without, but perhaps a bit harder to get started. Without question there are huge advantages to be had through the structured rigor of some kind of Photoshop curriculum (check CreativeLive), but getting through such syllabus can often be overload, and as it turns out, there are probably a set of key tips that could not only have you using Photoshop more fully, but significantly faster and more accurately. Here are a few:
Photoshop Tip | Split Your Screen For One Image To Maximize Efficiency
The Clone Stamp Tool | What Everyone Misses & Where To Find It
Just before I get to the actual tips – which are relatively short – it probably warrants being said that as photographers, most of us will live within similar Photoshop environments and do similar things, repeatedly. Likely they aren’t too advanced and take advantage of only about 2% of what Photoshop’s capable of.
As such, given the repetitive and similar nature of it all, slight tweaks in behavior and optimizations of the tools at your disposal are enough to create a significant difference in efficiency. One primary way to immediately open up Photoshop in ways you can’t imagine without experience, is to get a pen tablet. If you’re going to do any amount or retouching in Photoshop, Lightroom, Capture One or Affinity Photo, just get one. I rarely push anyone to buy anything, but get one. Buy a used one, buy a cheap one, steal one from your neighbor…just get one.
And I mean it that you needn’t buy anything above the base models. I generally advocate getting a small Wacom Intuos with touch capacity, and that’s it. Yes, if you can get it get the Intuos Pro small, but it’s 3 times the price of the non-pro and you don’t NEED it. You can see a review of the Intuos Pen & Touch here, and the Intuos Pro here.
Using The Keyboard And/Or Tablet Keys For Max Efficiency
You can find numerous cheat-sheets for Photoshop online that tell you all the different hotkeys that exist for the program, but honestly, using them as anything but a reference when you forget something is a fool’s errand. It’s akin to sitting an open book exam, where frankly, if you don’t know the material you’re still screwed because you don’t have time to look it all up. The important thing is to remember a few essential keys and functions at a time, and that’s what we’ll do here, and present a few more a few days on.
Easy Tool Swap While Retouching
If you’re retouching on a broad level or a micro one, there are a few tools you’ll be using with the most frequency (typically):
Eyedropper Tool: i
Spot Healing/Healing Brush: J
Brush Tool: B
Clone Stamp Tool: S
Hand Tool: H
This list isn’t exactly definitive, but suffice to say we won’t qualify each statement. You can add to that list as you like but this tends to be what the list looks like for most people as they’re retouching people at least. But regardless of what your list is made up of, there’s likely a lot of switching back and forth between tools, and while the number of tools may not be exhaustive, the switching can be exhausting and time-consuming.
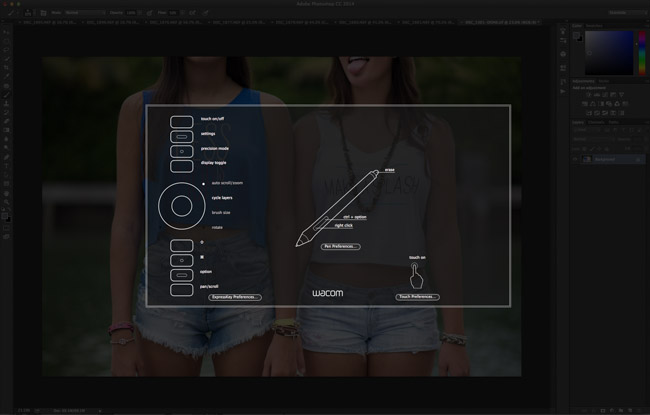
Hotkeys will cut your time here significantly if you remember the few you use most, because you can provisionally switch to the tool of your choice from the one you’re currently using simply by holding the hotkey for the desired tool during its use. So if you’re using the Brush tool (as we tend to for dodging and burning) but need to clone out something you would just press and hold ’S’ and your Brush will turn into the Clone Stamp tool, only to revert immediately back to the brush once you let go of the ’S’. Nice right? This is significantly faster than moving over to the tool panel clicking, using the new tool, then switching back. And if you have a Wacom tablet you can program the keys on the tablet to function as pretty much anything so you can do the same there.
Faster Zooming & Precision
Learning how to Photoshop faster is important if you’re a working photographer, but it’s an art, and needs a little time. Like writing a thesis or working on a painting, it’s typical to be so zoned in while you work that you become too close to the project to see it objectively. It’s why the greats take time, and advocate taking breaks. Hemingway would suggest finishing your writing with something left to say, completely stop thinking about it for the night, and then come back fresh in the morning. In retouching I advocate something similar but more easily done. Yes, it’s good to walk away and come back, but you should continually zoom out to see how your project is looking as a whole so you don’t lose the forest for the trees, so-to-speak.
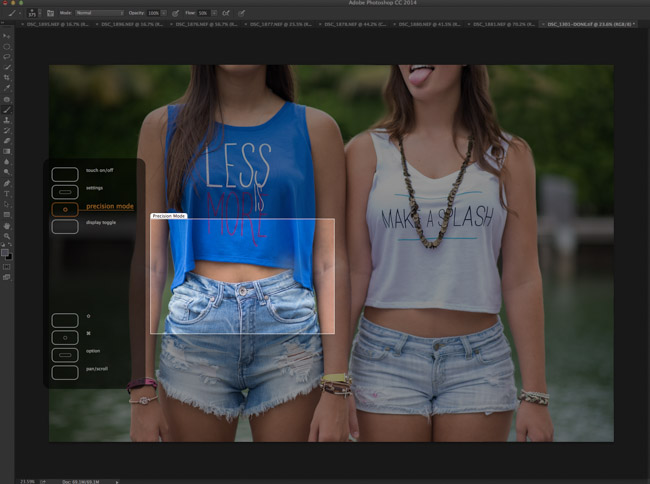
Again, constantly zooming in and out can be tiresome and at the end of a project it can have taken away time and focus. The quick way to do it is to simply hold the ‘H’ key when you’re zoomed far in, and then move the pointer. Upon doing so the image will zoom out fully and a box will appear to show you the size of your current space (see image above), and you can then move that around if you like. Sure you could hold down the spacebar to drag the image but this is just so fast and allows for immediate checks of the entire image.
If you’re looking to learn more about Photoshop and how to wield it like you invented it, just a thought you may want to check these classes on CreativeLive which are up to 50% off at the moment.


Get Connected!