In honor of our first Lighting Week, we wanted to showcase some of our incredible SLR Lounge Award winners and give you insight into how lighting completely transformed their images. You’ll notice that a wide array of gear was used to create these photos, from pocket flashes to medium strobes, proving that it isn’t what type of gear you have in your kit so long as you know how to use it in a scene.
If you are seeking tips & techniques to help you master off-camera flash for wedding & portrait photography then check out Lighting 101 & 201 – now on sale in the SLR Lounge store!
Lighting 101Off-Camera Flash Technique #1 – Annuj Yoganathan

Gear Used
- Canon 5D Mark IV
- Canon 24-70mm f/2.8 II
- Godox AD200
- MagMod CTO Gels
- Magmod MagSphere
- Manfrotto Nano Stands
How He Shot It
“The lights were already dim in the venue and seeing the way I wanted the final image to look, I wanted to keep it with that mood for this shot. I used a Godox AD200 at full power with two MagnetMod 1/2 orange CTO gels layered on top of one another to give the image that orange glow. The light was pointed straight forward and slightly up in the center of the bar placed far back against the wall with a MagSphere on it so that it spreads and hits all of the people in the frame as well as the inside of the bar. “
Annuj loves using the Manfrotto Nano stands “because of how compact and light it is as well as it’s ability to quickly convert into a boom pole”.
Off-Camera Flash Technique #2 – Carsten Schertzer

Gear Used
How He Shot It
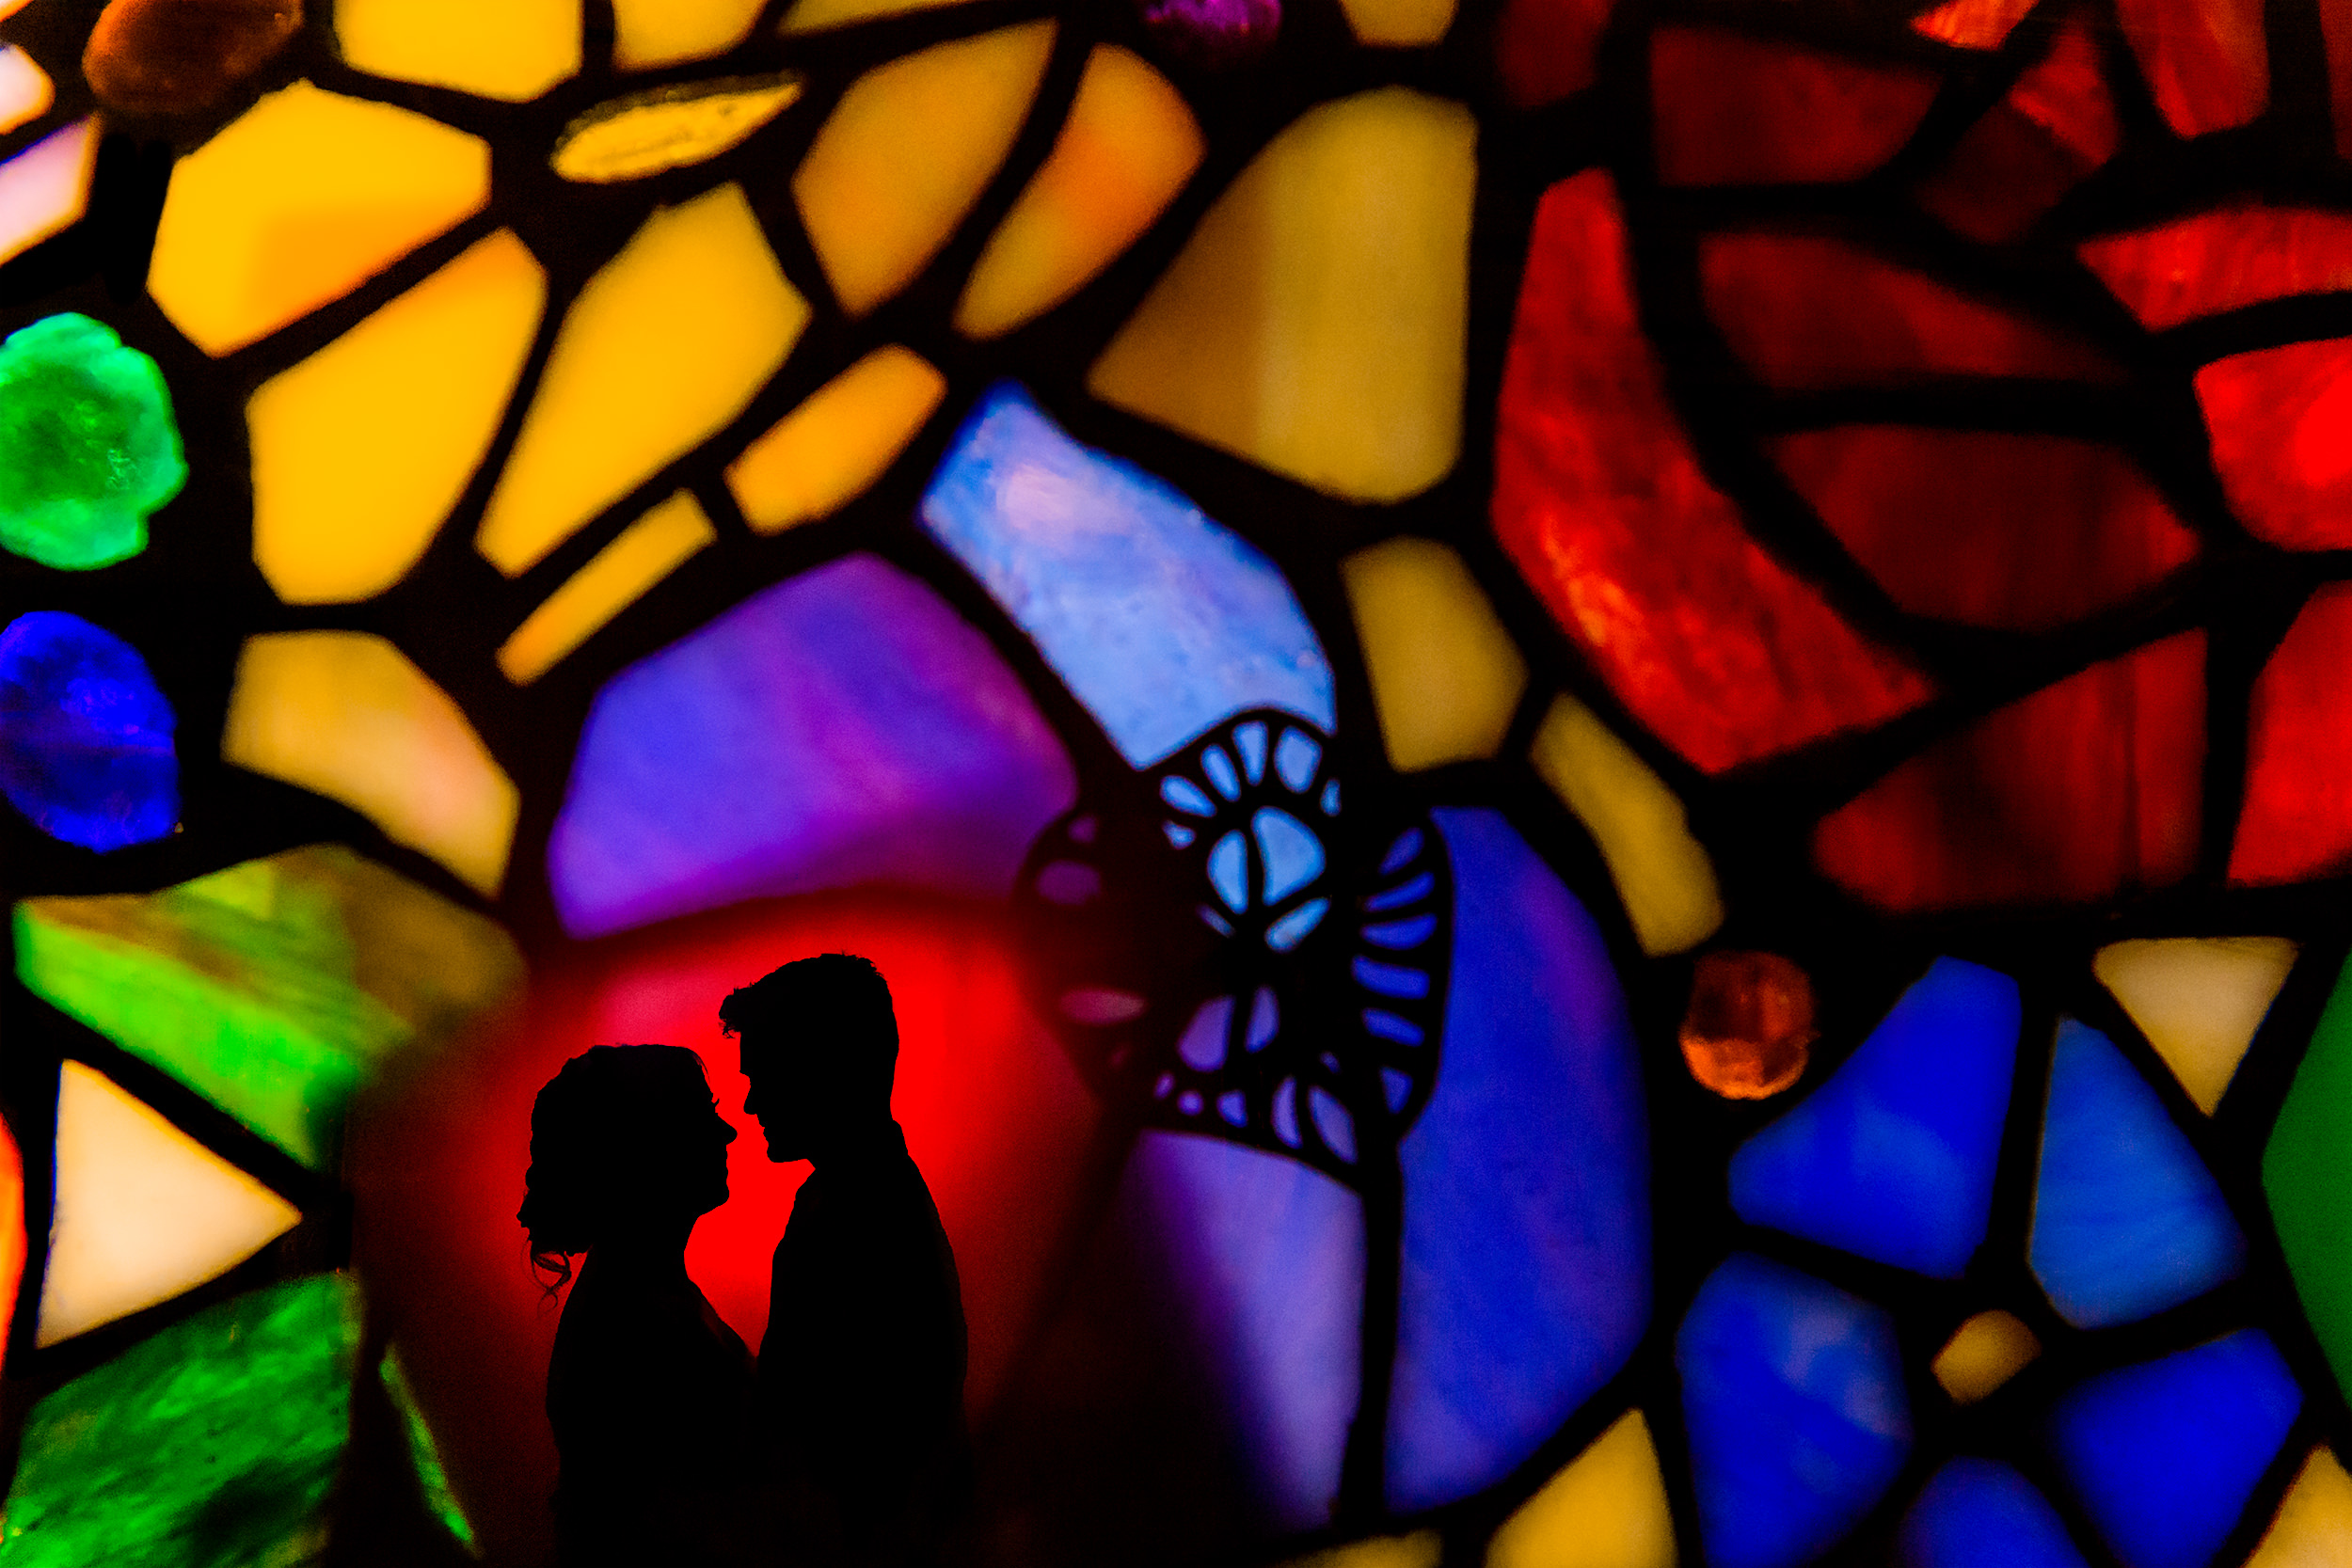
“This photo was a multiple-exposure made of two images, one being the simple silhouette and the other image being of a stained glass lampshade I found in another room of the reception venue. I first saw the lampshade and tried finding a way to use it in a photo. At first, I was considering trying to shoot through the lamp but that very quickly didn’t work out the way I wanted, so I settled on doing a multiple-exposure.”

“The first photo of the multiple-exposure was the image of the lamp, I underexposed the lamp as much as I could to get the most detail and strongest colors possible, I then used a credit card from my wallet to hold behind the lamp to create a dark rectangular area for my couple to sit onto once I did the silhouette exposure.”

“After I got the exposure of the lamp I then went into the reception area and found a nice clean wall to place my couple against and had the groom hold my flash pointed at the wall behind them.”
He then used a red MagGel to balance the frame with the colors displayed in the lamp. Once he captured both exposures he used Nikon’s “Image Overlay” feature to put the two exposures together. This is a great trick to have when working in boring venues and takes just a little bit of forethought and creativity to master.
You can download Carsten’s Multi-Exposure guide here for free where you can learn how to create images like this in just a few simple steps.
Off-Camera Flash Technique #3 – Paco Van Leeuwen

Gear Used
How He Shot It
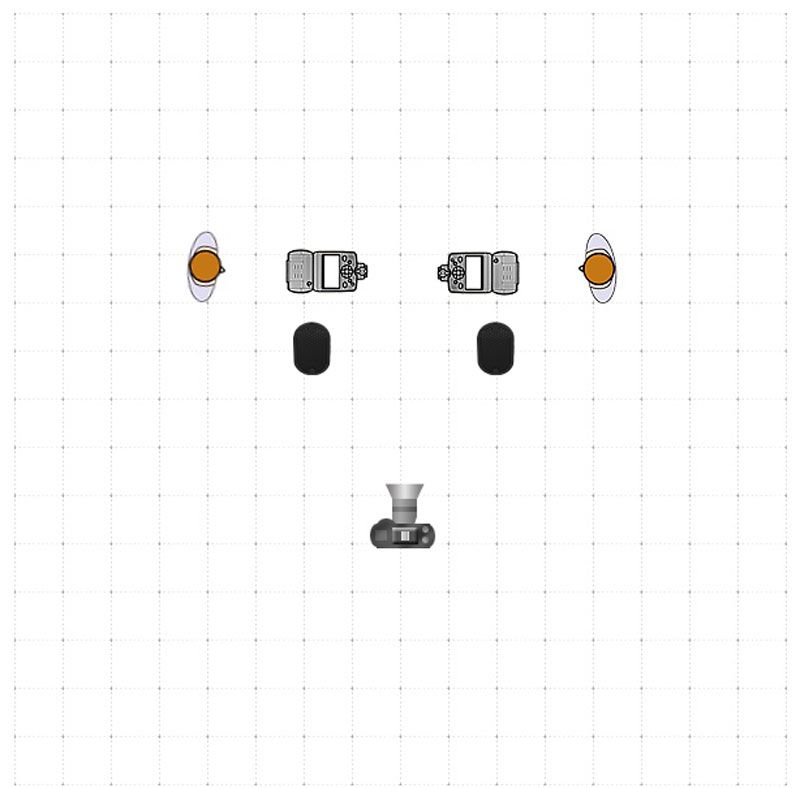
Paco wanted the lights highlighting the couple to mimic the natural light coming in from the stained glass window, so he set up two flashes with MagGrids aimed at a top-down angle on each of their faces powered at around 1/32. He chose to have the bride on the right side “as there was some window light coming in from the right and I preferred to have a little fill light from that on the her”.
He then took a plate shot (see below) without the flashes/stands in the scene in order to mask them out later in Photoshop. Paco posed the bride with her hands on her pregnant belly to draw attention to her baby bump and then cued them to “think about their baby boy who was due a couple of months later”.
Off-Camera Flash Technique #4 – Renatto Nomura

Gear Used
How He Shot It
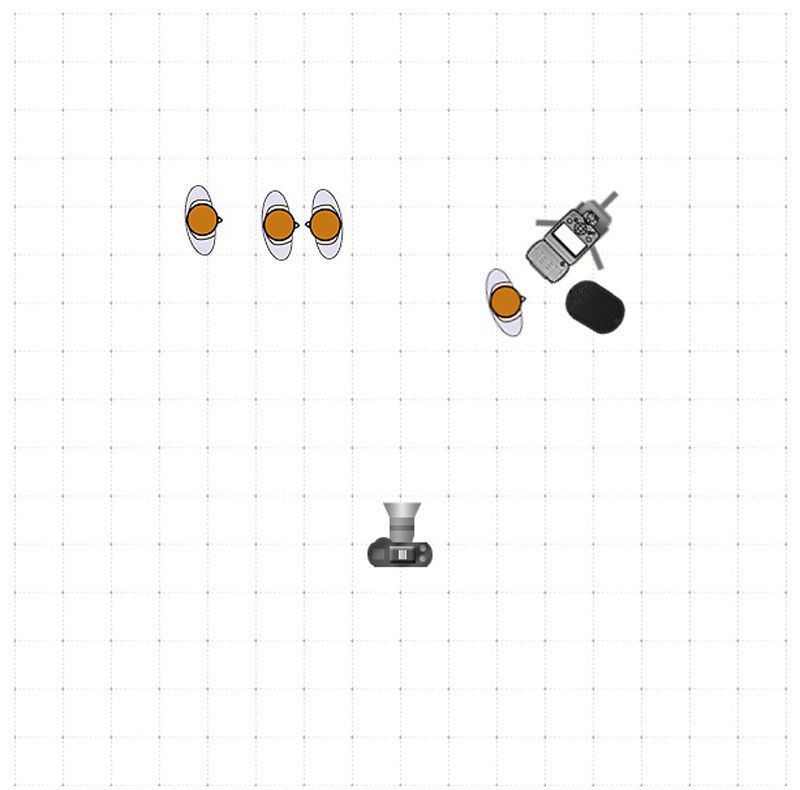
The picture was taken in a city square, in an acoustic shell, for street performances and at the time it was raining so Renatto wanted to enhance this beauty of the stage & the rain. He placed two flashes angled upwards towards the enclave, one with a Pink gel and one with a Blue gel, both set at around 1/32 power. Then to highlight the couple he placed one more flash pointed towards them. He emphasized the blue/pink tones in post and came to the final result.
Off-Camera Flash Technique #5 – Elliot Nichol

Gear Used
- Canon 5D Mark III
- Canon 24-70mm f/2.8 II
- Canon 600EX II-RT
- Canon ST-E3-RT Radio Transmitter
- Double Ball Head Clamp
- Magmod MagGrid
How He Shot It
Elliot explains that the setup for this shot was very simple, however, the difficult part is coming across this style/type of hotel room. This particular room had a glass wall/window between the bedroom and bathroom making it easy to include the silhouette reflection of the groomsmen getting ready. He secured a flash to the pipe above the shower head and then took the exposure for the ambient light outside of the bathroom. He then positioned the groomsmen in front of the hotel window to catch their reflections while getting ready within the bathroom window. Make sure that if you attempt this shot to use lukewarm water in the shower as not to create steam that could fog up the windows and haze out the subjects.
Off-Camera Flash Technique #6 – Meiggy Permana

Gear Used
How He Shot It
This photo was taken in a cave at around noon which was a perfect time to capture the sun’s rays coming through a hole in the ceiling of the cave. Meiggy placed one speedlight behind the couple at 1/32 zoomed in at @ 28mm to help separate them from the dark background (this is also causing those insane flares you see). As for his main light source, he placed a flash 45 degrees to camera right at 1/128 power zoomed in @ 105mm to really spotlight the couple. Note the angle of the main flash is coming from a top-down angle as to prevent light spill on the ground.
Off-Camera Flash Technique #7 – Pye Jirsa

Gear Used
How He Shot It
To accomplish a shot like this requires specific attention to the posing of each individual, making sure the image is balanced with varying poses. In order to pinlight each person they need to be spaced out so that the light doesn’t overlap and cost us valuable time in post-production when we layer and mask. “I used a MagGrid to really help me pin the light on just their faces & upper body and had my assistant hold it so it was angled top down to reduce any light spill on the floor.” The important thing to remember when creating a composite shot like this is to make sure your camera is set on a tripod to make it easier for you in post to layer each image. This image is comprised of 10 shots in total, 9 lighting each individual man and then one plate shot without any light to use as our foundation to layer & mask.
Check out Photographing the Couple for more tutorials on posing, lighting, and finding creative compositions for couples portraiture during the wedding day – you can see more in SLR Lounge Premium!
Join Premium


Get Connected!