Light what? Light Blaster!
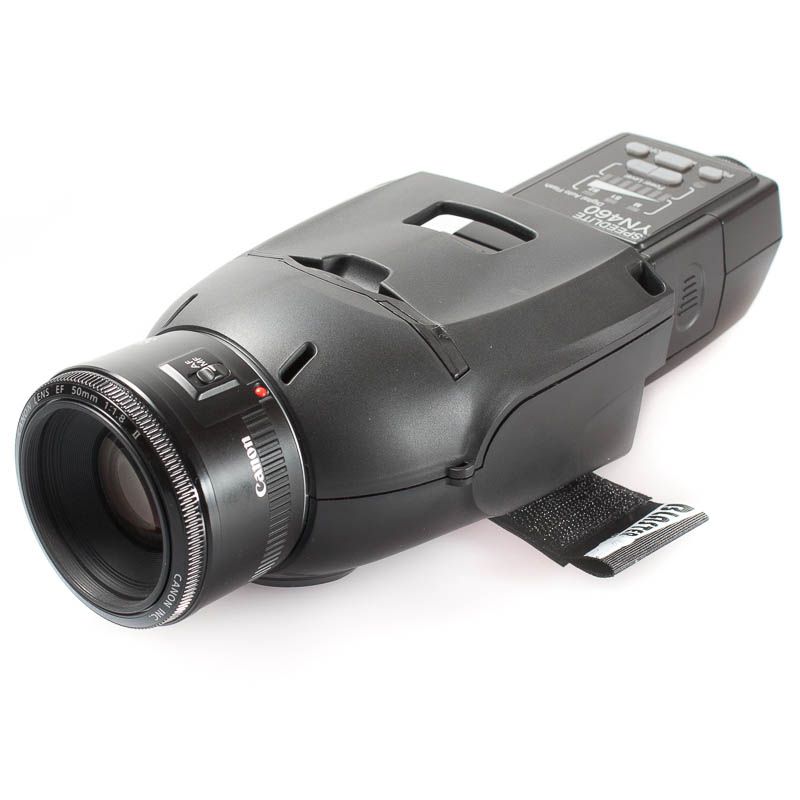
Recently I had the opportunity to test a Light Blaster. It looks funny, and it does funny things. But what exactly is a Light Blaster?
A Light Blaster is kind of a slide projector thingy (flashback to the 80’s where your parents made you watch 750 slides from their trip to Europe), but with two major differences:
- The Light Blaster uses a hot shoe flash (or a studio strobe) instead of a halogen lamp
- It uses a ‘regular’ Canon lens to focus the light (or you can use other brands via adapters). So you actually need 2 lenses to use the Light Blaster – one for the camera and one for the device.
This makes the Light Blaster very affordable because it does not involve any of the pricier components that a slide projector has (and you probably have anyway) and it keeps the device pretty compact.

Setting Up a Light Blaster Shoot
So the main question, of course, is what slides do you project? There are three slide sets for creative layouts. Those include backdrops, wings, and effects. These can be used to quickly change backdrops.
But I found a better option: the GOBO Creative Kit. These are made of thin metal sheets in the size of a slide, and have intricate designs. Sadly, that means that they are only black or white (no color, not even gray tones). But the black is pure black – this is the main advantage of the gobos over the slides.
And, of course, you can also re-use your (or your parents’) slide collection.
I did try to create my own slides using an inkjet and some transparency paper, but the quality was just not good enough. The contrast was too low and you could clearly see the ink dots. My plan is to shoot a roll of slides and use them for my next project.
Results of the Light Blaster Shoots
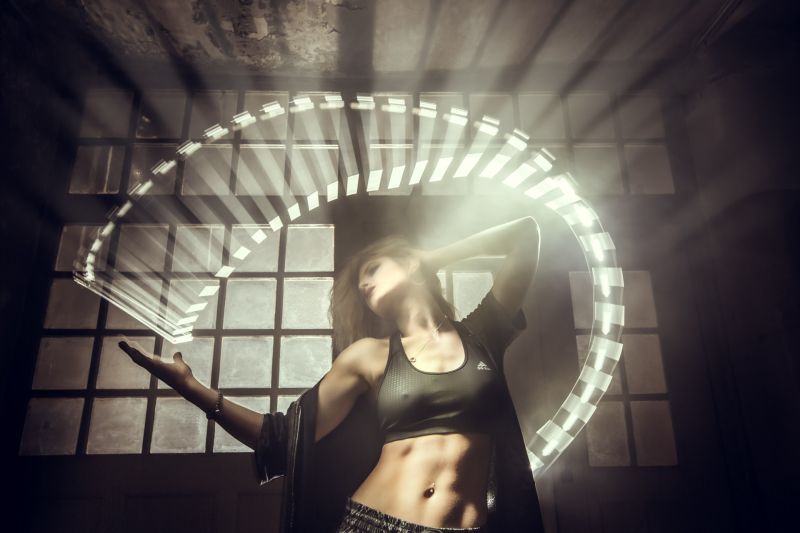
My work has a lot of light painting so I combined the Light Blaster with Light Painting. I used the Light Blaster from behind, by an old window. We had several layers in the photo: a window, a pattern on the smoke with the light blaster, a model (the great Lea), and some Light Painting.


Light Painting Video
For the video, the requirements were different. I needed the exact same background for every frame + a nice structure. My setup was as follows: the camera was set to B (Bulb) with a radio trigger, Light Blaster with a dedicated flash with second trigger was on a light stand.
The Procedure: Lea stood still in the frame. I started the exposure (and the flashes fired). Then I went in and did the light doodle (it wasn’t so easy in total darkness…). End the exposure.
We repeated this ten times for every second in the movie.
Tips & Tricks
- If you want to get an undistorted background, the Light Blaster should be parallel to the wall
- Remote trigger and a light stand for the Light Blaster are recommended (there is a tripod mount on the bottom)
- As shown, you can project onto walls or even flash from behind and add some smoke to create a pattern
- Slide stocks are very cheap on eBay right now. It might be worth to get some slides there instead of dedicated Light Blaster slides.
- Use a wide angle lens to cover bigger areas.
You can get your Light Blaster here.
About the Guest Contributor
Bernhard Rauscher (a.k.a Lumenman) is a photographer based in Munich, Germany who specializes in light painting. Follow his work on the following sites.


Get Connected!