3 Steps to $100K More | Free 1 Hour Training by Pye [Watch Free]

19 Apr 2024

Fill Light

Term:
Description: In photography, fill light is a supplemental light that is used to fill in the shadows created by the main light. The fill light is often positioned opposite of the main or key light, filling in the shadow side of the subject or object. Fill light can be created with flash or by bouncing light off of a reflective or white object.

What About The Fill Light? | Transcription

We’re going to analyze the image that we shot in that last tutorial, and we’re going to talk about our preferred methods of controlling the fill light, and how that control of fill affects the overall image. Again, this is part of the process of diving deeper into these images, and the whole reason why, because we want to teach you all to be efficient with your lighting.

When we’re working inside the studio. When we’re working inside the studio, we have the time, we have the leisure of setting up as many lights as we want. We can set up as many reflectors, we can do all that stuff, and we can shoot with it, without anything being moved, without anything being touched. When we’re on set, or not on set, but out on location. When we’re on location, not only do we have to carry out more gear, setting up that gear requires time, and then also you’re dealing with weather, and wind, and other things that are going to constantly shift, and move gear around.

We need to use sand bags, and we need to place things, and we need to have assistance to hold stuff. That’s fine and dandy. We still do lots of location lighting, with multiple light setups, but, before going into that, I like to just keep things a little more efficient. If I can control my fill, and get the results that I want, by using efficient steps, like shutter speed, to control the fill, then I will absolutely do that, before asking one of my people to set up another light.

Also keep in mind that when it comes to fill, an easier fill, when you’re doing location based shoots is using a bounce, like a reflector. You can use Wescott 5, you have a silver, you have a white, and you have everything you need inside of that. You can use Wescott Scrim Jim, or a California Sun Bounce. You can use a larger V Frame. You can take whatever you want, and use a bounce, and that will every time, that is more simple than having to set up another flash. The only benefit of setting up another flash is that generally, you can set up that flash and not have somebody stand next to it, whereas with a reflector, you’re typically going to need someone just to hold that.

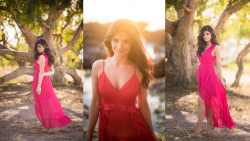
Either way, again, I try to work efficiently. Let’s look at this image, and let’s just talk through some of these tips that I have of you all. This is going to just be a reminder of certain points. We’re going to be reviewing certain key points as well as be talking about certain effects that fill is going to have over the image, or controlling fill with shutter speed. What you can see here is, we have the same image. This is the original image that we took. This is on the Sigma 120-300mm at 300mm. We’re at F7.1, 1/200th of a second, and ISO 50. It was shot with a tubal VB-22, with our Pro Photo RFi 3 foot Octa with the diffuser at around 1/2 to 1/1 power.
Again, you need anywhere between 250 to 500 watt seconds to get enough light in this type of a scene on your subjects. If I have the Profoto B2, and I was using just one of them, I’d probably be at 1/1 power. If I have the Bolt VB-22s, I could use 2 at half power, or 1 at full power. Again, it’s going to depend on that light source distance to the subject.

We know that, we covered that in the last tutorial. Our shutter speed is at 1/200th of a second. We mentioned that. If I were to step that down. What I’ve done here is I basically simulated different shutter speeds. We did this simulation and pose just so I can give you guys a very controlled example of what it looks like. If I were to step that down to 1/400th of a second, what you end up seeing is that the background and the shadows all deepen by one stop. They all deepen just a little bit, but our highlights remained relatively the same. The highlights and lights that are on her face and everything, it’s pretty darn similar to this first shot.

You’ll notice that it’s just a tiny, tiny bit darker, but the flash power didn’t change. Why would it be a little bit darker? It’s because remember that the overall brightness of this area where the flash is hitting, is not just your flash power. It’s actually equivalent to the ambient light, plus the flash power, so you’re adding ambient to the flash power. That gives you the overall brightness. If we cut ambient by one stop, we get less fill, but then this is going to go down, just a little bit in that overall exposure as well. It’s going to be affected, but now quite as much as the shadow areas of the image, or the background areas of the image.

If I were to simulate 1/100th of a second for my shutter speed, so I’m basically going a stop brighter than this shot. You can see how her shadows on this side of the face open up a little bit more. Okay, the shadows on the arms, the shadows everywhere, they open up. We get more background. The shadows in the background open up, the cactus and everything, and the area that has the flash hitting it, also becomes just a little bit brighter. Why? Because once again we added a stop, a fill underneath that flash, so the flash is layering over that fill.

This is the benefit and the drawback of using shutter speed to control fill. The benefit is that it’s very simple to do, but the drawback is that it’s not only controlling your background, but it’s also controlling the fill in the shadows, and the brightness over this area.
If we want to, what we could do if this brightness of this are that we’re lighting gets too bright, we can just stop down the flash power. That’s easy to control. The one thing we can’t control though, is the background. The background is always going to match that fill. If you brighten the fill by 1 stop, it’s going to brighten the background by 1 stop, at least when we’re using strictly shutter speed.

Remember these tips. Going above 1/200th of a second shutter speed is going to require your ND filter, and/or a HHS. Either of these options reduce effective flash power. If I throw 3 stop neutral density filter, it reduces ambient light, and flash power, because the flash is going to be 3 stops darker too when it hits the lens. Either of those are going to reduce, but when using HHS, if additional flash power is desired, you can on certain flashes use the ISO in conjunction with raising the shutter speed. What this means is, let’s say I’m using pocket strobe like a Phottix. When I go into high speed sync, generally between 1/1000th of a second, 1/2000th, 1/4000th, 1/8000th of a second, the flash power is all the same. It’s giving me as much light as it can at every one of those steps. It’s all the same, regardless.

If I’m using high speed sync, and let’s say that I want more flash power, but I want to keep the background the exact same exposure. This is a little review by the way on Lighting 101, so hopefully you guys still remember this stuff. If I step up my ISO to say from 100 to 200, it’s going to brighten the flash power by one stop, but it’s also going to brighten ambient by 1 stop. Guess what, we know that shutter speed doesn’t control flash power. If we’re in high speed sync, we can step that shutter speed up to whatever we want. If I bring the shutter speed up by 1 stop, and the ISO up by 1 stop, the shutter speed neutralize the ISO when it comes to the background, but the ISO allows the flash to be 1 stop brighter.

We can keep making those adjustments up to 1/8000th of a second, but keeping in mind that every step up in ISO is going to reduce dynamic range. It’s going to reduce image quality, and it’s going to have those effects. Also, you’re going to run into shutter speed limitations at 1/4000th on entry level DSLRs, or 1/8000th of a second on a basically advanced DSLR. High speed sync, or neutral density filter? Again, we talk about this in detail, inLlighting 101. With high speed sync, you’re going to be losing, on a pocket strobe, anywhere between 4 to 5 stops of power, but with a 5 stop neutral density filter, you’re still losing 5 stops of light power. Which do I prefer? They’re not equal, because I would always opt for the neutral density filter. I prefer the Tiffen HT line. The high transition line are absolutely impeccable optical quality. Make sure you get a good optical quality ND filter, otherwise, you’re reducing image quality. The Tiffen HT has fantastic quality, fantastic price.
Why do I go that route though? Because certain flashes will actually reduce even more power when you keep stepping up the shutter speed. For example, our Profoto B2s at 1/1000th of a second, they might be losing 3 to 4 stops of light. At 1/2000th of a second, they’re losing 5 stops of light. At 1/4000th of a second, they’re losing 6 stops of light. They go up to 7 to 8 stops of light loss depending on your shutter speed. If you pop that neutral density filter on there, you can use any of these flashes at their original, at their factory power settings, and know exactly how much power you’re getting on your shot, and not have to worry about burning out your batteries quickly, and not have to worry about all the other stuff, how much light you’re actually getting, and so forth.

I always prefer the ND option, at least until the point where high speed sync gives me straight up my actual regular flash power. When I get full power with high speed sync, and not a 5 stop light loss, that’s when I’m going to convert over to high speed sync. Did I say convert? Convert. That’s when I’m going to convert to high speed sync.
Let’s go to point number 4. We can add ambient light fill by slowing down the shutter speed, or by increasing the shutter speed to reduce ambient light filter. Remember we talked about that and what effect it’s going to have. It will also effect the background. Remember also, that when it comes to the exposure area being flashed, your total exposure is equal to the fill plus flash, not just the flash by itself. What this means is that if you are flashing over an area that has a decent amount of fill, make sure that you are lighting with the same color temperature of light, as the fill light. Why? Because you want to match that light, otherwise you’re going to end up with a mixed lighting effect, which is going to mean that basically the light from this side of the face, to this side of the face, is not going to match, and it’s going to look very strange. It’s going to reduce your overall image quality. It’s not a flattering effect either.

The time that, that’s most important is really when the fill is actually present in the final shot. If you’re shooting with the flash power so high, that it’s knocking out all the fill light, meaning that you have no fill, those shadow area are complete shadows, this doesn’t really matter. When we’re combining and mixing flash plus fill, we need to balance those light sources so that they are equal in color temperature, at least close to equal in color temperature.

One last little tip here is to not add too much fill, because adding too much fill to an image, flattens the image out. For this shot, I’d probably say the shadows are a little bit too much. For this shot, I’d probably say that it’s been flattened out a little bit too much. We’re losing some of that dimension in the body, and in the shape by losing too much shadow. It’s the same thing if we went into Photoshop, and we dodge and burn, and we dodge all the shadows and burn all the highlights, and we every everything out, you end up with a very boring image, because the shadows and the highlights match, and you need to have shadows, and you need to have highlights to have a compelling image.
That’s why we shot it at this setting right here, because that gave us a good balance between shadows and highlights. We had a good amount of fill still, where her face wasn’t too dramatic like it is in this shot, and it looks great overall. Just remember that when it comes to that fill, too much or too little is going to negatively affect the overall balance and the mood of the shots, so get that right balance in your image.

Hopefully, you all enjoyed this little exercise, just analyzing what about the fill light, how can we control fill via shutter speed? Remember that as we get into Lighting 301, we are going to be using more advanced technique. We’re going to be using reflectors, off camera additional flashes, like a 2nd or a 3rd light source to give us fill light and so forth. For now, this is going to give you tons of control over any scene with just a single light.

Related Articles to Fill Light Definition