
Taking photos of kids offers a fun and unique chance to capture innocence, spontaneity, and endless energy. Whether you’re a parent looking to photograph your child’s fleeting moments or a pro expanding your portfolio, finding fresh kids photoshoot ideas can make your pictures more memorable, creative, and impactful. In this article, we’ll explore a variety of kids photoshoot ideas designed to make your everyday photos stand out, bringing a new level of depth and joy to your images.
Note: This is just a taste of what we have to offer in our Creative Photography 101 Course which covers the fundamentals and helps you master a level of creativity using a camera we all have.
Capture Action and Movement
The first kids photoshoot idea is to create action rather than the “look here and smile” photo. This can be running, jumping, diving, or really any movement that adds movement and action to the scene. See the before and after photos below to see the difference. The action and movement can be done by the kid or by the elements surrounding the kid.
Ask Them To Play Naturally
Incorporating games and activities into a kids photoshoot a great way to make things more interesting. Before the session, it’s important for photographers to learn about the child’s likes, dislikes, and personality.
When a child’s attention starts to drift, introducing playful activities can quickly reignite their interest and energy. Rather than focusing solely on capturing these playful moments, actively joining in often yields better results. When children see the photographer as a friend and not just an observer, the overall vibe of the session improves, leading to more authentic and dynamic shots.

Get Down to Their Eye Level
The next most important tip to remember when photographing children is to get down to their level for the majority of your shots. There are times when shooting top-down will look great and fit your concept. For example, maybe there’s an interesting pattern on the floor that you want to include in your composition, or maybe the image is captured intentionally from the perspective of a taller person. However, in most instances, the image will simply look more interesting when it’s captured from the eye level of the child.
Create Your Own Mini Studio
Having basic accessories like a reflector can improve your photograph and give it a more professional touch. The 5 in 1 reflector is one of our favorite photography tools because of its cheap price and its versatility. For this kids photography idea, simply take out the white scrim from the reflector and shoot with your main light source. If you’re new to light direction, then all this means is that, if you’re outdoors, stand between the sun and your subject and block the sunlight using the semi-transparent scrim. See the results in the video below.
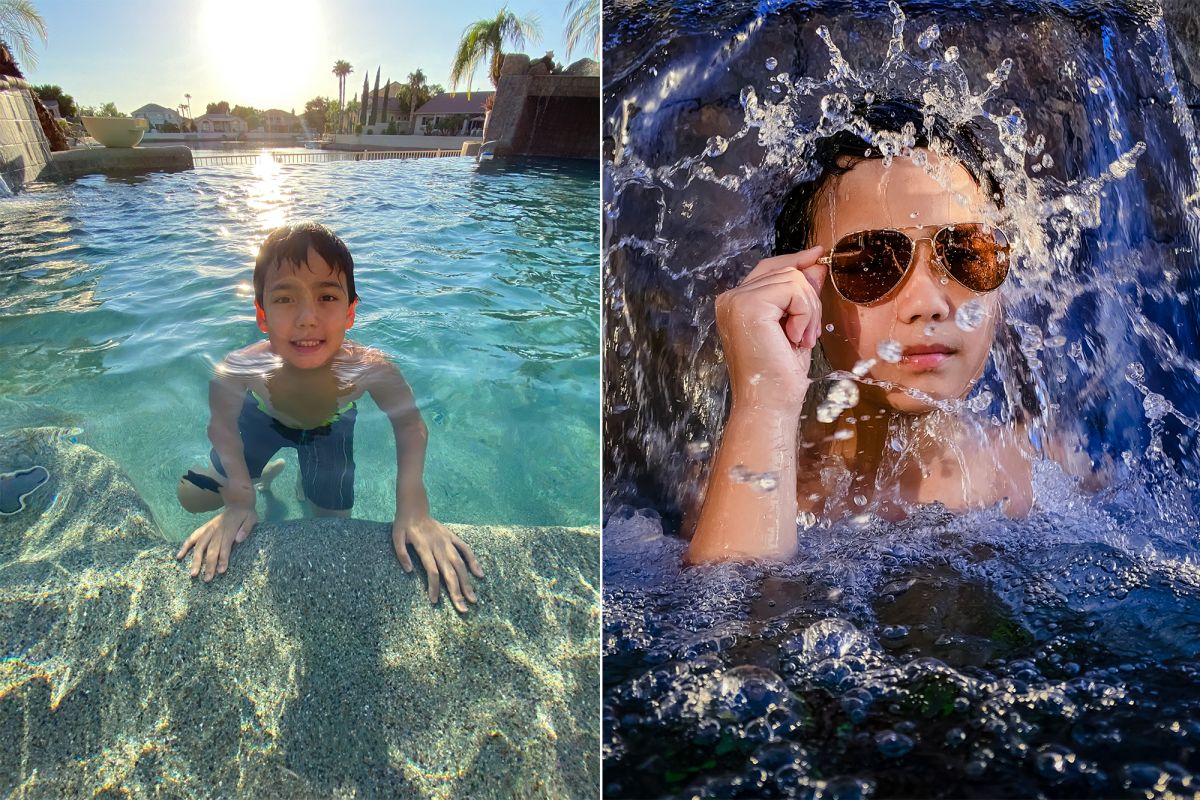
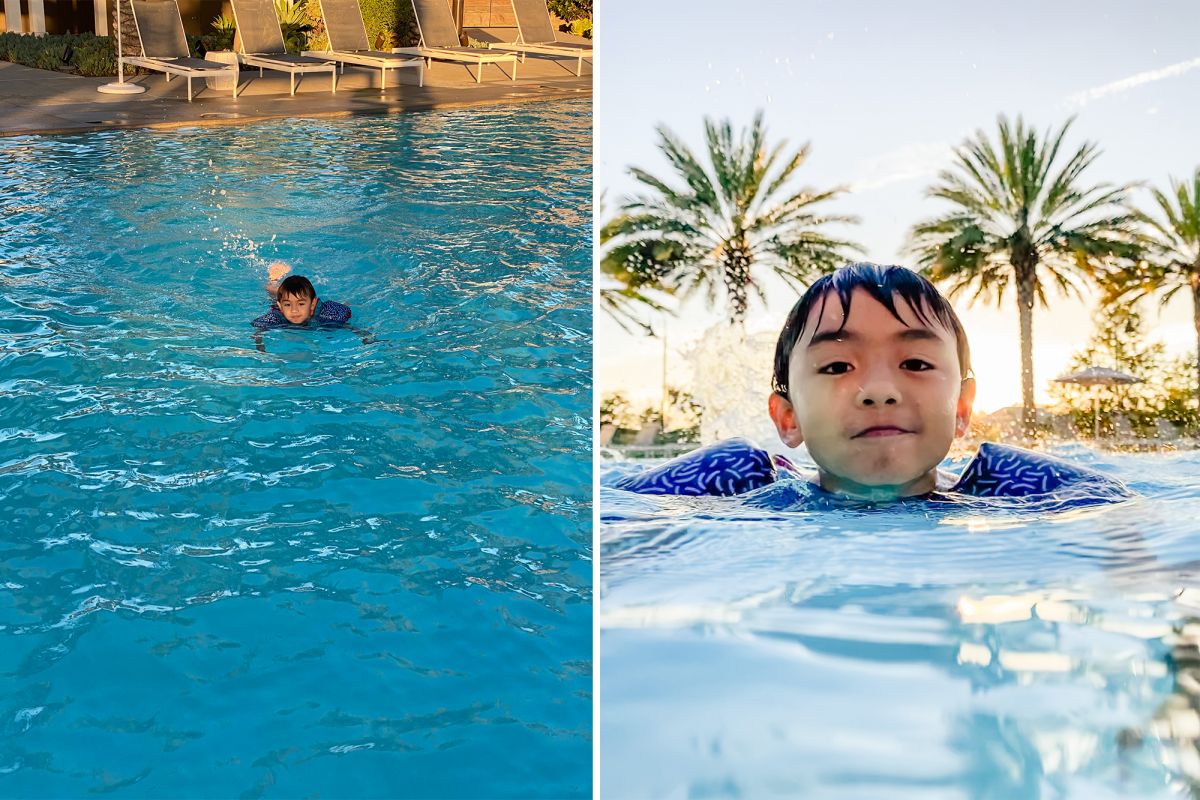
Choose Their Natural Environment for the Photoshoot
Switching from studio sessions to more open, playful environments has been a game-changer for photographers specializing in capturing the essence of childhood. It’s pretty clear that kids and studio walls don’t always mix well. Most kids have a natural urge to explore and move, so when picking out spots for photo shoots, find places where kids can just be kids.

Use Low Apertures or Portrait Mode
Using low apertures on your camera, like F/1.2 to F/2.8, will give you a beautiful burry background and make your subjects pop off. Blur makes textures, patterns, and objects in the scene less distracting so that the viewer can focus on the subject. You can also achieve this in portrait mode on your iPhone. See the example below:
Use Foreground Elements
Foreground elements are simply things in a photograph that is in front of the subject, i.e. things that are between the photographer and the subject. Adding them to your composition for your kids pictures can add interest to a photograph in a variety of ways. First off, they can isolate or frame your subjects. They can also add a photojournalistic, storytelling element to the photograph by placing your subjects into the action. See an example of this kids photoshoot idea below:


Find a Unique Perspective – Shoot up
At this point, we hope you’re recognizing a common theme with our kids photoshoot ideas. Avoid the standard, “walkup” shot, i.e. the shot that an average person would simply walk up and take without any effort or creativity. The next kids photoshoot idea is similar. Instead of taking a boring shot from a standard perspective, find a unique perspective, such as a “bottom-up” perspective, as you see in the following images.

Find Reflections in Your Kids Photoshoot Compositions
An easy way to elevate the creativity of your kids photoshoot ideas is to incorporate reflections into your photos. You can easily do this with a window or even the screen of another phone. Hold your camera close to the edge of the reflection to make it look seamless and make sure you don’t see the edge of the object you are using to photograph.

Add Fog or Haze in a Can
Adding Atmosphere Aerosol can create some drama in a simple backlit scene. For this kids photoshoot idea, spray some of the fog in the air and let it dissipate before capturing your image. What this will do is help create a layer of particles between the light and the subject that adds a cinematic effect to the light.

Use Cheap Props to Tell a Story
These kids photoshoot ideas require a bit of pre-planning and maybe some quick Amazon shopping. You can make creative and adorable kids portraits using items you have at home or inexpensive objects from Amazon. My favorite accessory to have on me at all times are string lights. Watch the video below for a demonstration of this kids photoshoot idea.
Use an Acrylic Sheet
A fun way to show and shoot action is placing acrylic sheet between you and your subject to create a window into the scene and add elements to create perspective. This clear material can be used for many creative kids photoshoot ideas. One of my favorite dad moments was when my son got his first camera so I decided to document it by creating this effect.


Water Hat Kids Portraits
Use a simple backdrop and angled natural sunlight, and some water balloons to create “water hats” for fun summertime kids portraits. See the full water hats tutorial here, and check out the gallery of images below:


Conclusion
The ideas we’ve explored provide a starting point for photographers to look beyond the conventional, urging them to embrace spontaneity, encourage play, and celebrate the genuine emotions that children naturally exhibit. Remember that the key to unforgettable photos is not just in the technicalities of photography but in the connection you forge with your young subjects.
For more tips on how to capture creative images, including more kids photoshoot ideas, check out Creative Photography 101. We hope you enjoyed these tips and have fun testing them out with your kids! Remember, the most important thing is that you have fun while trying any of these techniques out.


