Welcome to the IGTV series we’re doing every two weeks on Profoto’s Instagram called “Slice of Pye.” We’ll cover a myriad of topics, discuss lighting principles, and showcase a ton of Profoto gear in action over the course of the next year, so please join us over on IG.
Tune in to our next episode: June 18th at 2 PM PST!
Our goal for this session is to create natural light athletic portraits indoors when the available natural light is insufficient. In this episode, we’ll show you how to simulate natural light for athletic portraits while photographing sparring sessions on-location at a Brazilian Jiu-Jitsu studio. (Please note: The photoshoots featured in this video were all filmed prior to COVID-19.)
[Related Reading: Practical Guide to Understanding Flash Power | Slice of Pye, Ep. 21]
Step 1. Analyze the Scene

The studio presented two challenges for shooting with natural light. First, a large wall blocked light from coming into the studio, despite the large windows on the other side of it. Secondly, the tint on the windows further minimized the amount of the light coming into the studio.
Step 2: Dial in Ambient Exposure

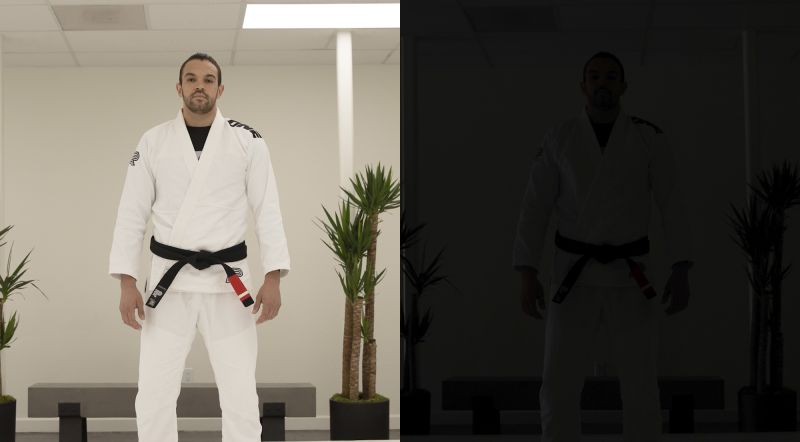
The overhead lights do not provide the directional, soft light we’re looking for (see the images above); still, even though we’ll need to turn them off when we’re shooting, we can use them to set our ambient exposure. You’ll notice the resulting image with the lights off is very dark. However, we know we’re going to add external flash to simulate natural light for our athletic portraits, so it’s okay in this instance to leave our ambient lighting underexposed.
Step 3: Open Up and Spread the Light Source with Diffusion and Bounce Flash

Borrowing from Hollywood-style lighting techniques, we’re going to open up and spread our light source. While movie sets might shine a large constant light through multiple scrims to soften the light falling on the subjects, we’re going to fire multiple (three) strobes in soft boxes and bounce the light off of a wall of v-flats from V-Flat World (see the image above). This provides at least two layers of diffusion; we go more into this technique in our Lighting 4 Workshop: Creating Every Natural Light Effect Using Flash.
If you don’t have the Profoto B10 and B10 Plus strobes that we’re using, you can use smaller flashes like the Profoto A1 for this exact setup. The biggest difference is the flash power and its effect on recycle time. The advantage of using more powerful strobes is being able to shoot with lower power settings, which in turn results in faster recycle times between flashes. A quick recycle time is crucial for capturing a sequence of images during a fast-paced athletic/action shoot.
[Related Reading: In-Studio vs. On-Location Lighting Setups | Slice of Pye, Ep. 2]
Step 4: Add More Light if Possible

As you can see in the images above, each of the three lights we used to create natural light for athletic portraits worked to soften the light and eliminate the shadows. When fired alone, the first flash, which is placed across the room from the subject, casts a noticeable shadow from one of the beams near the wall. After adding a second light, the shadows soften. By the time we add a third light, the remaining shadows are erased and we’re left with a soft, natural looking light. Although the light is soft, it is still directional, which you don’t really get when using the overhead lights in the studio.
Pro Tip: White walls like those in the Jiu-Jitsu studio can prove deceiving and may appear extra bright in the image previews on your camera’s LCD screen. Use your histogram and highlight alert to make sure you’re maximizing dynamic range and not clipping your highlights.
Step 5. Cue Your Subjects and Capture the Portraits

Once you’re lighting is dialed in and you’ve composed your shot, cue your subjects and start capturing the action. Try to capture multiple sequences and change up your focal length throughout the shoot to add more storytelling opportunities.
Conclusion
To watch more episodes, be sure to check out the Profoto IGTV channel! We hope you enjoyed this episode of Slice of Pye; please feel free to share or re-watch the IGTV video at any time to reference the material we covered! For more tutorials and lessons on the fundamentals of lighting, check out our Flash Photography Training System!


Get Connected!