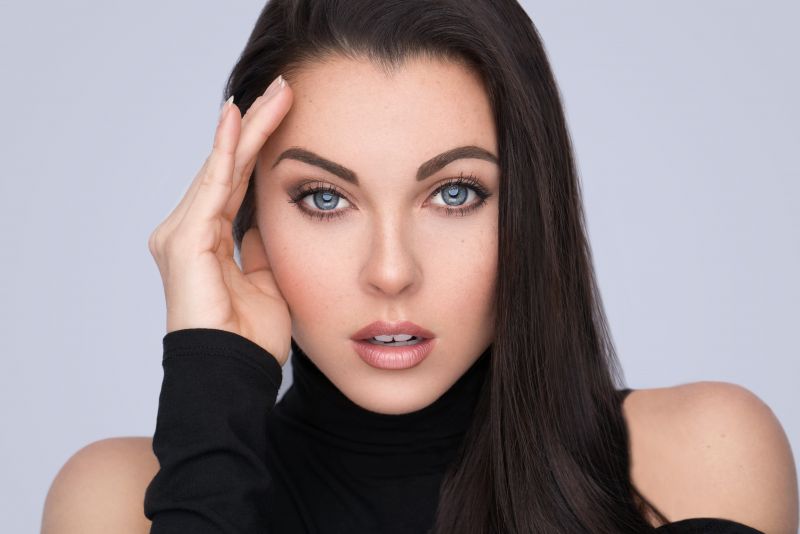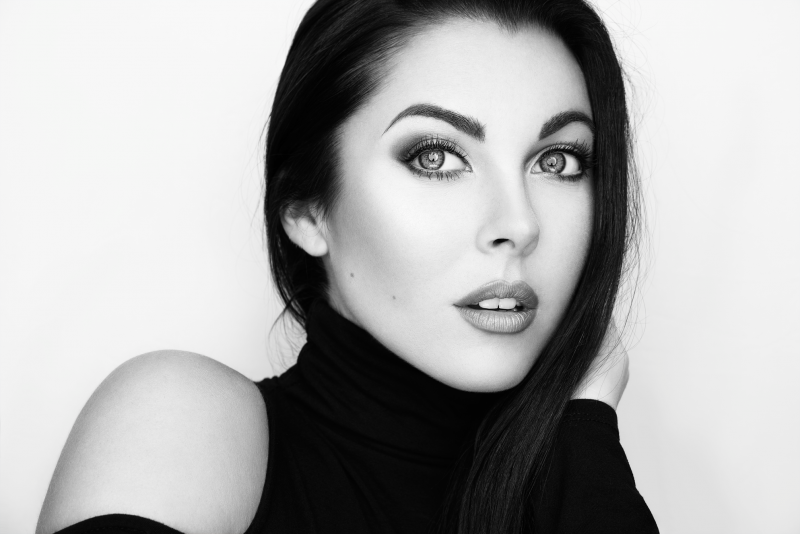
Ever since I first picked up a camera and started shooting professionally, I’ve always wanted to shoot beauty images, similar to what you see in magazine ads. Unfortunately, it was rather difficult to find good resources online detailing the process of creating them. Because of that, I decided to partner up with Sony & AdoramaTV to create a new series called “The Breakdown.” The series seeks to explain the process of creating images in an easy to follow and repeatable manner.
In this first episode, I set out to explain my process behind capturing this beauty look that I absolutely love, using just a single light and a reflector. If you’re looking to do the same, here are some tips that will help you nail the look technically and artistically.
Tip #1: It’s All About The Eyes
Having your subject engage with the camera is crucial in this genre of photography. I often coach my models to gaze piercingly into the center of my lens in each frame, and then rinse and repeat the process. Even if they aren’t looking directly at my lens, I let them know to look with a purpose and intent wherever that may be. A dull expression that isn’t connecting with the camera will lose the viewer, and ultimately end up making for a lackluster capture.
Tip #2: Keep The Hands Relaxed & Natural
This is something that I often struggled directing in my early days, but has become better with time. Coaching your subject not to show the inside or back side of their hands when shooting this style is very important. By showing the blade of their hands and forearms, it will keep the focus on the face, which is the ultimate goal when shooting a beauty image. Also, make sure your model has their nails cleaned and polished, as it’s a major pain to try and clean up in post production.

Tip #3: Give Feedback Throughout The Shoot
Make sure that every so often you stop and give your subject feedback and coaching. Never let them know they are doing a bad job or not giving you the look you want, but rather, give them specific instruction on what you’d like for them to do. I’ve been known to try and pull off some of the looks and expressions that I want the models to give me, which is often met with a hearty laugh by all. It loosens up the mood and gives them the confidence to keep mixing it up in between each frame.
Tip #4: Test Out New Lighting Setups Often
The lighting setup you see used in this video isn’t very conventional but was the result of a variety of test shoots that I’ve done over the past year. I’ve used it to shoot full body images, and now most recently to shoot the images you see below. I will often look through the pages of Vogue, Elle, Harpers Bazaar, etc. and study makeup and hair ads to see if I can decipher the lighting setup.
I’ve landed on some of my favorite lighting techniques doing that, and the longer you use this discipline, the better and more creative you will become as a photographer. Try placing the light close to your subject, above them, to the right and left of them, and see how making these changes impacts the final image. This has been the key to my lighting success in recent years, and I trust it’ll help you, too.
[REWIND: THE ONE LIGHT PORTRAIT CHALLENGE | ARE YOU OVERCOMPLICATING YOUR LIGHTING SETUP?]

To see the full breakdown of the gear used to take these images, be sure to watch the video and leave a like/comment if you enjoyed it and found it useful!
Gear Used:
Sony A7RII w/ Zeiss Batis 85mm 1.8 Lens
Phottix Indra 500 w/ Phottix Hexa-Para Modifier
Savage Collapsible Background & Posing Table


Get Connected!