
In my years of exploring photography and especially automotive photography, I’ve made my fair share of mistakes and had plenty of situations to learn from. Issues arise and we all make mistakes even with the most practiced photographers. As with any craft, it’s important to continually learn from situations and errors we make. I thought I would share some of my personal stumbling blocks to help others along the way as they try their hand with automotive photography. These are certainly not the ONLY factors to consider, but these are some of the most common mistakes you may discover while shooting.

Mistake #1 – Not using the RIGHT gear.
First things first… You have to start with the right gear. This doesn’t mean you have to use the most expensive gear, but early on, it’s important to get started using the RIGHT gear. Getting started I didn’t know anything about quality or cheap tripods, and I didn’t know what a circular polarizer did. Through trial and error, I learned about these things and how they played into different shooting techniques.
Of course using a camera with a good sensor and a decent lens are necessary, but these days you can find that in fairly entry level gear. These are few accessories that can really make the difference.
Here is a rundown of a few of those extra pieces:
A Quality Tripod – I say “quality” tripod because there are some really crappy ones out there. No, you don’t need it for every type of shoot, but for lower light, composite shots, or HDR it is necessary. A cheap tripod can really limit what you can do. I’ve had many fail to hold or support the weight of the camera. Sometimes they can only be positioned in a few ways or they can flat out break. A good tripod will be with you for the long haul and help to shoot some more challenging situations, it’s worth the initial investment. You don’t necessarily need a very light tripod since you won’t be moving locations as much as a wedding or portrait photographer. Prioritize stability over portability.
A Circular Polarizer – I greatly overlooked the value of polarizers until I finally used one, which helped reduce glare and reflections. And for those that think they can just clean them up in post… that is not always the case, and even if you can clean it up, it is extremely tedious work. You don’t have to buy the most expensive one, but it makes a world of difference. I can’t tell you how many times I’ve forgotten my filter, and thought I was still able to do the shoot, it helps capture a clean image requiring a lot less work in post.
A Camera Remote Trigger – For composite photos, this is a huge piece. I’ve forgotten remotes or had them die at shoots. It IS possible to shoot without one, but it’s exhausting. Remote triggers not only reduce camera shake but will save you the time and energy of running back and forth between the camera and lights. These days there are even remote triggers that can be controlled by an app on your phone. If you don’t have a remote trigger, at the very least, try using your 2 second timer so that you can reduce camera shake.

Mistake #2 – Trying Too Much at Once
I am always trying to learn and expand my skills, but it is also important to have strong foundational skills. I might see a photo and practice certain techniques, but without a strong foundation it might feel like stabbing in the dark trying to get a good photo. This is an issue that happened much more when I was starting and was VERY frustrating when I was trying to improve. I wasn’t trying to “get good” at one thing, I was trying to get good at 5 things all at the same time. There is real value in starting small and developing those basic skills like composition, working with natural light, understanding your gear, etc.

Mistake #3 – Poor Location Choice
Just like composition with any other photo you have taken, it’s important to consider your subject but also how it relates to the setting. I’ve seen my fair share of car photos that all look the same. A car sits in the middle of a popular spot or in an open lot somewhere, you see the car but there is no effort or thought on how the background or foreground looks. Setting could be as simple as a flat wall or the city in the background, but ask yourself how that works with the car for the overall photo. There are a lot of factors that can impact location choice, like time of day and vantage point, but sometimes it’s important to consider what the overall setting looks like. Sure, the focus is the car, but what takes a photo from good to great is how the subject fits into its surroundings. I recommend only playing with one or couple of locations to really master the basics of composition and to really get a feel for how the location can impact a photo.

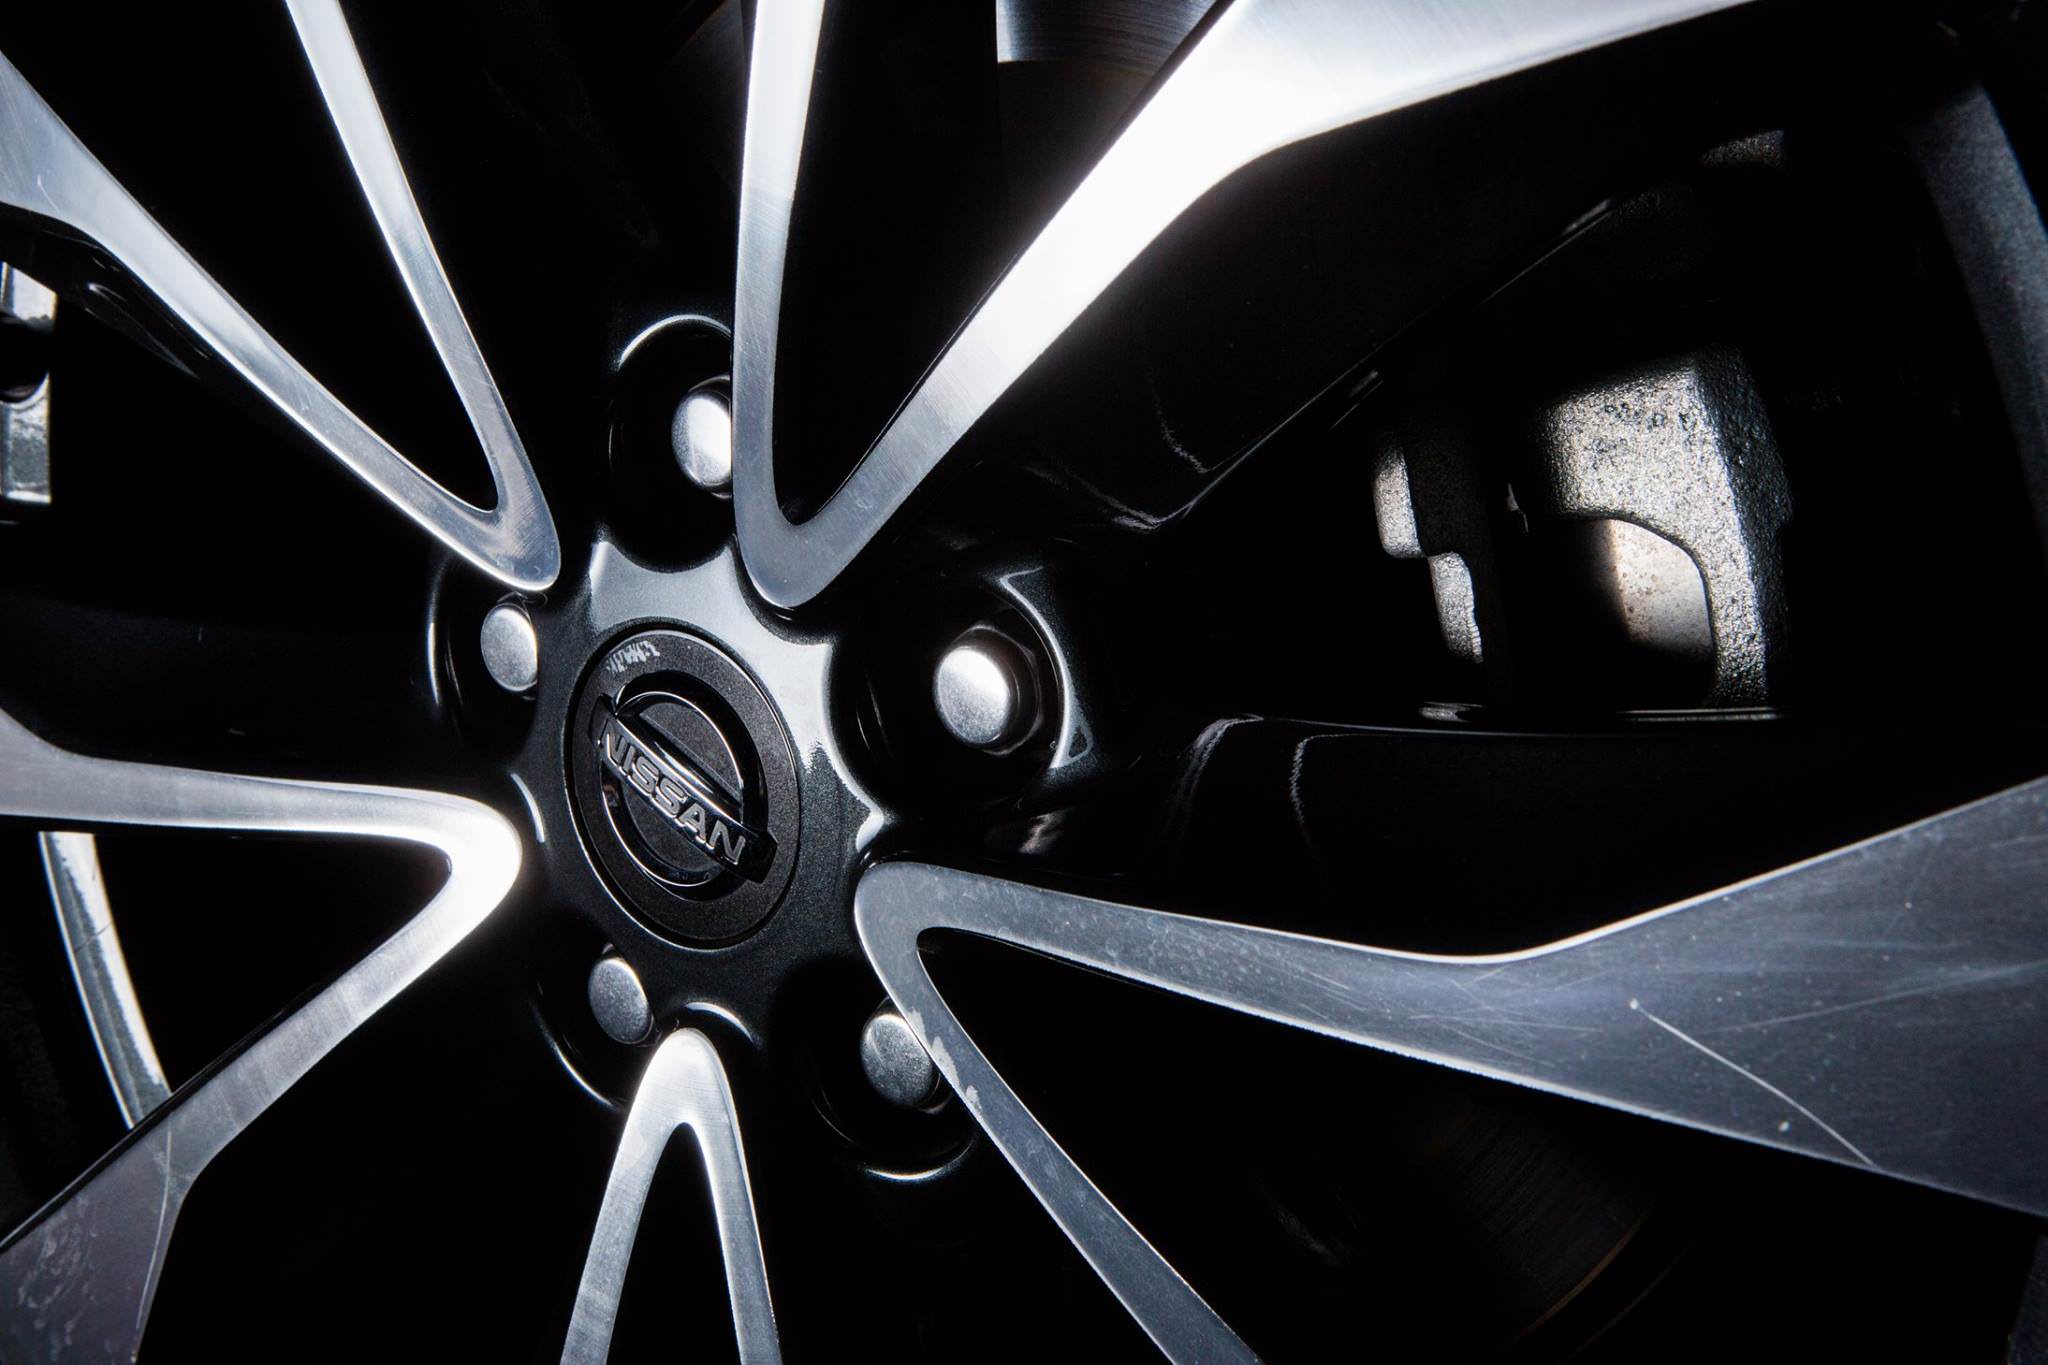
Mistake #4 – Dirty Car, Especially Details (Wheels, Close-Ups, etc.)
So you’ve spent days, weeks, or maybe even months planning, finally got a location that will work, and have all the gear you’ll need to get those much anticipated shots you’ve been imagining. But for all of that there is one factor that is in the way… some pesky dirt, grime or spots on the car. There is nothing worse than setting things up, having everything where it needs to be, and you then see that the car is dirty or water-spotted. This brings me back to those concepts people LOVE to rely on, “It can be fixed in Photoshop” OR “you probably won’t see it”, OR “ it’s probably not THAT bad”. It’s not only a problem with wide shots of the car, but with those close up detailed shots. It’s the wheels, the grill, the badges, etc… metallic and chrome parts are very unforgiving in post and are difficult to replicate.

The idea should be to set yourself up to get the best images when you shoot and not to spend time later fixing and cleaning up mistakes that you could have easily avoided. I’ve experienced shoots where this has happened, and sadly, it limited the amount of images we had to work with because of how much time and labor were needed to clean the image. The easiest way to fix this? It’s as simple as having a few towels and a bottle of water in your car. You can clean and fix any spots you might need without washing the whole car. You should probably be aware of a detailing spray that will help you to clean your car quickly and make it glossy. For more information on the detailing sprays, check out websites like CarBibles. Having a full kit of car cleaning gear handy will save you hours in post production and make you look like a rock star in the eyes of your client.

[Related Reading: Six Common Real Estate Photography Mistakes And How To Avoid Them]
Mistake #5 – Not Shooting Enough Photos
Shooting is going well and it feels like everything is going together. I’m trying some different angles and getting pretty much exactly what I had envisioned for the shoot and then some. It feels like we are just about ready to wrap things up and it’s been a great shoot. Now, downloading the images from the shoot, I see different things that I didn’t see on site. I wish I had changed my angle a little. I wish I had explored the location a little more, maybe I should have tried a few other things. The shots look good, but I feel like I left a lot on the table. It happens to all of us, but we can be so focused on what we planned to shoot that we don’t take a step back to see what could work a little better or there could be something we are completely missing. With automotive shoots there is usually a lot of time and planning, and the last thing you want to do is wish you had taken a few more shots.
In light of this experience, I developed a mantra I try to remember at shoots… “It’s digital, so why not?” If I tell myself I think we are done, or that I got what I “planned” I ask myself: What am I missing? Is there anything else I could try? Could there be a different angle? For all of the things we can create or fix in post, I can’t make a shot I wish I would have taken. I can’t add light to a photo somewhere that I didn’t put a flash. If there is anything that digital photography has allowed us, it’s the flexibility to explore, try new things, and shoot a little extra just to be safe. So try something different and explore a little, and take those extra shots if you don’t feel confident that you got it right. You will thank yourself in the end when you have more options and don’t regret missing out on those ideas you had in the back of your mind.
A sample of the many layers I use even in just one composite image. Missing just one image can leave a huge dark spot making the whole sequence unusable.
Bonus Tip – Shoot Tethered to View Your Final Images
As a bonus tip, shooting tethered is a great way to zoom in and spot small issues that you may have missed on when you were viewing the final images on the back of your camera. If you don’t like shooting tethered or don’t have the necessary gear, you can also upload your final keepers to an iPad prior to wrapping up your shoot if your camera or memory card has wifi capabilities.
As you zoom in and pixel peep, you have the chance to spot errors that you can fix prior to breaking down and wrapping up the shoot. This can save you hours in post production later.
Conclusion
We will always make mistakes, and things won’t always go as smoothly as you hoped. But when honing one’s craft, I feel it is our responsibility to look objectively at what we do to learn from situations in order to work better and be more efficient in the future. Hopefully, these tips will help you learn from my errors and mistakes as you pursue your interests with cars and photography and this can help eliminate some obstacles from your path along the way.
Note: Article modified on 10/8/2020 to include more tips from the editor.


