During my very first digital photography class (ok, it was my only digital photography class) at art school, I learned about a camera-less photography technique which produces an image called a Photogram. Artists like Man Ray and Pablo Picasso experimented with the technique, which is traditionally made by placing objects on photographic paper and then exposing the paper to light. Sometimes they would simply lay the paper and objects out in the sun, or expose it with an enlarger in the darkroom.
 Photo by Anna Atkins and Anne Dixon, 1854, Cyanotype, Via The J. Paul Getty Museum Open Content Program
In the 1800s Anna Atkins, an English Botanist and Photographer, used this contact print method to make photographic impressions of plants. I’ve always admired these Photograms and wanted to create something similar, with a modern twist. To create a modern photogram, I simply used my flatbed scanner instead of photo sensitive paper.
Making Your Own Digital Photogram
Here’s What You’ll Need
Flatbed scanner
Plants or other subject matter
Photoshop or other image editing software (optional)
Construction paper
Paper weight
Here’s How to Do It
1. Gather your subject matter. I took my oldest son on a nature walk to find plants for our project. We threw rocks in the river, gathered different kinds of plants, and took pictures along the way.
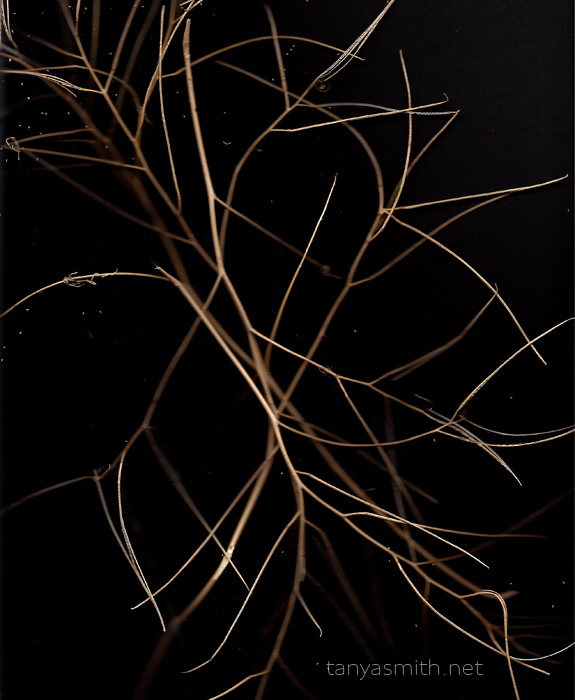
2. Place your chosen materials on a flatbed scanner. I wanted a look that had more depth and color than the original photograms. To get that depth, I left the scanner lid open and turned the lights off in my studio while scanning.
If your materials are too high off the scanner bed, like the tumble weeds in the image below, you might have to place a piece of construction paper on top and weight it down with a book or paper weight.
3. Crop and touch up your image as needed in Photoshop. I left most of the dust specs in my images because I liked the way they looked. You could clean them up if you want by applying a dust and scratch filter or manually cloning out the blemishes.
How to Get a More Traditional “Photogram” Look Using Photoshop:
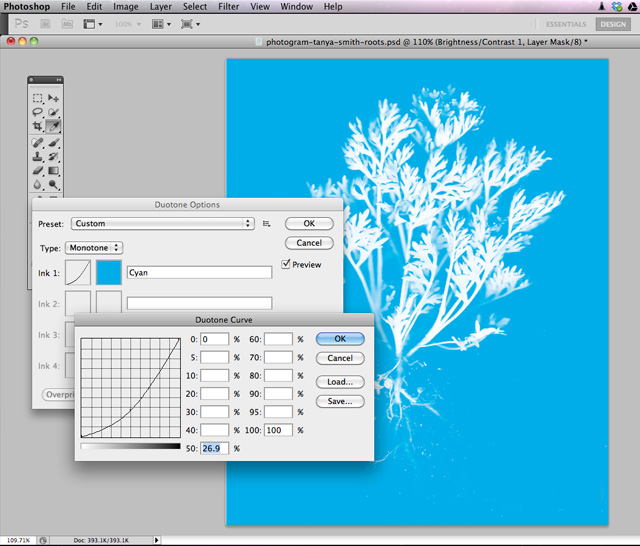
1. Open your image in Photoshop.
2. Change the mode to Greyscale and discard the color information.
3. Bump up the brightness with a brightness/contrast adjustment layer. In this case I brought the brightness all the way up to 112.
4. Convert the color mode to a duotone. This will actually end up being a monotone image because we are going to choose one color.
5. I chose 100% cyan, but you could use any color you like.
6. To further brighten the plant image, I brought the duotone curve down significantly until I was happy with how it looked.
7. I added some noise to the image via a noise filter, just to give it a little more texture.
8. Then, I actually went back into the duotone menu and darkened the color a little bit. 100% cyan was burning my retinas. At this point, don’t forget to change the color mode to suit the output of your image.
Here’s the final photogram…
And here’s a side-by-side comparison of the original by Anna Atkins and my digital version (not the same plant, obviously, though that would have been really cool…)
I’ve been using scanned materials in elements of my work for over a decade now. The flatbed scanner is just another creative tool for me. How have you used it? If you haven’t already, how would you use this “camera-less” photography technique in your own work?
CREDITS: Photographs by Tanya Smith and the Getty Open Content Program have been used with permission for SLR Lounge. Do not copy, modify or re-post this article or images without express permission from SLR Lounge and the artists.


Get Connected!