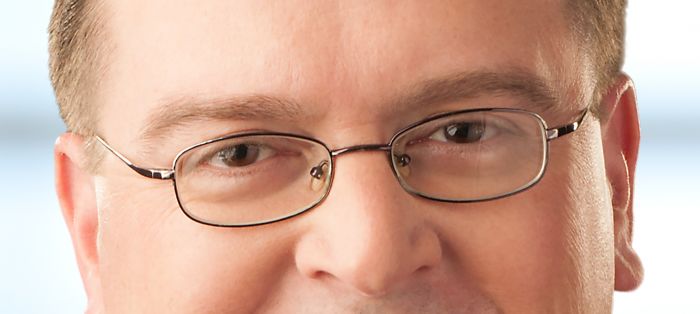
A good portrait frequently includes careful placement of your lights to nicely sculpt the subject’s face complimenting them making them look as good as they can. But when the person you’re shooting is wearing glasses you’re presented with a whole new challenge, how to minimize the glare that appears in the lenses when the glasses reflect that light you’ve so carefully placed.
Fortunately there is a relatively simple way to deal with this in Adobe Photoshop so your portrait can shine without that distracting glare. Since the glare is mostly just a lighter area we can solve this problem by making a careful selection and using that with a Curves Adjustment Layer to darken that light area.
First Make a Path
In the image above we can see there is a large flare in the glasses on the right side, along with a smaller one on the left. The first step is to use the Path Tool to carefully make a Path tracing the edges of the 2 flares, as seen in the image below.

Add a Curves Adjustment Layer
With the Path made turn that into a Selection and then with the Selection active add a Curves Adjustment Layer, (the Selection will automatically create a Layer Mask for the Curves Adjustment Layer).
[Related Reading: How To Cure Age Spots With The Dodge & Burn Reverse Time Machine!]
Adjusting the Curves is the most challenging part of this technique. In this case it’s a pretty simple adjustment that’s needed, mostly just to darken the flare just enough to blend in with the rest of the image in the glasses. When adjusting the Curve on this image I noticed a slight Green tint showing up as well as the lighter tones, so in addition to pulling down on the RGB Master Curve I also nudge the Green Curve down just a tick or two. The adjustments made are shown in the image below.

Here is a shot of the image with the Curves Adjustment Layer, as you can see the flare on the right is now pretty close to blending in, we just need to work on the edges of the flare that are still apparent, but we’re pretty far along in solving the issue on that side.

When the Flare One Side is Stronger
But notice how the flare on the left is still there? As commonly happens the flare on one side is stronger than the flare on the other.
Fortunately we can deal with this by simply copying the Curves Adjustment Layer we just made and painting Black in the Layer Mask where the flare on the right is to keep it from affecting that side as well. Below is our shot with this 2nd copy of the Curves Adjustment Layer.

Blend the Edges
With the Flare muted our final step is to blend in the edges where the borders of the flare are still visible. While we could take extra time to try to perfect the edges here a simpler way is to just add one more Layer and use the Healing and Spot Healing tools to blend in the edges. Below is our image with the flares blending in on both sides so they’re no longer the big distraction they were.

Finally here is a larger view of the image with the flares toned down along with the Layers we used to address them.

[Related Reading: Photoshop Tips | How To Use Curves]
As you can see with just 3 simple steps we were able to deal with this common issue, (OK, 4 steps if you count copying our first Curves Adjustment Layer.) The key is to use selections and layers to break down a complex challenge into simple ones we can address one at a time to get the results we need.


Get Connected!