In this tutorial, learn how to unleash the power & potential of Lightroom with a technique we like to call “Dark Mode”. Watch until the end to see how we lit this shot. Thank you to Profoto for sponsoring this video and allowing us to bring start to finish tutorials like this to our YouTube Channel. Make sure you subscribe to see more videos like this in the future!
“Dark Mode” Lightroom Editing Technique – Free Download!
You can download the RAW file to work on while you are watching this tutorial by filling out the form below!
This is an tutorial similar to what we teach in our newest release: Mastering Lightroom, a complete A-Z Lightroom tutorial that will help you elevate your editing skills to a whole new level! The Dark Mode Preset is also included in our Visual Flow Modern Pack, made in partnership with DVLOP, which you can learn more about here.
We are going to save the information on how this photo was lit and shot for the very end of the tutorial, so let’s jump into the actual Lightroom editing technique:
Step 1: Dial-in Your Color Manually or Use a Lightroom Preset

As mentioned before, we are using the Visual Flow Modern Preset Pack that we made in partnership with DVLOP. For this image, I am using the Soft Light preset which will apply a bit of warmth, some contrast, and giving it a nice finishing touch based on the lighting condition in which this was shot (overcast daytime weather).
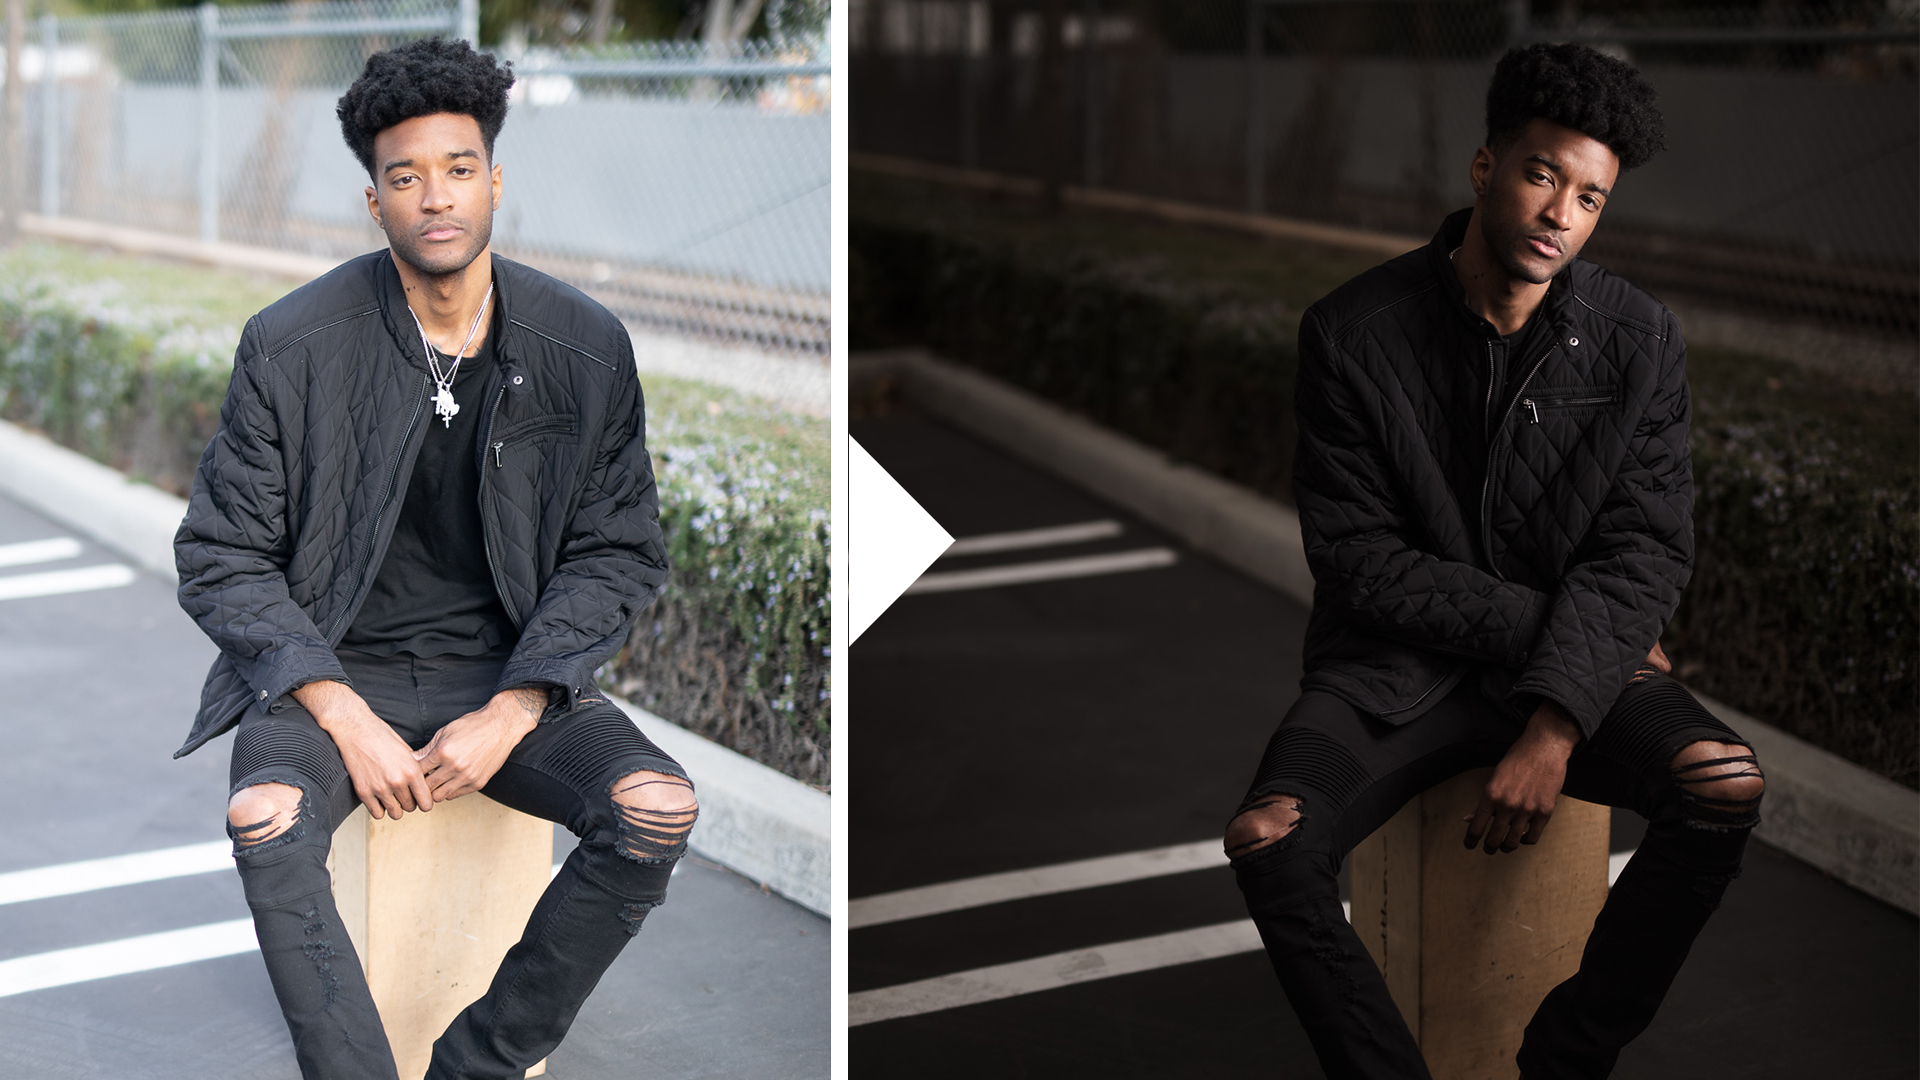
Step 2: Create Dark Mode Preset

Now that we’ve added our intended preset I actually want to completely reverse it. Crazy, I know, but hear me out. I am going to darken down the overall Exposure to -3.00, raise Blacks to +100, balance out the Whites at 0, and lastly, raise Highlights to around +60-70. We end up with a very rich and dark-toned image without doing anything. If you are a Visual Flow user you’ll notice that we built this into the Tweaks section to quickly adjust your image to our tested Dark Mode edit.
Step 3. Finalize Temperature
After that, all that’s left is to correct your Temperature if necessary. If you lit too much of the ground, you can always grab a Local Adjustment Brush with a -.5 Exposure Burn and brush the ground. Here is the final image:

How We Shot It
To create this image we used a Profoto B10 Plus in a Profoto 3′ RFi Softbox Octa. The reason why we couldn’t darken our in-camera exposure to make our background darker in the first place is because we are shooting at f/1.4. You have two options to cut down your ambient light when using flash in a more dramatic fashion like this:
- High-Speed Sync (HSS): When you are shooting outdoors and your intention is to maintain a wide aperture and shoot at a shallow depth of field, you are going to be letting tons of light in. For our HSS test shot in the video, you’ll see our settings are at 1/200th of a second, f/1.4, ISO 50 which is still letting a lot of ambient light in.
- ND Filter: The ND filter is going to cut both our flash power and our ambient light exposure. Depending on the type of filter you purchase, you are likely to get a bit better performance using an ND filter because the flash power won’t have to pulse as quickly. Here we are using a 10-stop ND filter which is what I take with me for most of my portraiture work. We pushed our settings to 1/8000th of a second, f/1.4, ISO 50 and were able to arrive at a more dramatic ambient light exposure.
The Downsides of High-Speed Sync

The solution to avoiding the bar the top and bottom of the image is to switch into High-Speed Sync, but there is a slight issue that occurs. The flash isn’t going to be giving you its full power. As soon as the curtain starts to open the flash is going to pulse, it will start rapidly firing to get an even amount of light into the frame before the rear curtain closes. What that means is dramatically less flash power, as you see demonstrated in the episode.
The alternative is to forego a shallow depth of field and drop down your ambient light exposure and compensate with your aperture and ISO settings rather than adjusting your shutter speed. You obviously lose that wonderful bokeh that is created with a shallower depth of field, so let’s discuss our options. In this case, our light had to be so close to our subject that we would have had to composite it out and take a plate shot, further increasing our work. The easier alternative was to grab a 10-stop ND filter and place it in front of the lens – this is a common technique we discuss in our Lighting 3 course for more advanced flash techniques. You can see a full behind the scenes video on how we created it from this episode of Slice of Pye.
Enjoyed this tutorial? Click here to see a full break down of how we created this Visual Flow Preset. If you are in need of in-depth Lightroom learning, look no further – check out our Mastering Lightroom course to amplify your editing abilities (now available in SLR Lounge Premium).


