Lighting 101: Foundation and Light Shaping
The following tutorial is from one of our more recent workshops, Lighting 101: Foundation and Light Shaping. We show you how to modify and shape light to achieve a variety of effects, using imagery from fitness shoots, couples portraiture, in-studio head shots, outdoor fashion shoots and much more. (Click here to Purchase). Take your photography to the next level by gaining a full understanding of lighting and flash photography!
The Key To Capturing Your ‘Good’ Side | Lighting 101
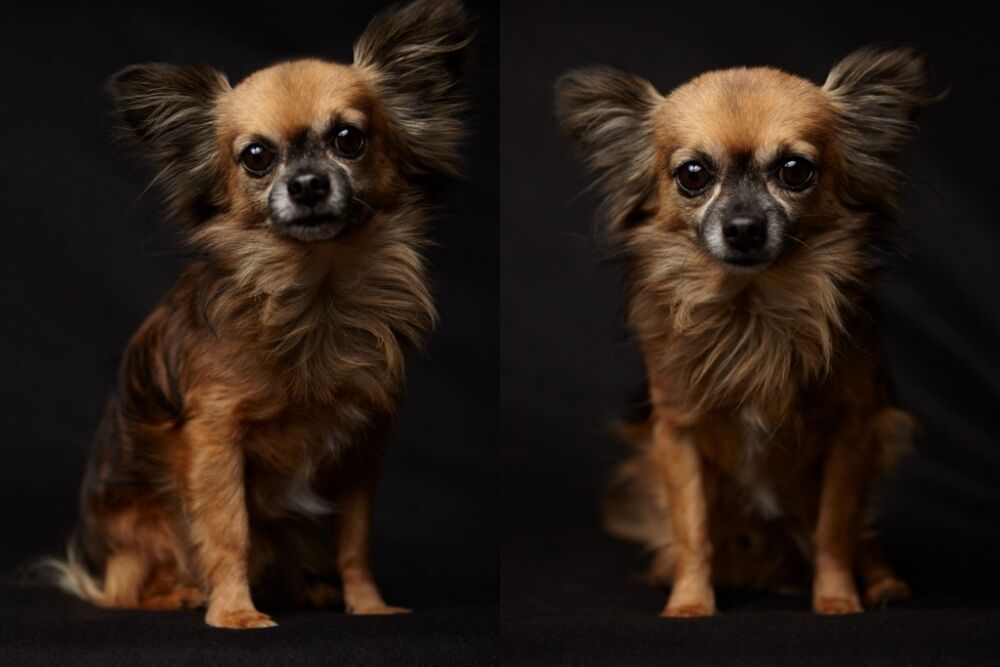
3 Primary Subject Positions (In Relation To Key Lighting)
There are three common subject positions in relation to the key light: short, direct/flat, and broad lighting. Each one of these subject placements invokes different feelings in your images.
Direct/Flat = Symmetry
Each one of these subject positions has a different usage and effect. For a direct/flat or symmetrical light, the subject looks directly into the camera while lit.

Symmetrical lighting creates an equal balance of light on the entire face of the subject. Since the even lighting fills up all the blemishes and wrinkles, this is often used to create beautiful portraits.
However, I want to mention that subjects with dissymmetrical faces may not look flattering in this type of lighting.
Short = Slimming
More often than not, short and slim lighting is the more flattering angle. Short lighting is when you light into the “short” or far side of the face, leaving shadows on the “broad” side of the face.

In other words, we turn the face into the key light, which lights up the short side of her face, and the broad side falls into the shadow. This, in turn, makes the subject’s face look a bit slimmer.
Broad = Gaining
Now the opposite of short and slimming is broad and gaining. Broad lighting is lighting into the “broad” or near side of the face, leaving shadows on the “short” side of the face.

The effect that this has is “gaining” or enlarging the face of the subject. This is used when the subject has a smaller face, and you want to make her face look a little bit bigger.
Learn More about Lighting
This has been a small sample from our new workshop Lighting 101 where you learn all the fundamentals of shaping light. We take you on a journey, starting with basic light knowledge all the way to step-by-step instructions from real shoots! This is the most comprehensive tutorial ever created with 9 hours of video all designed to teach you how to create your own amazing images. If you want a sneak peek, check out the Lighting 101 trailer here.