Just a few days ago we shared a short how-to article detailing how to ensure that the images you upload to Facebook from a mobile device like your iPhone are of the highest quality. Essentially, the default of FB is to compress and display your images poorly. All that’s needed to be done from mobile is to change around a setting which you can learn about here. and see an example below. For the desktop it’s a bit trickier.
Open images in new tabs and you’ll see what a huge difference it makes.


Uploading from the desktop on Facebook has come a long way, but it’s not perfect. Actually, even with what I’m about to share with you it’s not perfect, but it helps. Again, when you’re uploading to Facebook from a desktop it still won’t be posting in the highest quality even though you can sort of select for it to upload (in albums).
You may be familiar with some of the standard fare for uploading to Facebook for best results such as setting your image to 2048px on the wide side, ensuring you convert to sRGB, using Save For Web, and even uploading PNG files versus JPEG. In my experience the PNG file solution no longer really works, and the JPEGs still do suffer from artifacts depending on the image. ‘Depending’ being the operative word here. That disclaimer is key for what I’ll be showing you, because for the most part I’ve found the above options fine for most shots, but in many instances where there are gradients, artifacts and banding appear more prevalent, and here’s a solution for dealing with that.
Noise Layer
Many of you will know that using a noise layer within Photoshop has been a long-known trick for ridding an image of banding, but even an extremely low level of noise seems to help when it comes to uploading to Facebook.
The problem is, some images on your screen in LR or PS won’t show banding, but once you get it up on Facebook it will. What I’m suggesting is to add a 1% noise layer to your image, and though it may make no difference outside of Facebook, trust that it will when you upload.
Here’s an example where the first image was uploaded without the noise layer and we can see very obvious banding and artifacts (Open images in new tab). The one below it doesn’t suffer from the problem, and that’s the one with the noise layer. Note that within Photoshop that image showed no banding on my screen, and only when uploaded to FB.


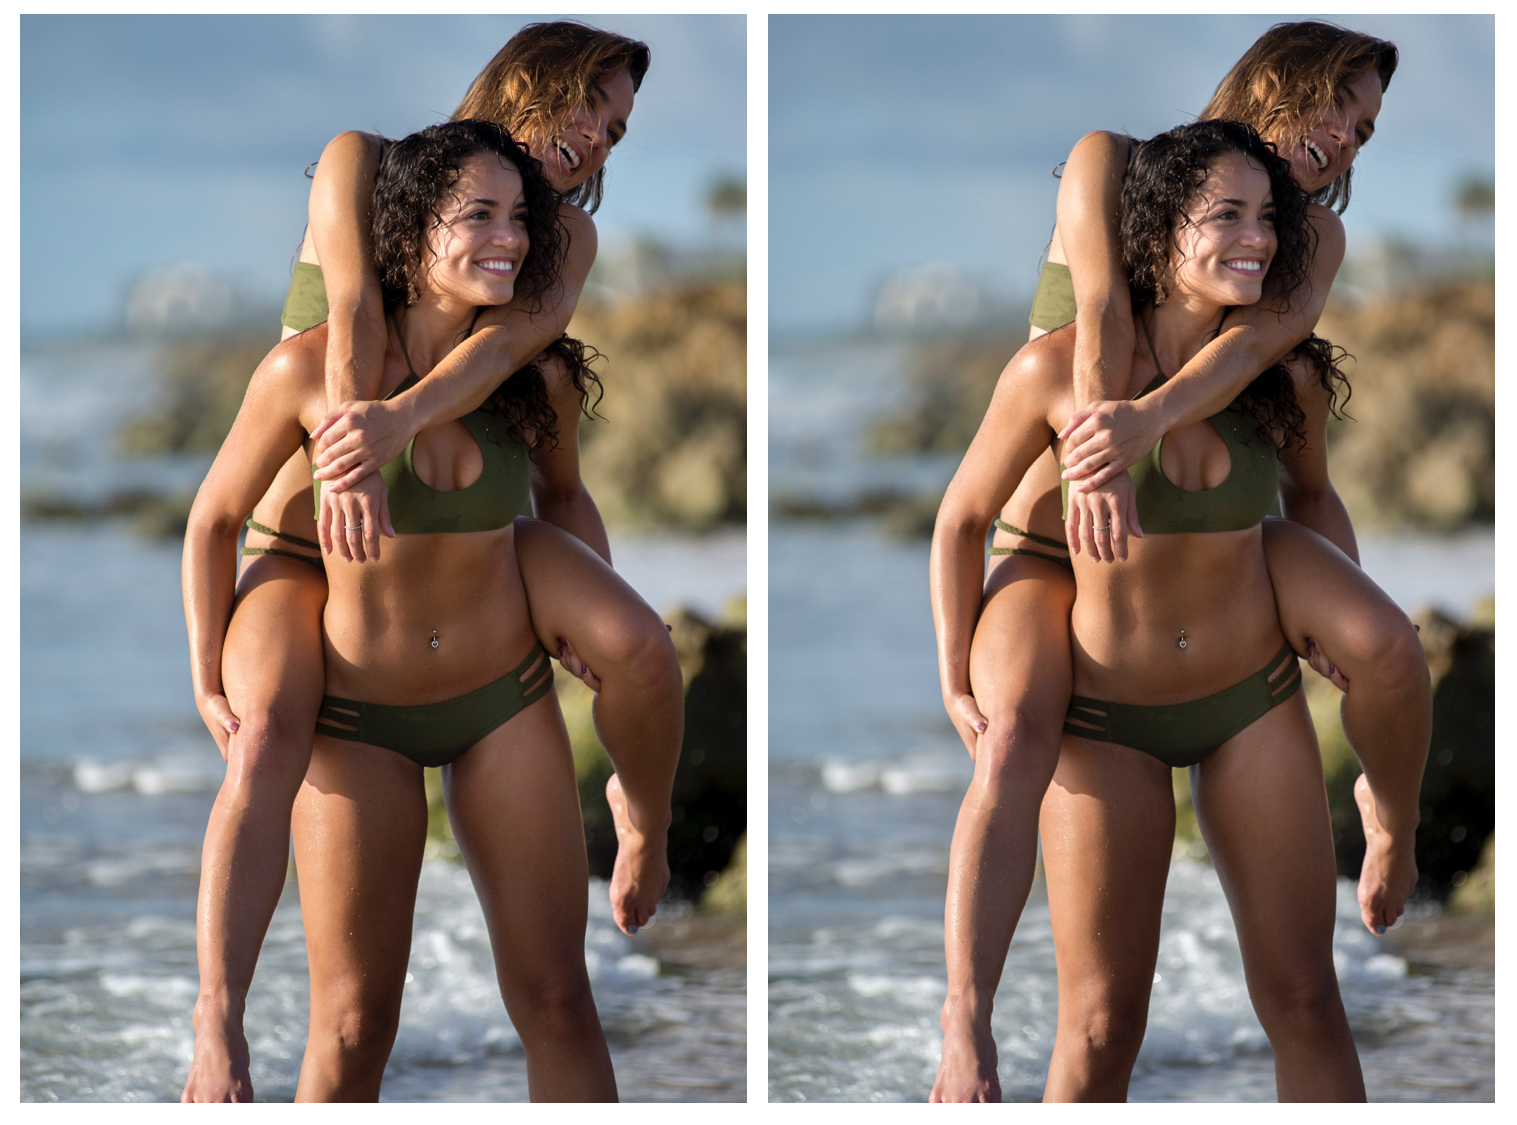
Incidentally, using this method I’ve also noticed instances where color was truer with the noise layer than without, and why that’s the case is beyond my comprehension. As ab example the side-by-side you’ll see below is a bit more accurate on the left to the actual look of the processed image. On the right it doesn’t look bad (I actually like it better), but not as true to the edit.
[REWIND: CORTEX CAMERA APP REVIEW | ONE OF THE BEST PHOTOGRAPHY APPS, PERIOD]

Here’s how to do it within Photoshop:
- Convert Image color space to sRGB: Edit>Convert To Profile>sRGB
- Resize image to 2048 on the longest side (L OR W)
- Create a new layer (name what you like, like ‘FB’), Change mode to ‘Soft Light’ & ensure you check the box that says “Fill with Soft Light—neutral color (50% gray) > Hit ‘OK’
- Go to Filter > Noise > Add Noise… > Input ‘1%’ & Select Gaussian > Hit ‘OK’
- Save your file: File> Save As > Change Format to JPEG > Uncheck box that says to embed color profile as you already converted > Max out slider and quality and select ‘Baseline’
That’s it. It may sound like a lot, and it’s a bit annoying, but, when you’re showcasing your work this may be the solution you need.


