Think back to the last time you saw a great photograph and consider why you felt awestruck. More than any other aspect, I’d contend that the reason you were mesmerized was because the image seemed to defy both the human eye and your conception of normal It triggered something in your brain that you otherwise never would have considered. Whereas the eye has a greater dynamic range than our sensors, the beautiful thing about understanding your camera is that you can alter reality in a way that would be otherwise incomprehensible. For example, in portraiture, this alternate perspective might be due to a unique angle or an unusually colored gel on your flash.
For travel and landscape photography, I’ve found that using long exposure has been the most important element in creating great photos aside from shooting bracketed images for HDR post-processing later on. Specifically, I see three main advantages to long exposure: 1) the ability to minimize or exclude unwanted moving images (generally people), 2) changing the apparent characteristics of weather, and 3) adding a sense of city life through beautiful light trails.
Keeping Unwanted People Out Of Your Photos
When you do travel and landscape photography, you want the grandiosity of the scene to be the subject. Although portraiture can enhance some of these scenes, random people milling about just gives you a snapshot. We all take them (I have about 11,000 of them on my phone), but you need to transcend that if you want to elevate your images to the next level. Removing people is possible through a variety of techniques ranging from Photoshop removal to compositing to creative cropping. That said, if you can’t (or don’t want to) do any of those things, I’d suggest long exposure.

[Related Reading: 10 Common Long Exposure Photography Mistakes to Avoid]
Long exposure is generally considered to be a shutter speed of many seconds or more. Basically, you’re leveraging the fact that fixed objects will stay constant in your viewfinder, whereas anything moving will be captured for just a small fragment of the time your shutter is open. The recipe for a photograph is really just light and time. This being the case, if the exposure time is long enough, you’ll only see the stationary parts of the scene and everything else will be blurry or absent.
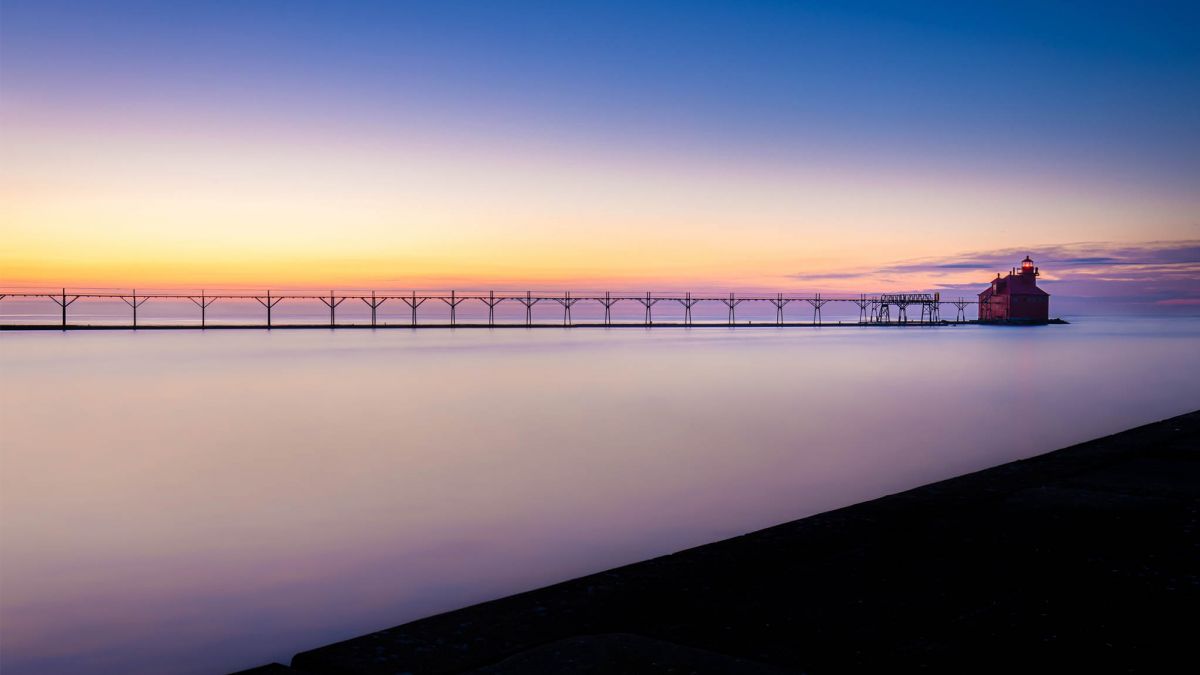
Changing The Characteristics of Water
When we look at water in real life, we see waves and movement unless it’s perfectly sedentary like a small pond on a windless day. Sometimes we want to freeze the moment when photographing water, such as when capturing sports like surfing. Additionally, we may want to convey a sense of foreboding or surprise by getting a crisp wave as it’s hitting an object.
That said, the ripples in water by themselves tend to be rather unremarkable. They don’t generally add much because they’re exactly what the human brain is used to seeing. To take things up a notch, we need to give the water a magical quality. By smoothing water over the course of many seconds or minutes, we remove the fine details and leave a glowing residual aspect. This quality will make your image pop and most people will wonder how you accomplished it. In addition to this mesmerizing component, it imparts a feeling of motion into the frame. This can be especially useful when photographing a moving stream or water receding from a beach.

Breathing Life into Cityscapes via Light Trails
Since we process images instantly with our retinas, we see cars and trains at night as just moving sources of light with distinct headlights and taillights. Much like random pedestrians and unflattering water, nobody wants to see cars in cityscape photos unless the car itself is the actual subject (think a red Ferrari).

In cityscapes, we crave the surreal, which is why light trails breath life into an image with variously colored glowing rays that also add a sense of motion. Sometimes those light trails can even be the subject themselves.
Long Exposure Sounds Great, But How Do I Actually Do It?
I think we’ve all done long exposure at some point by accident when there wasn’t enough light in the scene and our camera set the shutter speed far longer than allowable for a handheld image. The result was a blurry and unsatisfying photo destined for the recycle bin on your computer.
Instead, we need to be more methodical in our planning and technique. First, however, we must talk about equipment.
Equipment Required
Tripod
More than any other piece of gear, having a great tripod or something similar is the most essential aspect for creating great long exposure photos. Remember from earlier that moving objects will blur or fail to show up in the final image if the shutter is open long enough. If you’re handholding your camera, chances are exponentially high that the entire image will be blurry. Instead, we need complete steadiness to ensure that all stationary parts of the scene are entirely still throughout Even a small jostle to the camera from pressing the shutter button can result in an unusable photo. For this reason, it’s imperative to keep your camera perfectly still with a tripod.

I’m also a big fan of the Platypod. It’s simply a flat piece of aluminum (about the dimensions of a thick envelope) and honestly looks like a gimmick, but it’s so easy to use and creates a unique low-angle perspective. If you’re shooting where tripods aren’t allowed, it also comes in handy for the simple fact that it’s not actually a tripod even though you get complete stabilization. I’ve even shot in the Vatican with a Platypod without any finger-wagging from security.
Neutral Density (ND) Filters
This is where it becomes necessary to separate out required and elective long exposures in your landscape compositions.

To expand on this concept a little further, think back to scenes you’ve been in before with minimal ambient light. For example, I like to shoot interiors and have done a lot of work in European churches. In these cases, I want the lowest possible ISO and a small aperture (f/11 to f/16 usually) to capture everything with minimal noise and complete focus. I often shoot aperture priority and my camera meter usually recommends a shutter speed of anywhere from 3 to 15 seconds. In these instances, long exposure is simply required to get the shot. Although I could handhold the camera with an ISO of 6400 and an aperture of 2.8, I would be sacrificing image quality and noise for convenience.
[Related Reading: PolarPro QuartzLine Filter Review | A Polarizer and ND Filter In One]
Conversely, there are often times where we have more than enough light in the scene. On a bright day, we may not be able to go slower than a fraction of a second even with the lowest ISO and an aperture of f/22. There is simply too much light to accomplish what we would like. In this case, ND filters are imperative.
I consider ND filters to be sunglasses for our lenses. When we have too much ambient light, we need a way to block most of it from reaching our sensors in the same way that sunglasses limit much of the sunlight from hitting our retinas.
ND filters come in varying strengths. Like lenses, they can be either fixed (called solid) or variable. For the sake of attaining the best quality, I stick to fixed strengths, however. You can also get graduated filters where half the filter is clear and the other half is darker. Like the fixed aperture for a lens, ND filters are rated for how much light comes through. You will see this expressed in stops of light and optical density numbers. I find it far more useful to consider stops, however. In contrast, optical density numbers are multiples of 0.3, so 1 stop would be 0.3, 2 stops are 0.6, 3 stops are 0.9, and so on. I think stops are more intuitive, so I will use that going forward Think of ND stops the same way that you would about stops with regard to your shutter speed. For example, if you go from 1/125th to 1/250th, you’re letting in 1/2 the light. If you move to 1/500th, you’re getting 1/4th. Get the picture? Each increased stop in a ND filter represents half the amount of light being let through. Moving from a 3 to 6 stop ND filter doesn’t seem like much but it means only 1/8th of the available light will reach your sensor.
One other thing to keep in mind is that you can stack multiple filters, although forcing light through more layers of glass can cause some unintended effects.
Filter Holder
While you can buy filters for a specific lens size, I’d initially recommend getting a holder for square 100 x 100 mm filters. This will allow you to use the same filters across all your lenses by getting adapter rings (cheap) instead of differently sized filters (expensive).

[Related Reading: Polar Pro Filters Summit Landscape Kit – An Innovative New Filter System]
Camera Trigger
At some point when your shutter speed is long enough, even the slightest movement like the mirror opening/closing or pressing the shutter button can affect your image. On a DSLR, you can use the mirror lock-up function to avoid this, although this obviously isn’t a concern with mirrorless.
 With regard to the shutter button, there are a variety of options at your disposal. Most new cameras include a WiFi or Bluetooth connection to trigger the shutter remotely. I find establishing the connection a little clunky in most cases and not worth my time, however. You can also get wired or wireless remote triggers to avoid touching your camera entirely. Instead, my recommendation is to use the timed release function. On my Canon EOS R and EOS R5, I have the option of a 2-second release. Basically, I just press the shutter button and the camera fires 2 seconds later. I find this is the easiest method without requiring any additional gear. In many cases, I also shoot 3 bracketed images (1 normal exposure, 1 under-exposed, and 1 over-exposed) for later HDR processing. One benefit of the 2-second function is that it will shoot this entire image series sequentially.
Method of calculating the correct exposure
Although this can be done by hand, I would find this dreadfully tedious and far too arduous when I’d rather be shooting. Like other things in life, I use an app instead. There are many that offer this function, but I like one appropriately called “Long Exposure Calculator.” It is free, easy to use, and functional even without an internet signal (a huge advantage in many places you’re shooting landscapes).

My workflow is the following:
- Always use the lowest ISO (100 with many brands)
- Select desired aperture for the scene
- Determine the necessary shutter speed for the correct exposure according to the camera meter
- Input the “normal” shutter speed into the app.
- Once I have the shutter speed inputted, I select my ND filter strength in the app and it tells me how long I need to have the new shutter speed. I often carry a 3, 5, and 10 stop filter, which allows any of those strengths (3, 5, 8, 10, 13, and 15 if using two stacked filters)
- If the new shutter speed is longer than 30 seconds, I use bulb mode (i.e. the mode you never pay attention to). This allows you to have the shutter open as long as you would like.
*Two technique issues specific to a camera with a mirror (i.e. not mirrorless)
- You’ll also want to consider blocking the viewfinder of your camera during the exposure because it can let in small amounts of light that might alter the image during such long exposure times. I’ve used Gaffer tape for this because it doesn’t leave a sticky residue.
- You may want to focus without the filter, set it to manual focus, and then add the filter. I noticed with my previous Canon 5d Mk IV that automatic focus would hunt quite a bit. I haven’t noticed this with mirrorless.
Some Common Scenarios:
- Remove Unwanted People:
I find this scenario to be one of the most enjoyable for me because it totally perplexes the senses. For example, here are two photographs from St. Mark’s Square (Piazza San Marco) in Venice. The colored one was shot at about 5:30 AM with roughly 20 people in the square whereas the black and white was shot in the height of the evening when there were thousands. By varying the length of time captured, I had complete control aside from the tourists sitting at tables. The result is that all the moving objects were essentially blurred out of existence. Even if you haven’t removed everyone, it’s far easier to do the rest in photoshop than if there were a thousand people in the image. I’d recommend roughly 8-10 minute exposures in these cases, which is about how long I used for the isolated building in the middle of the Venice Canal. In that case, boats were going past probably every 30-60 second, but you’d never know.


- Blur Water:
Of the three scenarios, I find water to be the one with the most trial and error required. You may get by with as fast as 1/5th of a second to perhaps 1 second. This can create some of the dreamy implied motion you often see with waterfall pictures. On the other hand, going up to 30 seconds or longer will result in an even more surreal quality.
 Create Light Trails From Headlights:
I think about 10-30 seconds is just right for photographing city light trails. If the traffic is heavy enough, you’ll see a constant line. I usually take a few images to find the best one. Alternatively, if you keep everything completely constant by shooting manual, you’ll have an easy time compositing multiple images and light trails to get everything perfect.


About the Author
Jeff Wiswell, M.D. is a full-time emergency physician and avid travel/landscape photographer who also loves shooting creative portraiture. Based out of La Crosse, WI. View his work at https://jlwiswell.com. Follow his Instagram: @jlwiswell.photography (portraits) and @jeffwiswell (travel/landscape).


