
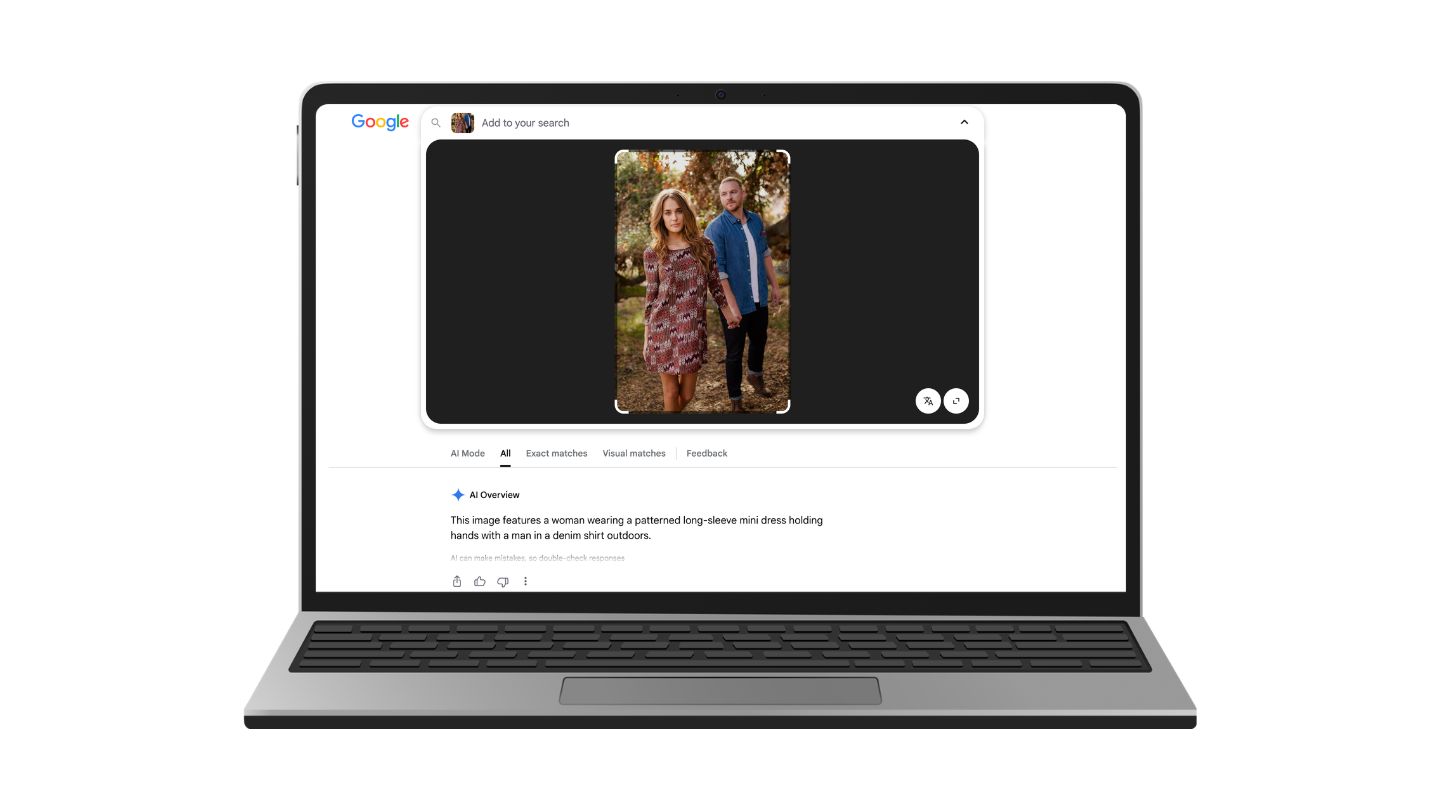
Wedding and portrait photographers run into unverified images more often than they’d expect. A “real wedding” submission that turns out to be three years old and shot by someone else. A couple’s inspiration photo that’s actually a stock image with the watermark cropped out. A screenshot from Pinterest that’s your own gallery image, stripped of credit and reposted on a stranger’s blog. In each case, the picture looks convincing. The assumptions attached to it might not be true.
You don’t need forensic software to catch most of this. A short, repeatable checking routine handles the majority of cases in a few minutes.
Start with the original source
As a wedding or portrait photographer, you’re rarely publishing someone else’s photography wholesale. Where this actually comes up is narrower and more specific: a “real wedding” submission for a feature, a couple’s Pinterest inspiration board, a venue’s promotional photos, a competitor’s portfolio you’re checking before referring a client their way. In each case, you’re not verifying a stranger’s photo for its own sake. You’re deciding whether to trust what someone told you about it.
Google Lens is the fastest way to trace earlier versions of a photo across websites and social platforms, and Google’s “About this image” tool, available through both Lens and Search in 40 languages, will surface earlier appearances of an image along with whatever metadata is publicly attached to it. Run a submission through it before you feature it or build marketing copy around it.
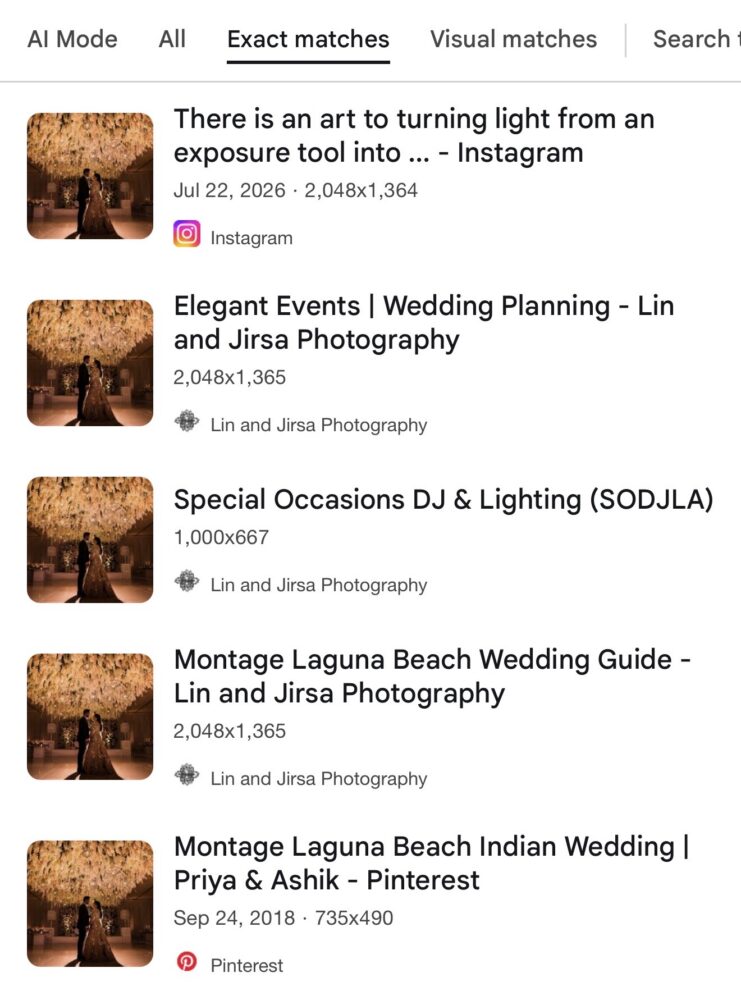
When you turn up an older copy, read the caption carefully. A “real wedding” submitted to you as recent might be three or four years old and shot by a different photographer entirely. A tighter crop can also remove context, a venue sign, a date stamp, another vendor’s watermark, that would have changed how you read the image in the first place.
Here’s how to do this:
- Find the earliest credible page hosting the original image.
- Compare publication dates across a few independent sources.
- Check whether the story attached to the photo actually matches what’s in it.
- Search the photographer’s or couple’s name against their official portfolio or social accounts to confirm the submission is genuinely theirs.
- Confirm you have permission to publish, and how the photographer wants to be credited, before it goes live.
This is the same routine you’d use to find out whether your own gallery images have been lifted and reposted on a vendor’s site or Pinterest board without credit.
Check metadata, but don’t rely on it
EXIF data can tell you the camera used and the original capture date, when it’s still attached. Most social platforms strip this on upload, so a missing EXIF doesn’t mean the photo is fake. It usually just means it passed through Instagram or Facebook at some point.
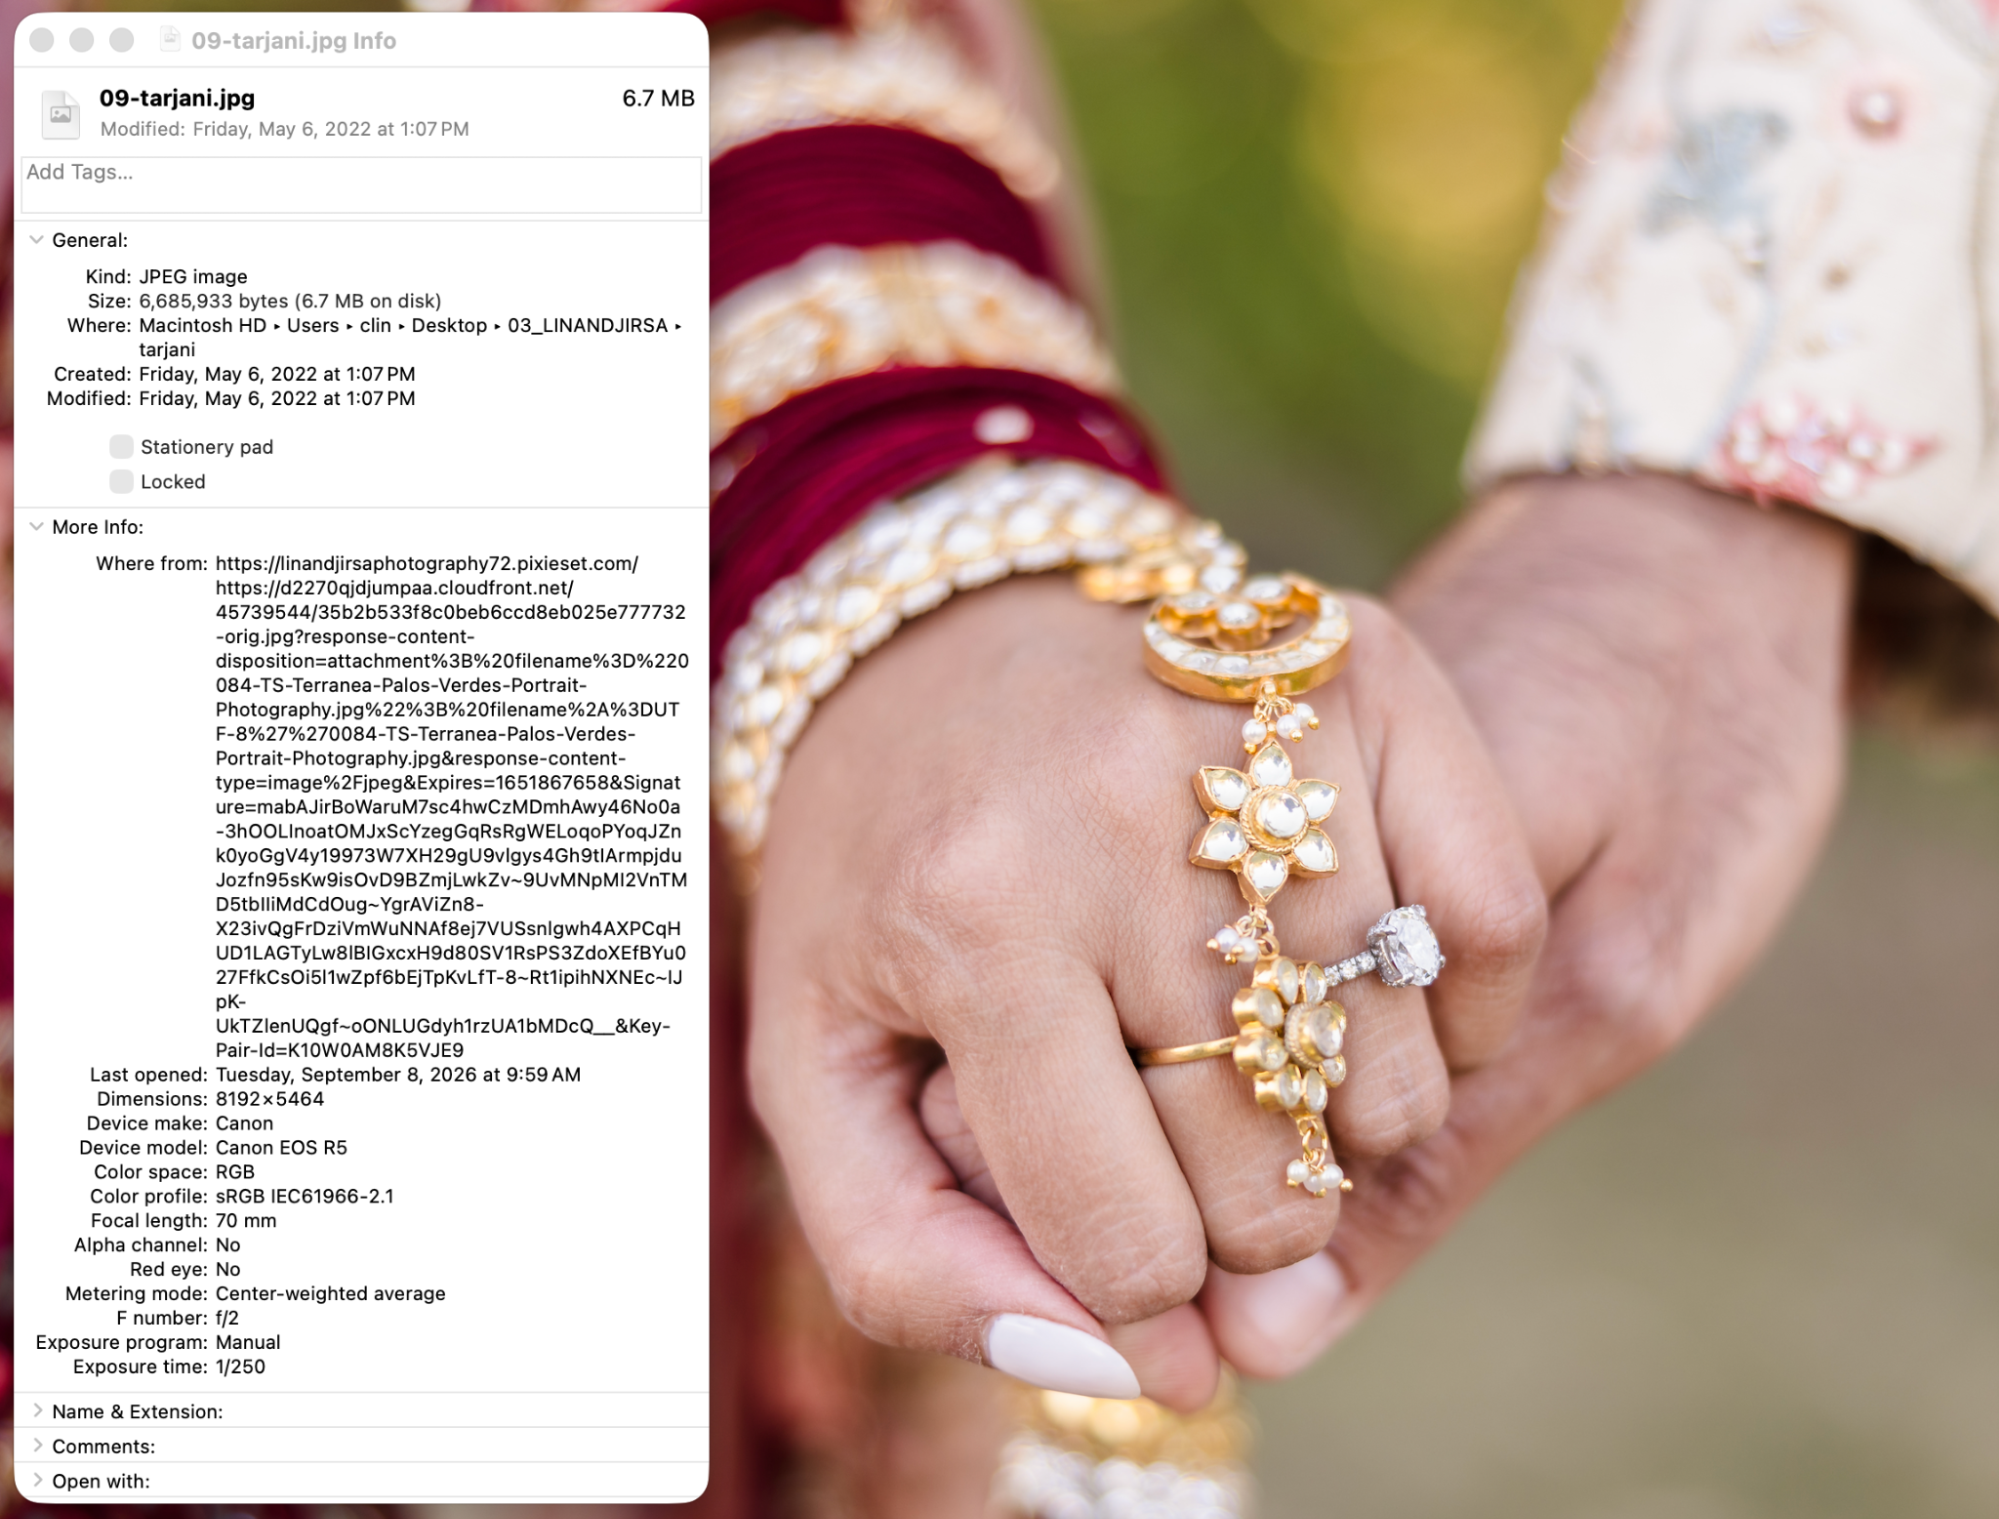
Content Credentials are a more durable option. Adobe describes them as metadata tied to creator identity and edit history that’s meant to survive resizing, cropping, and platform uploads in a way EXIF doesn’t. Photographers can attach this information from within Lightroom’s export settings, including producer info, linked social accounts, and a record of the edit history, and choose whether it’s published to Content Credentials Cloud, embedded in the file itself, or both.
Adoption is still uneven across the industry, but it’s growing. The Coalition for Content Provenance and Authenticity (C2PA), the standards body behind this system, has added members steadily since its founding, and more major software and camera makers are shipping support for it. If you’re a wedding photographer who’s tired of finding your own galleries reposted without credit, turning Content Credentials on for your exports is a low-effort way to make that harder to strip out cleanly.
Use reverse image search before you trust what you’re looking at
A photo can look untouched and still be heavily edited or generated. Pixel-level inspection by eye won’t reliably catch that. Reverse image search gives you something pixel inspection can’t: a history.
Run the search on the full photo and on a tight crop separately. A crop of a single building, a venue sign, a specific piece of decor, can surface an earlier source the full image doesn’t. This is genuinely useful for wedding photographers vetting a venue submission or checking whether a “featured real wedding” someone sent you was already published on another site under a different couple’s names.
Treat AI detection tools as one data point, not a verdict
Some photographers run suspicious material through an AI detector as an extra check. It’s worth knowing what you’re actually getting from that. Most tools in this category, including that one, were built first to catch AI-written text and added image or video detection later as a secondary feature. Detection accuracy for images is meaningfully less reliable than for text, and it degrades further after resizing, compression, or normal editing, the exact things that happen to almost every photo that’s been reposted or run through a CMS.
Use the result as a single clue, never as proof on its own. Weigh it well below what you find through reverse image search and original-source tracing. If a Content Credentials record is attached to the file, that provenance trail is a stronger signal than any automated detector score, because it documents specific edits rather than guessing at them statistically.
Confirm rights before you publish, not after
Verifying where an image came from and confirming you can legally use it are two separate steps. Finding the photographer doesn’t automatically tell you who holds the copyright, and some wedding photographers license usage rights to clients without transferring ownership.
Before publishing someone else’s photograph:
- Identify who currently holds the copyright, which may not be the person who posted it.
- Check that the license covers your specific use (editorial, commercial, print, paid promotion are often licensed differently).
- Confirm how the photographer wants to be credited, and use their preferred name and handle.
- Verify commercial use is explicitly included if you’re running the image in anything monetized, including a sponsored roundup.
A routine you can actually keep using
Verification only works if it’s fast enough to survive contact with a real deadline. A practical order:
- Reverse image search the photo and a tight crop of it.
- Trace the earliest credible source and compare captions and dates.
- Check for Content Credentials or EXIF data if either is present.
- Confirm the current rights holder and license terms before publishing.
That’s four steps, most of which take under a minute once you’ve done it a few times. It won’t catch everything. But it will catch the false attributions, the recycled “real weddings,” and the stock photo pretending to be a client’s inspiration board, before any of that ends up published under your name.
FAQ
Do I need to verify every image I use, even from a client? Not every image needs the full routine. Reserve it for anything you didn’t shoot yourself and plan to publish: submitted real weddings, vendor-provided venue photos, inspiration images a client sends you, or anything going into a public gallery or blog post.
Can I use these same steps to find out if someone stole my photos? Yes, this is one of the more common uses for reverse image search among working photographers. Searching your own gallery images periodically is a reasonable way to catch uncredited reposts on vendor sites, Pinterest boards, or competitor blogs.
Does stripped EXIF data mean a photo was faked? No. Instagram, Facebook, and most social platforms strip EXIF on upload as standard practice. Missing metadata is common and not, by itself, a red flag.
Are AI image detectors accurate enough to rely on? Not on their own. They’re a supporting signal at best, and less reliable for images than for text. Treat a detector result as one input alongside source tracing and reverse image search, not as a final answer.









