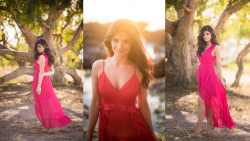
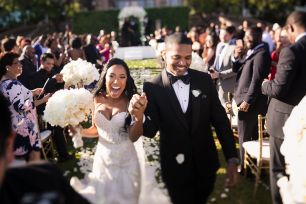
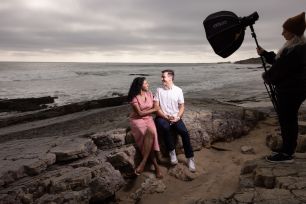
When shooting HDR photography, not every scene we approach will have a dynamic range broad enough to require using the bracketed HDR sequence. Instead, we can take single-shot HDRs of scenes that have a more limited dynamic range. In this tutorial, we’ll discuss single shot HDRs and ETTR (exposing to the right) and show you examples in different types of photography, from landscapes to portraits. We will also discuss the advantages and disadvantage of using single-shot HDRs when compared to bracketed HDR sequences.
This article was originally written in 2015 and updated in 2022 by our editorial staff.
What is a Single Shot HDR?
A single-shot HDR is when all or most of the tonal range of the scene can be captured with one single image. This can also be referred to as a “one shot HDR” or a “single exposure HDR.”
With single-shot HDRs, we have all of our shadows and highlights within that one image. However, when you take a single-shot HDR, you need to expose in such a way that all or most of the detail is captured in one shot. To do this, we use a technique known as “exposing to the right.”
Why Use Single Shot HDRs (vs Bracketed HDRs)
There are two main advantages of single-shot HDRs when compared to bracketed HDR sequences.
- Simplicity and Time – First, single-shot HDRs are easier to deal with when we get into post production because we only have one image to work with. This cuts down our workflow significantly, which saves us a lot of time.
- No Movement or Ghosting – Second, we can shoot moving objects without having to worry about movement issues like ghosting or motion blur because we are not using a bracketed sequence. Instead, you can freeze the motion of moving objects because you are not taking multiple exposures. This is impossible to do with a bracketed sequence because the moving object will be moving through each frame in the bracketed sequence. When we process the image, the moving object will be at different points within each frame. This is known as “ghosting.”
Disadvantages of Single Shot HDR Photography
The biggest disadvantage of a single-shot HDR is that we need to capture all of the tonal range in one image, which makes the exposure rather difficult. In many cases, it is impossible to capture the entire range in a single image. We are limited in dynamic range to the actual DSLR body itself. For example, if your DSLR can capture a 12-stop dynamic range with one single image, then you can only capture 12 stops, which limits your dynamic range. Any scenes that have a range broader than 12 stops cannot be captured with a single-shot HDR. If you have a full professional DSLR, you will get better single-shot HDRs. For example, the Nikon D800 can capture up to 14 stops. So, essentially the dynamic range you can capture will come down to the DSLR body itself as being the capability when you are shooting a single-shot HDR. With single-shot HDRs, the exposure becomes absolutely critical. A single-shot HDR that is incorrectly exposed will not turn out in post production at all.
WHAT IS “EXPOSING TO THE RIGHT?”
To get the proper exposure for a single-shot HDR, we use a technique known as “exposing to the right.” Most people think that “exposing to the right” means that you are exposing to the right of the histogram. In other words, you are overexposing your image. However, that is not necessarily the case.
Whether the image looks overexposed or underexposed will depend on the scene itself. For example, if your scene is super bright, your image will look different with the “exposing to the right” technique than when you are shooting a darker scene. Therefore, whether the scene looks underexposed or overexposed has nothing to do with whether you have correctly exposed to the right. “Exposing to the right” means that we adjust the exposure of the image so that the entire tonal range is shifted to the right of the histogram, but not to the point where we are blowing out detail. The goal of a single-shot HDR image is to capture the exposure in a way where all or nearly all of the tonal range is captured in one single shot. This means that if your highlights are blown or your shadows are clipped, you will not be able to pull out all of the detail when you get the image into post production.
Whenever you are exposing to the right, you are always better off blowing out more of your highlights than clipping more of your shadows. If you are clipping shadows, you will have many problems when you try to bring out the detail in the shadows. These problems include noise, grain, green dark shadows, and more in your images. On the other hand, if you blow out some of the highlights, we can generally recover the m. In addition, the image will look more natural with the highlights slightly blown out rather than having the shadows clipped. For example, if you are in a situation where the dynamic range is broader than what can be captured in a single shot, but you have no choice but to shoot a single-shot HDR, you need to expose so that your shadows are basically touching the left side of the histogram. However, these shadows cannot be clipped. From there, you are retaining as many highlights as possible but you will still blow out some highlights. However, this is fine because you will get a cleaner looking image. As mentioned earlier, the image will look overexposed or underexposed depending on the scene itself. However, as long as your highlights are pushed to the right and you have retained the shadows and detail, you have correctly exposed to the right.
Examples of ETTR Histograms
In the histogram below, you can see a significant amount of shadows that are clipped. This would be referred to as “exposing to the left.” We are going to run into issues as we try to bring out detail in the shadows, where details do not actually exist.

Below is an image that has been exposed to the left.

In the next histogram below, there is a significant amount of highlights that are blown, meaning that we have exposed too far to the right. We are going to run into issues when we try to recover the details in the highlights because we have lost too much contrast and the shadows will not look like shadows as the details have been lost and blown out.

In the image below, we have exposed too far to the right.

The last histogram below shows the correct exposure based on the “exposing to the right” technique. As you can see, the histogram is pushed to the right, showing that the image is overexposed a bit, but not to the point that the highlights have been blown. We can see that the entire tonal range in the histogram is captured within a single shot.

Below is an example of an image that is correctly exposed to the right. With shots like these, we can process them as a single-shot bracketed HDR or as a single shot faux HDR.

If we go into the Develop Module (hit “D”), we can turn on our Highlight Alert (hit “J”) to see that we have not really blown out or clipped too much detail in this shot.

Taking a good HDR often requires numerous shots to be blended after the fact, but the challenges that presents aren’t few. Generally, things move in an image that require detailed analysis afterwards, and even if they didn’t, cameras do if even minutely, so you often require a very steady footing/tripod. But, you needn’t always fuss with taking numerous exposures to blend later on if you shoot correctly and know how to manage it in Photoshop.

Bonus | Single RAW File HDR Video
To get another perspective on this topic, here’s a video from photographer and educator Jimmy McIntyre. What he demonstrates is how to digitally blend a single RAW file that results in a natural, balanced, and effective HDR image. This method isn’t going to be as effective in some aspects as using multiple exposures, but depending on your situation, and also how well your camera handles RAW files regarding how many stops DR it’ll get, you could be in good shape. Jimmy, in typical Jimmy fashion, walks you through the steps on how to do this, in just a few short minutes using what he calls the Rapid Blend-If Technique.
What you’re essentially doing is opening a single RAW file in ACR, making the adjustments of exposure and highlights to the lighter portion (the sky in this instance), and then making that image a smart object. You will be rasterizing your layers once you’ve adjusted both, and then blending them, and you’ll see just how simple and effective this can be.


Again, I stress that this method certainly depends on your camera sensor’s ability to handle dynamic range, and will not be as powerful as creating an HDR with multiple exposures, but it can do the job. If you really want to create effective HDR images from within Lightroom easily, our Lightroom Presets has the ability to do it with a single click.
Jimmy does some really fantastic tutorials, always keeping them as succinct as possible, and always pretty bulletproof. You can find more about and from Jimmy here on his site, and YouTube channel, and see other articles we’ve done featuring his work below:
Conclusion
Remember that when you are shooting a single-shot HDR, you need to expose the image to the right. Push the highlights in your frame all the way to the right side of the histogram, retaining as many highlights as possible while not clipping any of your shadows. Typically, the histogram of a single-shot HDR that has been correctly exposed to the right should look like a U-shaped, where you have a spike right in the highlights, then a dip in the midtones, and finally another spike right in the shadows. This will usually be what the histogram looks like but remember that it can vary depending on the scene.


