
Damaged lenses are a no win situation. It’s expensive to replace them, and it’s expensive to repair them. Nothing fills a photographer with dread like the prospect of getting a repair quote for their exotic glass. Fortunately, you can minimize the risk of breaking a lens by taking several simple precautions.
The strategies for protecting your lenses can be generalized into three categories:
- Protective Accessories
- Electronics Support
- Proper Storage
By following these ten methods of keeping your lenses safe, you can drastically reduce the risk of receiving an unpleasant surprise from the repair shop.
Accessories
1. Use the Lens Cap: This one’s somewhat controversial. Lots of people never use lens caps, so that there’s no way they’ll miss a shot as they fumble to take off the cap. The added risk of their lens being damaged is balanced out by the value of the photos they might capture. This makes sense for event photographers who need to be ready for anything, but all too often, other photographers mimic this style and end up with scratched lenses for no reason.
You don’t have to put the cap on after every shot, but when the camera goes back in the bag, you don’t want the front element rubbing against all the grit and miscellaneous objects that have accumulated in there. If you have bad luck, and you’ve lost your lens cap, spend the $5 and get a new one!

2. Use the Lens Hood: We can all agree on this one – using a hood on the lens is always* beneficial. Not only does it block stray light rays from sucking the contrast out of your photos, but a hood also protects the front element of your lens from any balls, frisbees, arms, or other objects that might otherwise try to ruin your day and your lens.
*Unless you’re shooting macros and the hood would block your light.
3. Use a Clear/UV Filter: A good filter can be a lifesaver in bad conditions. The beach is a prime candidate for filter use – all that sand, water, and salt can take a toll on a lens. It’s worth spending a bit of money on a good filter to avoid having your lens’s coatings eaten by salt or scratched up by a sandy breeze. Some lenses even require a filter to complete their weather sealing.
4. Don’t Use a Filter: On the other hand, filters aren’t always helpful. In fact, sometimes they can do more harm than good. Since they’re made of thinner glass than the actual lens, they tend to shatter more easily. Hence, it can be safer to leave the filter at home, rather than take the risk of it shattering into sharp fragments all over your lens. For example, a lens could probably survive a bump with someone’s elbow, but a filter might not fare so well.

Sigma may have a solution in their new ceramic composite filters, though, so keep an eye on those.
5. Use a Lens Coat: A lens coat will add an extra layer of protection to your lens, softening minor impacts and preventing scratches on the body. This is mostly cosmetic, and will help with resale value, but the added protection can help to avoid impact damage and reduce general wear and tear. Note that if you want to preserve resale value but don’t want to pay for a lens coat, you can put a piece of tape over the distance scale window (if your lens has one) to prevent scratches there.
Electronics
6. Turn Off Stabilization: The more complex a lens is, the more likely something will break. You can minimize this risk by putting as little stress on the VR/IS system as possible. The obvious way to do so is by only using it when you need it – if you’re shooting at a high shutter speed, turn off the stabilization. Additionally, make sure that you turn off the camera before removing the lens – removing a lens while the camera is on interrupts the communication between them, which can mess with the electronics.
Finally, you may also want to turn the stabilization off before removing a lens. Apparently this locks the floating lens elements in place and prevents them from bouncing around in transit, which would potentially wear down internal components. This seems to primarily be for Canon lenses, but it may apply to others as well.
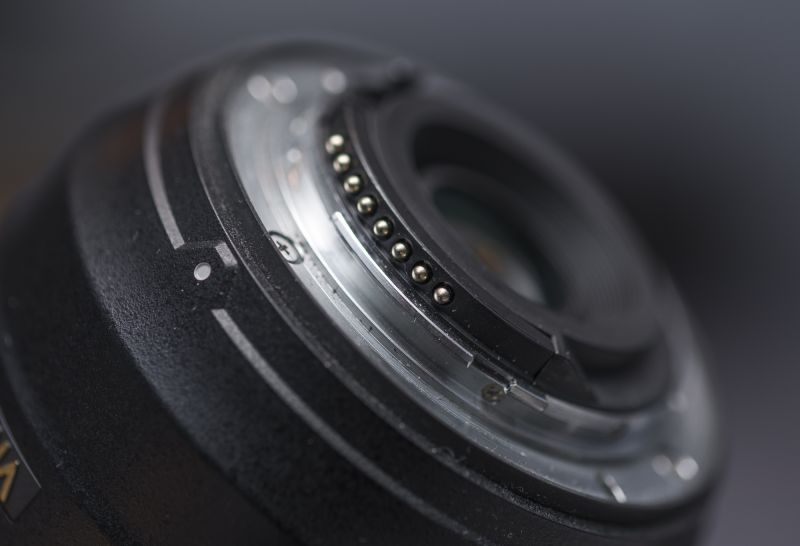
7. Clean the Contact Pins: The lens contact pins are how the camera and lens communicate and are often the weakest link in a system. It’s very easy for dust, dirt, and grime to find its way onto the pins, and this can very easily render the lens temporarily useless. Even a tiny amount of dust can create issues, so lenses are frequently deemed broken and sent for repair when in reality, they just need their contacts dusted. Gently clean the pins periodically to avoid having any unexpected failures, and to prevent any moisture or mould from causing more permanent damage.
Storage
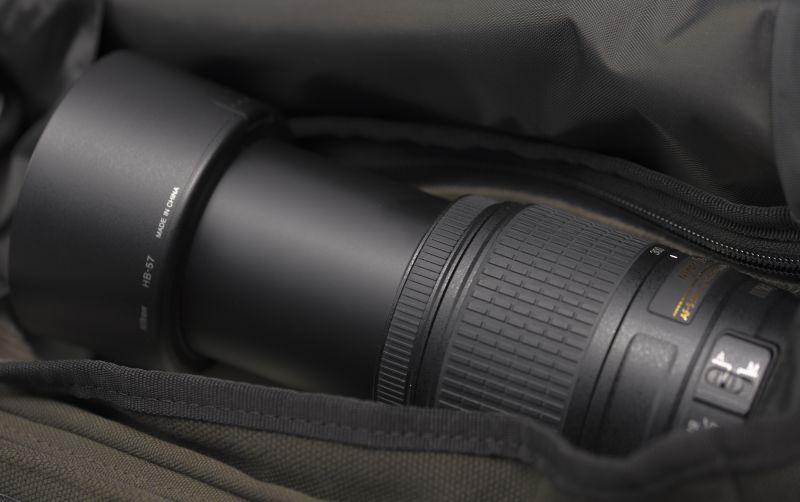
8. Keep Things Compact: When packing your lenses, try to keep everything as compact as possible to avoid having them shrink and shake around during transit. Change the zoom and focus settings so that it’s as compressed as possible, reverse the lens hood, and fit the lens into a snug, well-padded compartment. This goes double for flights, where you have little control over how your equipment is handled and need to keep it safe from jostling.
9. Keep the Climate Right: Lenses are like family. You love them dearly, but they’re never happy with how you’ve set the thermostat. While most lenses are pretty hardy and won’t be harmed by a few months or years in a slightly sub-optimal climate, if you want them to last a lifetime, you’ll have to be careful that you’re providing the right conditions. A cool, dry storage location will help to prevent mold from eating away at the glass, reduce any damage to electrical components from moisture, and keep the internal lubricants from becoming clumped up.
Lenses should also be stored away from sunlight, as over time, the sun will cause rubber grips to fall off, discolour the body, damage the lubricants, and possibly cause calibration issues from the repeated heat expansion.
10. Let the Lens Adjust: Whenever you take a lens from one temperature zone into another, give it time to slowly adjust to the new temperature in your camera bag, or in a sealed plastic bag. Or, ideally, both (plastic bag inside the camera bag). This helps to prevent condensation from forming on the lens, both inside and out. In the short term, condensation would cause blurring images, and in the long term, it can lead to damage from electrical failures and mold. Leaving a home or car at night or in the winter often results in this scenario, as does then going back inside. Be patient and wait those extra few minutes, and your lens will thank you for it.
[REWIND: How to Protect Your Gear from Theft]
If you’re doing all of this already, you’re well on track to enjoy your lenses for many more years. If not, consider taking up these practices to avoid being hit by costly repair fees down the road. Few things are worse than an unexpected failure, especially if you’re on the job.
(But before declaring a lens broken, try cleaning the contact pins first!)
Do you know anyone who could benefit from knowing a few more tricks to preserving their lenses? Be sure to share this article with them, and comment with any tips of your own!


Get Connected!