When it comes to couples portraits, creative lighting and editing can make all the difference between good and breathtaking photos. Putting this idea into practice is one of the things the best engagement and wedding photographers in the industry have in common. In this tutorial, we’ll walk through five powerful lighting techniques, each paired with easy-to-follow editing tips to elevate your couples’ portraits. Whether you’re on-location or in the studio, these methods will help you create dynamic, polished images that truly stand out — even when working under challenging conditions.
Video: 5 Pro Tips for Lighting and Editing Couples Photos
Gear Checklist
Here’s a list of the gear used in this tutorial:
Like always, if you don’t currently have access to the gear listed above, use what you have or find comparable alternatives.
1. The “Plate Shot” Lighting Technique
Simply put, the “Plate Shot” technique is a clever way to get powerful, soft lighting up close — without leaving evidence of your light in the final image. It involves placing your flash or modifier close to your subject (even including it in the frame) to maximize soft light and power, and then later removing it in Photoshop using a clean shot. This clean shot, which does not include the light source in the frame, is known as the plate shot. If that sounds confusing, don’t worry. Fortunately, this lighting technique is as easy to use as it is effective.
How to Shoot a Plate Shot
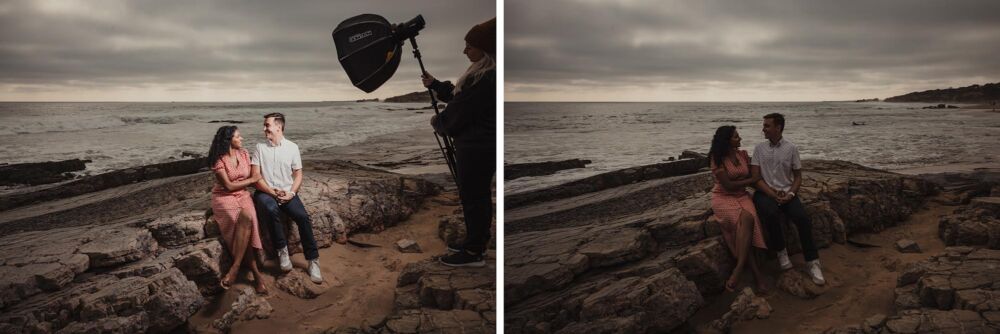
Here’s a quick step-by-step breakdown of how to create this style of couples portrait using a plate shot.
- Set your desired camera settings for ambient exposure (darken background if needed)
- Place your light close to your subject — it’s okay if it’s in the shot!
- Take the main photo with the light source
- Immediately after, take a clean plate photo (same composition, but without the light in the frame)
One of the main benefits of using this technique is it allows you to use a larger, softer light source. Normally, for a shot like this, we’d have to place the light source farther back and use a bare bulb to get the power we need to light up our subjects. That method works, but it limits us to creating more dramatic images with sharper transitions between light and shadows.
Instead, using the plate shot technique, we can bring in a larger light source like the MagBox Pro 24 Octa while using less flash power to create a surprisingly dramatic, yet softly lit couples portrait. Lastly, having a plate shot simplifies the process of removing the light source.
How to Edit a Plate Shot

Now that we know how to create a plate shot, here’s how we can edit it.
- Process both images identically in Lightroom
- Select both images > Right click > Edit In > Open as Layers in Photoshop
- Use Auto-Align Layers (especially if handheld): Edit > Auto Align Layers > Auto
- Add a Mask to the top layer (the one with the light source in the frame) and mask out the light source by painting black over it
- Refine and feather your mask for a seamless blend
- Clean up dust or blemishes with the patch tool
- Optional: In simpler scenes, you can use Photoshop’s Generative Fill instead of a clean plate!
Final Image

It’s worth noting that you should use a tripod to get the best results, but handheld is absolutely doable, depending on the scene and whether or not you auto-align carefully in post.

Again, for scenes with simple backgrounds like those featured in the image above, you can usually get away with using AI Generative Fill. The lighting assistant is framed against a clear sky with a little bit of overlap in the clouds. Generative Fill should have no problem fixing this quickly and easily.
2. Lighting From the Backside Angle

If you’re tired of the typical off-camera, front-lit portraits, backside lighting is your new best friend. By simply placing your light slightly behind and to the side of your subjects, you can create highlights along their edges and add depth and dimension to the scene. It’s a simple setup that will boost the visual interest of your photos with minimal effort.
How to Pose and Light from the Backside Angle
The key to pulling off this shot is carefully positioning your subjects so the light hits from behind at an angle of about 120°–150° off camera axis. In addition to dialing in the right light angle, you’ll also want to ensure that the subject closest to the light source is not blocking the light in a way that will cast a shadow onto the other subject. To do this, slightly stagger the couple’s positions in relation to the light source. Lastly, Pose faces toward the light for beautiful highlights.
Pro Tip: Consider pairing this setup with a MagGrid (and optionally a MagSphere) to help control spill and focus the light tightly on your subjects.
How to Edit Backside Angle Portraits
You can edit your backside angle portraits to taste, although this type of shot pairs particularly well with dramatic edits. Either way, due to the complexity of some backgrounds, capturing a clean plate shot is often safer for removing the light stand later in post. See the tip above on creating a plate shot for a refresher on how to do this.
Final Images


3. Stacking Flash Over Natural Light
Want your subjects to pop without losing that beautiful natural light feel? Stacking flash over ambient light is the technique for you. The goal here is to match your flash direction to the existing natural light, reinforcing the sunlight rather than replacing it.
How to Set Up for Stacking Flash Over Natural Light

Here’s a quick overview of how to use this technique.
- Analyze the ambient light direction
- Place your flash units to mimic the same direction and quality (notice the bare bulbs used in the two flashes above, mimicking the light direction and quality of the sun)
- Boost flash power to create noticeable but natural-looking highlights using bare bulb or MagGrid, depending on preference
How to Edit “Stacking Flash Over Natural Light” Shots

After color grading the portrait to your liking, consider adding a subtle radial filter in Lightroom to darken the edges slightly and pull attention toward the center to further enhance the “pop” effect even more.
Final Image

By stacking the light, we maintain a natural light feel while adding subtle, yet powerful, subject separation from the background, thus creating more impactful portraits.
4. Silhouette & Background Lighting

Turning simple scenes into dramatic portraits is easy with background-focused lighting. All you’re going to need is a powerful enough flash to light the background behind your couple, creating silhouettes or stunning background glows. The brighter the ambient light, the more flash power you’ll need (we’ll share our recommendation in the steps below). This technique works especially well to draw the viewer’s attention to your subjects, and it’s a go-to when shooting in less-than-stellar environments.
How to Shoot a Silhouette & Background Lighting

To keep things simple, here’s a quick list of steps to follow to capture silhouette and background lighting portraits.
- Place a powerful strobe (250-500ws recommended) behind the couple, aimed at the background
- Have your subjects block the light source directly, minimizing light spill into the lens
- Darken the ambient exposure for a stronger silhouette, or expose a bit brighter for a soft glowing backdrop
It’s worth noting that simpler backgrounds (like trees, open walls, etc.) work best to catch the light cleanly and avoid messy flares.
Editing Notes for Silhouette & Background Lighting Shots
Depending on how you set your ambient exposure, you can edit for a silhouette, or to use the background light to create a dreamy effect. The only real difference will be whether you leave everything a bit brighter in post (for the dreamy effect) or pull down the exposure, deepen the shadows and blacks, and bump the contrast for the silhouette.
Final Image

And, as an added bonus, here’s another example (below) of this technique used for an epic environmental couples portrait.
![]()
[Related Reading: Five Dynamic Lighting Setups for Engagement Photography]
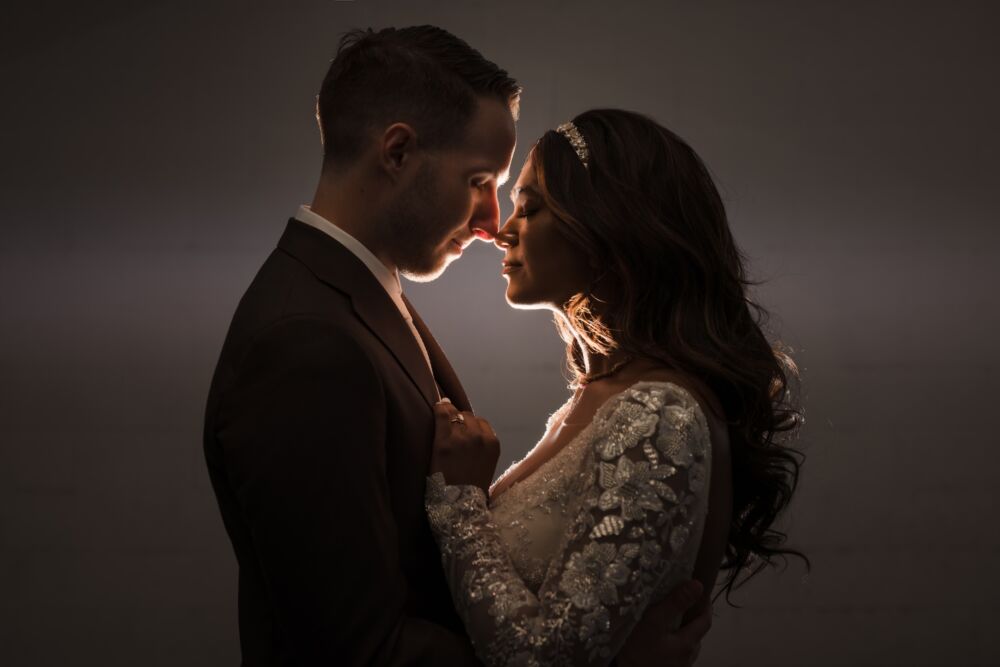
5. The Classic Backlight

We’ll close it out with the classic backlight technique. It never goes out of style, and it instantly adds magic, romance, and depth to any scene, even a parking garage, as illustrated in this example. This technique only requires that we position a light source directly behind our couple and shoot into it, creating a beautiful rim light effect.
How to Shoot It
While you should find these steps super easy to follow, the results will look dynamic.
- Find a clean, simple background (parking garages, fields, or tree lines work great)
- Place a flash behind the couple aimed at the camera–use a MagSphere to create a softer, dreamier light source
- Add a CTO gel to the flash if you want warm tones on the couple while cooling down ambient tones later in editing
- Be sure to pose couples close together with chins down to avoid unwanted “campfire” up-lighting
For this technique to really “shine,” it helps to use it in darker or dimly lit locations, including parking garages or other shaded areas. Otherwise, if you’re shooting midday or in a bright location, you’re going to need a lot of flash power (250-500ws).

Bonus: Adding a foreground element, as demonstrated above, can add depth and interest to your couples portraits, and it can also help conceal other unwanted elements.
Editing Tip
In post, if you used a CTO Gel for the shot, cool down the overall white balance to create contrast between the warm flash and a cooler environment for an extra punch.
Final Image
You’d never know this was captured in a simple parking garage!
Final Thoughts
Each of these five techniques — The Plate Shot, Backside Lighting, Stacking Over Natural Light, Silhouette Background Lighting, and Classic Backlighting — offers a simple but powerful way to level up your engagement and wedding photos. They’re designed to maximize visual interest and make your couples look and feel amazing. On top of that, they’re fast and flexible, and they yield incredible results with minimal gear. Give these techniques a try on your next couples portrait session!