
While it may be true that you don’t need the most expensive gear to produce good photography, each genre of has its specific tips, tricks, and tools. The various fields are very advanced and are filled with some amazing photographers who employ a variety of techniques and gear that may leave you puzzled as to how you should get started. If you follow the work of someone like Kayley McCabe or Andrew Scrivani, you’ve seen high-level work worth emulating. However, it’s unlikely that you’ll embark on your photography journey under their tutelage but, you shouldn’t slight small beginnings. Here’s a massive list of food photography equipment at any price level!

Food Photography Camera Bodies
There are some advantages you should consider before you rely on a lens that doesn’t have a true macro capability. First, they enable you to get in close for those wonderful detail shots while conventional lenses usually have minimum focusing distance that keeps considerably further back. Second, the ability to stay close to your subject gives you the ability to make the most of your shooting space, especially if it’s on the smaller side.
*Always be on the look out for good used or open box deals.
DSLR
Full Frame
- Canon 6D – $1,269.00
- Nikon D610 – $1,495.96
APS-C
- Canon t5i – $549.00
- Nikon 5600 – $596.95
Mirrorless
Full Frame
- Sony a7 – $898.00
APS-C
- Sony a6000 – $548.00
- Fuji X-10 – $599.00
- Canon EOS M5 – $979.00
Micro 4/3
- Olympus OMD-EM-10 – $649.00
- Olympus OMD-EM5 II – $999
- Panasonic G7 – $797.99
2 – Macro Lens
DSLR Lenses*
- Nikkor 60mm 2.8ED – $596.95, Nikkor 60mm 2.8D – $516.95
- Tamron 90mm 2.8 – $649.00
- Canon 100mm 2.8L – $799.00, Canon 100mm 2.8 $599.00
Mirrorless Lenses*
- Sony 90mm 2.8 OSS – $998.00, Sony 50mm 2.8 – $448.00, Sony 30mm 3.5 – $278.00
- Olympus 60mm 2.8 – $399.00, Olympus 30mm 3.5 Macro – $199.00
- Panasonic Leica 45mm 2.8 – $797.99 Panasonic 30mm2.8 – $397.99
- Fujifilm 60mm 2.8 – $649.00
- Canon 28mm 3.5 Macro – $299.00
3 – Tripod w/ Lateral Arm

Stability and precision are key in food photography just as with product photography. The need for a tripod only increases with your megapixel count; so if you’re shooting on a Nikon D810, Canon 5DSR, or Sony A7RII, the extra detail these sensors provide will make it more difficult to avoid blurry images.
- Vanguard Alta Pro – $169.99
- Manfrotto Lateral Arm – $98.99
4 – Reflector A 5-in-1 reflector is a common accessory for almost every genre of the photography and there is no exception here. It provides a means to reflect, subtract, and diffuse light to help you sculpt the image you want. They come in different sizes, shapes, and price points and you’ll be able to easily find the one to meet your needs.

5 – Bounce Card
If your reflector is a machete, a small bounce is a scalpel. You can make more subtle adjustments to the lighting on your food subject. It can flag light or create small openings that allow slivers of light to fall on just the portion of the subject you want to highlight.
- Bounce Card – $5.99
- Selens Bounce Reflector – $10.80
6 – Scrim Fabric

If you’re fortunate enough to have access to good sunlight in your shooting space, the ability to soften your window light with diffusion will be extremely useful. But if you have to rely on artificial lighting, this works just as well for that too. This can transform any light source into a soft light that wraps your food.
7 – Lighting

When looking for artificial lighting, you can find a wide range of options to choose from online. If you are just getting started, you can find inexpensive softbox kits on Amazon. They won’t be the top of the line lighting, but the light you pay for will certainly meet your needs.
- Neewer 24″ x 24″ Softbox – $25.99
- Neewer 700W Softbox Kit – $73.99
8 – Tethering Cable

You may be accustomed to trusting what you see on the back of your camera but, when you’re shooting food, you typically have more time to pay attention to the details and reshoot until you get what you want. Reviewing what you shoot on a larger screen will lead to better results.
Tether Tools Cable – $36.95
9 – Spray Bottle

Sometimes, capturing a crisp and fresh look requires a bit of moisture and the best way to apply it is a simple and refreshingly affordable spray bottle. You can find them at your grocery store, hardware store, or online and they won’t hurt your budget.
Soft ‘N Style Fine Mist Spray Bottle – $3.95
10 – Props

Everyday kitchen utensils such as wooden cutting boards, bowls, and napkins help create the setting that makes your shot more dynamic. A trip to the clearance section of your local Target or Ikea could hold the missing element of your next photographic masterpiece.
11. Backdrops
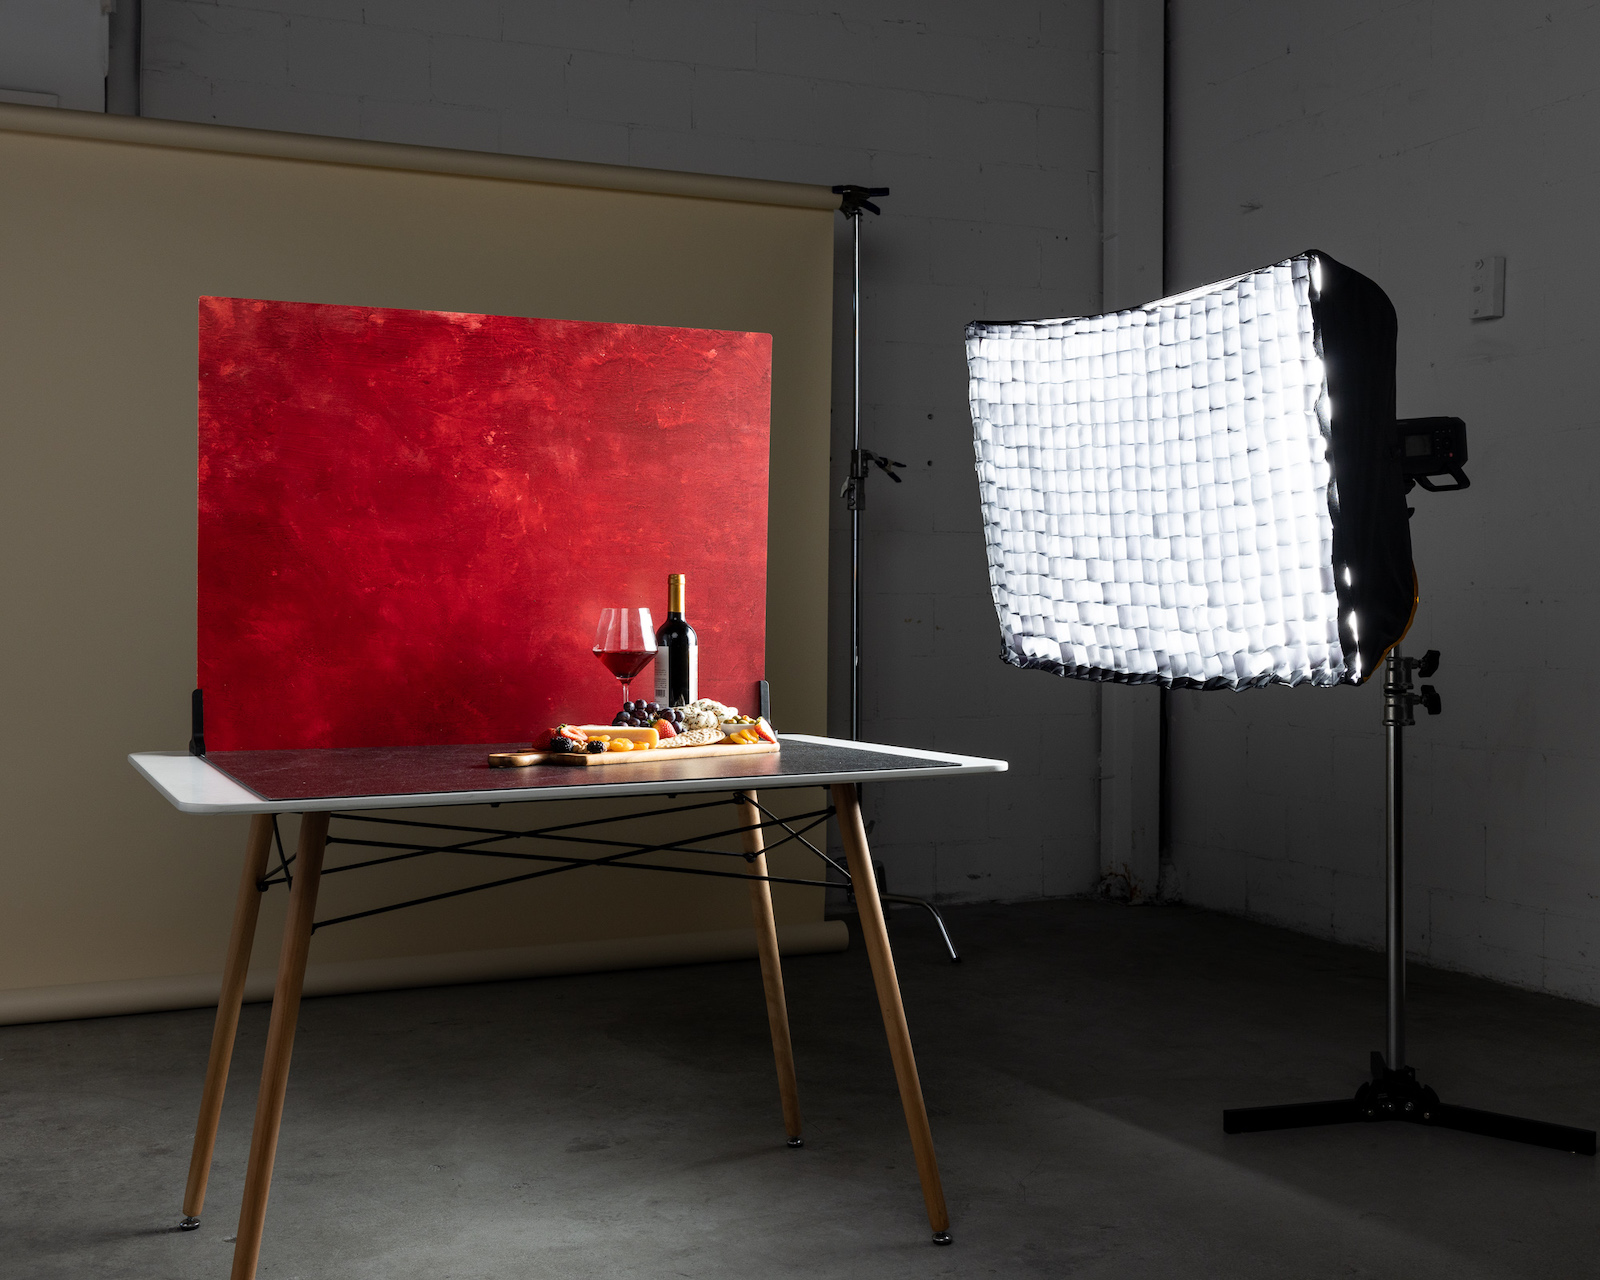
As is true with other photography genres, backdrops play an important role as a key compositional element in food photography. We use food photography backdrops to help establish a mood, give context to our subject (in this case, food), and add visual appeal to our photos. With portable options like V-Flat World’s Duo Boards, you can easily transport and setup a wide range of backdrops to suit your needs. These particular backdrops feature hyper realistic, ultra-high definition prints on each side of the board. Available textures include everything from subway tiles and wood flooring to concrete and marble, among others. For the money, they provide an affordable means of taking professional-quality studio backdrops on the road.
Bonus – Other Tools For Food Photography
Props and tools are an integral part of food photography and there are a few things that can make life easier. Whether you are just getting started or have been photographing food for many years, there is always going to be something else you need or would like to add to the your food photography toolbox. Some things may be used in the image, while others are never seen but are important to the final product.
Let’s talk tools today and we will come back to props in another article.
Extra-Long 12-inch Tweezers
These are not your grandma’s tweezers but instead are about 10 to 12 inches long. They are very narrow at the tip and allow you to handle small, delicate objects, setting them just where you want them on the plate. You can get straight or curved tweezers and the cost is so low, there is little reason not to have both.
Tacky Wax
Tacky Wax is nothing more than a small tub of sticky wax. You can use a very small amount to hold things in place. It works well to hold a fork or spoon on the edge of a plate, for instance. It comes in a small tub but you do not need much to do the job.
Wildroot Hair Lotion
No, really, I typed that right. Wildroot is a white lotion that is extremely thick. It is commonly used as a milk substitute on things like cereal. I prefer to use real food products when shooting food but corn flakes or foods with similar textures get soggy so fast that milk would be impractical on them. Wildroot can be put on after the food in in the bowl and it does not soak in, but looks like milk.
Brulee’ Torch
A small brulee’ torch can be handy for melting a bit of cheese or crisping up an edge of meat. You just never know when you might need a small heat source that can be concentrated to just where you want it.
Charcoal Starter
The charcoal starter is a great tool for adding symmetrical “grill marks” on meat. I know, but sometimes the way those grill marks look is more important to the client than the entire rest of the set. If you need them and they have to be perfect, his a great way to control the pattern, size, depth, and over all look of the final product.
Tether Cable

I know I touched on this in a previous article about tethering, but wanted to mention it here as well. While not a mandatory item, I mention this because, if you can tether while shooting food, you will find that it can improve your images. The rapid feedback you get is a huge help, and while many computers come with a cable to connect them to a USB port on your computer, they are typically very short cables.
White and Black Foam Core

Foam core or foam board is simply paper board with a center core made from light-weight foam. It is light, can be cut with scissors, and comes in many colors. White foam core makes a great reflector, and if you cut it into small pieces, you can place them close to your work to fill shadows in specific spots. Larger pieces can be used to fill large areas.
Black foam core is just like the white stuff, but is black in color. These sheets of foam core have all of the same properties of the foam sheets, but can be used as a gobo or flag to add shadows, remove flare from a lens, or add some depth when shooting glassware.
White foam core sheets are available for about $1.50 at most Wal-Mart stores and the black runs about $2.50.
Clamps

Spring clamps are simple devices, but so handy to have. You cannot have enough of these kicking around the studio in my opinion. There are metal and plastic clamps on the market and in many price ranges. I prefer the plastic because they are flat black and do not add any light reflection to the image.
I recently found a large bag of different sizes of clamps at a local department store for about $4.00, and you can get them at any of the home improvement stores for about the same price or cheaper. Try to get as many different sizes as you can, because even the very little ones come in handy from time to time.
Metal L brackets

This one is not a requirement by any means, but very handy to have. Metal “L” brackets in several sizes can be used with the clamps to help support the foam core. It acts as a foot and on really big sheets, adding one to the front and one to the back really adds stability. Again, these can be found at any home center or department store in the hardware section.

These few things and good light source should get you started. As I said at the start of this article, there will always be more to add as you go.
Are there things you use that might help the rest of use work a little better or easier? Tell us about it so we can share it with all our readers.


