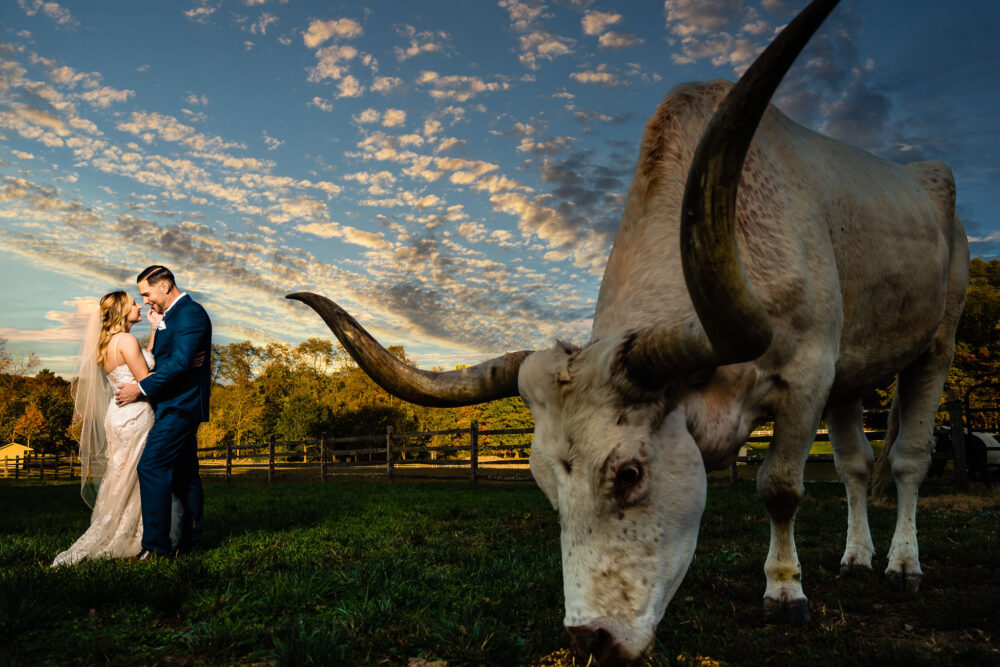
Modern cameras can capture a ton of dynamic range, preserving incredible details in the deep highlights and shadows. In this video, I’ll be walking through a 5 step guide to editing HDR environmental portraits while retaining natural skin tones.
Video: The Ultimate Guide to Editing HDR Portraits in Lightroom
Before we jump in, if you’re a member of SLR Lounge Premium, go ahead and load up the exercise file. You can also follow along using one of your own images.
Step #0: How to Shoot for HDR
Before we even start editing HDR portraits, it’s important to get the right settings in-camera to maximize the information in the image.
- Shoot RAW format.
- Use the histogram.
- Expose as dark as you can without losing shadow detail. This may take understanding your camera’s capabilities.

Let’s take a look at my exposure. The histogram shows that I have plenty of shadow information. The Highlight Clipping Alert also shows me where I peaked, but this amount is expected for this kind of scene.
Step #1: Maximize Tone & Dynamic Range

Our first step when editing HDR portraits in Lightroom is to bring out as much dynamic range as we can. Visual Flow offers presets designed specifically for quick and natural HDR effects, but this time around, we’re going to start from scratch. Start by pulling the highlights and whites down and the shadows and blacks up. Bring the contrast back using the tone curve. It’s important to note that we haven’t touched the actual contrast slider yet.
Step #2: HSL Adjustments

First, let’s tone down the parts of the image that are oversaturated, such as the oranges, and for me, the blues. You can also adjust the overall color temperature to add back the warmth to the image.
Step #3: Color Grading

Here, we can make further stylistic adjustments to our colors. I added in subtle yellows to the highlights and slightly bumped up the orange in the mid-tones. The key is to keep these adjustments subtle.
Step #4: The Contrast Slider

The reason I saved the contrast slider for step 4 is because it affects the overall image without precision control. By making all the other adjustments first, I get a good and clear picture of how I want my image to look. Then, the contrast slider can provide that last little touch to the overall tone.
Step #5: Local Adjustments

The final step for editing HDR portraits is to make local adjustments to recover more of the background. Select your Subject and invert the mask. Then, slightly pull down the exposure on the background.
Related Reading: Advanced Masking with Lightroom’s AI Features

You can also add a subtle vignette using a radial burn and again using a linear gradient that affects just the sky. This helps pull more attention to your subjects.

I also like to lift my subjects out with a touch of highlights.
Final Comparison

Finish up with some noise reduction in the shadows and any touch ups in Photoshop. Check out the difference between a quick and dirty edit vs our detailed and clean HDR edit.
Conclusion
We hope you enjoyed this article/video! While this was a complete manual method of editing HDR portraits, these settings are all loaded up in Visual Flow‘s presets. All of Visual Flow’s presets are intuitively designed to work with specific lighting conditions for natural tones and colors. Be sure to check those out to maximize your editing workflow and get beautiful results. For complete photography tutorials such as Mastering Lightroom, check out the SLR Lounge Premium Library.
Don’t miss our next episode of Mastering Your Craft on Adorama’s YouTube channel next week! If you want to catch up on all the episodes, make sure you check out our playlist!