Recently, I posted an article detailing an extensive list of online photo storage options to backup & store your photos. In that post I also very briefly talked about the “Three C’s” of backing up your photography and other important files. Today, I’d like to dive in a little deeper into some backup best practices to give you some peace of mind.
As a working photographer in today’s digital age, protecting your data is one of the most important things you can do for your business. Some may feel this strategy is a bit over the top, but if you have the time and space, there’s nothing better than knowing all of your files are safe.
Copy
First and foremost, you have to copy your files from your camera to your computer. There are dozens of ways to do this and i’m sure you’re all familiar with several different import methods. For the purpose of this post I’ll just detail my personal workflow.
[REWIND: Never Lose An Image With This File Backup And Cloud Storage Guide]
- First, I manually copy to my computer’s HD into a “Work In Progress” folder I keep on my desktop.
- From here, I’ll open Lightroom or Capture One and import these new files into the appropriate catalogue/session.
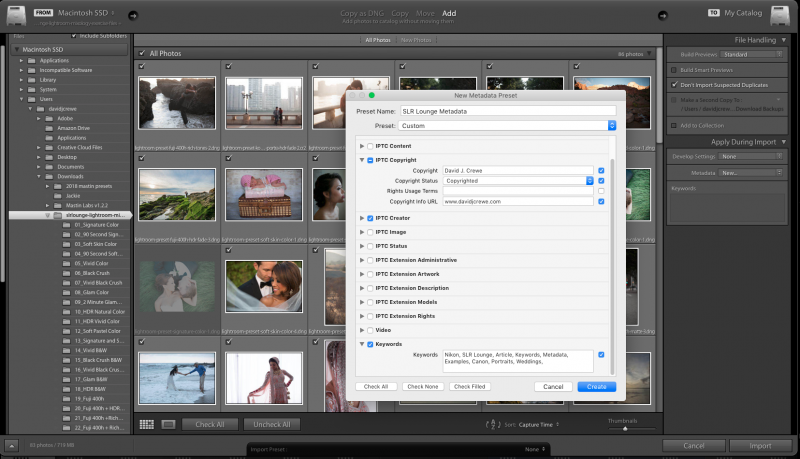
- Now here’s where things get fun. When I import, I always use the metadata features that are built into Lightroom. Lightroom Classic even has a fantastic feature that lets you create multiple presets to save you time.

On the right hand side of the import screen in Lightroom, you can create and apply develop & metadata presets along with some custom keywords. It’s possible to do this at any time from the Library view, but I’ve always felt it’s best to get everything in the system when your shoot is fresh.
The amount of detail available within the metadata presets can almost be overwhelming, so it’s up to you how much gets used. It can help you with copyright details and save a lot of time in post later as a lot of photo hosting sites will keyword your uploads automatically for you with this metadata addition. Since the gear I use is pretty consistent, I’ve made a generic preset that details all the keywords that will always be there, including the year, camera body, website, date, location, etc. Then, adding any specific & custom details can be done in the “Keywords” field during the import screen.
[Related Resource: Photography Insurance Guide and Advice]
By now you’re probably asking why do all this before you’ve even started working on the images? Well, assigning your copyright before you start will help protect you and your images should someone ever try to use them illegally. Also, assigning your keywords will help you find your images should you ever need to do a specific search through your library at a later date. You never know when you may have an opportunity to license a specific shot you took one day but you can’t remember when/where you shot it!
Once I’ve got my images imported into Lightroom, the next step is to copy the entire folder of images to an external HD and apply the same treatment of key-wording and metadata to your folder structure. Everyone has their own preferences; I like to break things up by Year, Month, and Day with a subject/shoot description. Within my shoot folder I’ll also separate my selections and edits from the RAW files that went unselected. Adding all this metadata, along with sorting your images in this manner will help you keep your images super easy to search and sort.

Once I’ve got my edits done and the files have been copied from the Work in Progress folder on my desktop to my external drive, I’ll update the folder location in my Lightroom catalogue to point to the external HD.
There are an insane amount of external drive solutions out there to choose from, ranging from standard travel HD’s to self-powered USB3/C, Thunderbolt, and RAID. What you use is entirely up to your personal preference and budgets, but if you can afford it, I’d also recommend jumping into a Raid setup.
The word “RAID” can be very intimidating, so for more information, PRO EDU’s studio manager Gary Martin has several educational videos about Backing Up Your Photography & Videos using RAID, which you can view here:
Additional videos in the series can be viewed here;
RAID 0 & RAID 5 Backup Workflow
What Does RAID Mean in Hard Drives – Part 1
What is RAID 0 & When to Use It – Part 2
What is a RAID 1 Hard Drive – Part 3
What is a RAID 5 Hard Drive – Part 4
How do Mobile Drives Compare to RAID Drives – Part 5
They may be a few years old, but the information and workflows still hold true today, so it’s worth checking out.
Clone
This brings us into the second “C,” which is Cloning. No matter how much you’ve paid for your hard drives or what brand they are…it is still just hardware that will someday fail. I’ve heard from many colleagues who’ve had disaster strike and lose nearly everything. So with their help, I’ve adopted this workflow; thankfully, I haven’t had any file losses, even with several hard drive failures.
Once a week, I make a complete physical clone of my “live” external drive, in case the one I’m working off of ever happens to fail, gets lost, or stolen! Call it a manual insurance plan.
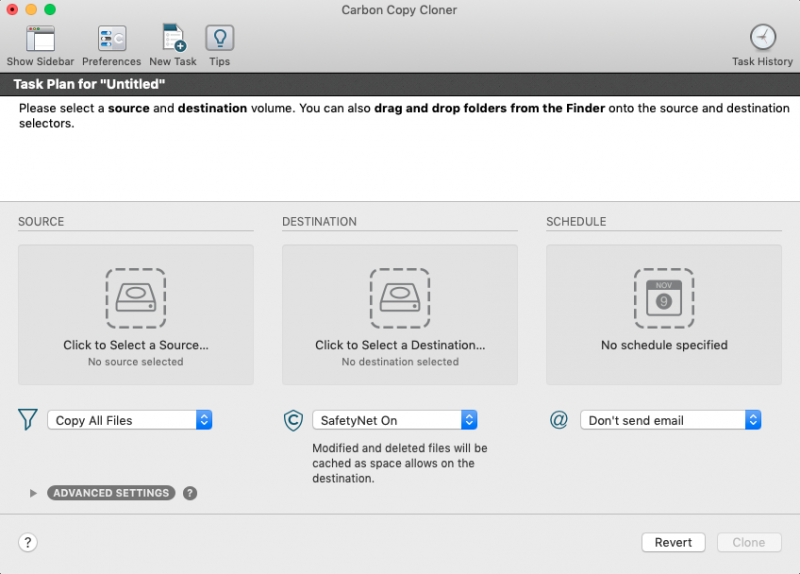
There are several tools you can use to do this but my personal favorite is an app called Carbon Copy Cloner, which lets you completely customize & automate your cloning and it checks for incremental changes on the fly. Typically, I’ll run these clone jobs on a Friday or Saturday while I’m out and about doing other things. Copying/cloning terabytes of data can take a pretty long time.
Once my working HD has been cloned, I’ll take the spare/backup drive and keep it in a fireproof & waterproof safe. A quick search on Amazon will return you a TON of options that fit your budget so I won’t go into extremes here, but when you have clients’ work at risk, I believe in a “better to have and not need, than need and not have” mentality. This leads me into the last of the three “C’s,” and that’s Cloud Storage!
Cloud Storage
There are a plethora of online options to choose from out there now, as we’ve mentioned in our Ultimate List of Photo Storage Options. Cloud Storage is the final and most important step of my backup process. Regardless of how careful I’ve been and how much maintenance I’ve done, there is still a chance disaster can strike and completely wipe out all my physical drives. To add another level to my security and photography insurance, I dedicate time every week or two to sync my entire photography libraries to an online cloud based storage solution. In that worst case scenario where you lose everything, all you need to do is download the backup from the cloud and you can start right where you’ve left off (after a lengthy download, of course).
[REWIND: How To Backup Your Photos | The 2018 Ultimate List Of Photo Storage Options]
Conclusion
All of these tools and services provide an incredibly affordable business write off, but more importantly, they provide you, your family, and your clients the peace of mind that comes from knowing that the images and memories are safe and always available!


Get Connected!