A corporate photoshoot may not always be the most exciting type of photoshoot, but it doesn’t mean that there’s no room for creativity. In this article, we’ll give you three separate tutorials for corporate photography tips to help you on your journey.
Tutorial 1 | Clean, Modern Corporate Photography
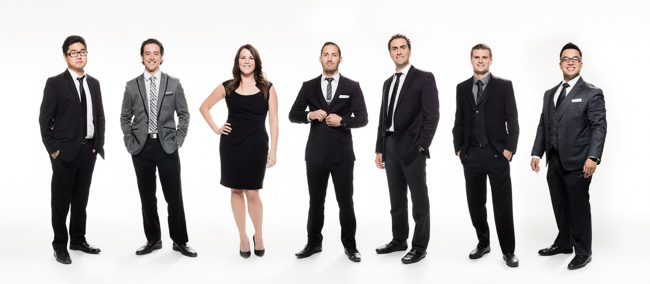
Recently, I was asked by my client to do a group photoshoot with a fresh and contemporary look that is shot on a white background. What we end up with is a strong set of clean, modern images that would not look out of place in a business magazine.
Shooting and lighting a group can be challenging because you have to not only deal with properly lighting everyone, but you have to make sure that you can get the best expressions and poses from everyone.
Luckily, because we were shooting on a white seamless background, instead of shooting everyone at once, I can shoot each person individually and composite them together in post.

Gear and Camera Settings
Camera: Olympus OM-D E-M1
Lens: Panasonic 12-35mm f/2.8
Shutter Speed: 1/125 seconds
Aperture: f/8.0
ISO: 200
Focal length: 31mm (62mm full-frame equivalent)
How We Lit and Shot It
As I mentioned before, shooting one-by-one allowed me to take 8-12 shots per person and have the client pick out the images with the best pose and expression. Additionally, I can maximize the amount of pixels used for that person, and have the flexibility to create individual portraits in case they need them in the future.
Here is the lighting diagram to how I lit this shoot.

The beauty dish with diffusion sock is the key light, and its power was set for f/8. Using a front sock diffuses the light and creates a look that is more like a small softbox or octabox. Because I’m already using a softened key light, I used a 74″ Paul Buff soft-silver parabolic light modifier (PLM) umbrella without a sock to add a bit more contrast than a diffused PLM umbrella. This was set around 1-stop below my key light.

For the hair light, I had an Einstein on a light boom with an 8.5″ reflector with grid at 1/2 stop over my key. The grid creates a spot light effect for the hair and the shoulder and helps to minimize lens flare.
Finally, the two softboxes flank either sides of the white seamless to blow out the background. You want to overexpose the white background by 2/3 to 1 stop over the key light, but not any higher. If you start lighting it any brighter than that, the white background starts to become a large light source and its light will start to wrap around the subject. This is good if that is the look that you’re going for, but if you are compositing, you will not have as clean of an outline around your subject.
And finally, be sure to feather both lights toward the center in order to get an even exposure coverage across the background. This is where a lightmeter comes in really handy because you can meter in different area of the background. Just be sure to twist down the lightmeter’s white dome when metering a flat surface such as this.


Before and After
Here is how the image look straight out of camera.

Because the images all look the same in frame, I can just take each person’s image and layer them together in Photoshop. Using layer masks, I can blend the white background area between each person.
The next step to retouch each subject using a combination of Portraiture plugin, Heal tool, and Clone tool to clean the skin.
Finally, I cleaned the white background by desaturating and lightening up the floor, and using the Level adjustment layer to clip the white background a bit more.
Additional Images
Here is the same lighting setup used to light the two managing partners.

And here is how it looks when I did a single-shot group image. Notice that even though I used a 9-foot seamless background, it was not enough to completely cover everyone from left to right. As a result, adding back the white background required more time and effort.


Bonus – Corporate Imagery Made Easy
Corporate imagery can be a tough nut to crack when you are first starting out. The imagery itself is usually very clean and simple, but what makes a successful corporate shot vs. an unsuccessful one?

Jay P. Morgan and the crew over at The Slanted Lens just put together this wonderful video outlining what goes into creating an effective corporate image. The best part is, they only used one light!
[RELATED: Using a Tilt-Shift Lens for Focus Control]
It was really interesting to hear Jay talk about the prep for this shot. Once they arrived and set up, capturing the shot was pretty simple. It is just a great reminder that sufficient prep needs to be done before a shoot in order to assure its success.
[Via The Slanted Lens]
Bonus 2 – Striking Corporate Head Shots In Cramped & Boring Spaces by Chad DiBlasio
“Yeah, we can do that!” I heard myself say it out loud. Then immediately thought, ” But HOW?” This is the predicament I found myself in with a corporate client a few years ago regarding professional ‘studio-style’ head-shots for staff.
I was working out of a 130 sqft office at the time with just about enough room for a spare chair before being crowded, so I knew that I needed to figure out another option and quickly. When it comes to making things work and doing more with less, it’s something most photographers have to be able to do. Most never had the ability to just go buy everything for every situation right away. The choice is either do without, complain, or figure it out, and the ability to adapt serves photographers well. You’ll always be facing adversity and problems in different situations from clothing choice, location, client demands, weather, etcetera.
So, with a client on the books for studio shots, I tried to adapt and I started making my plan for shooting in small spaces that would work for me, and this is by no means a rare occurrence; this kind of thing is often done on location in poorly lit office rooms or, quite literally, in storage rooms. It is where they have room, so we make it work.

Getting set up
When you’re shooting portraits on location, setup and travel both need to stay light. I usually take the following list of items:
My camera roller bag which contains:
2 Bodies – Canon 5d ii and Canon 5d iii
3 Lenses – Canon 50mm 1.2, Canon 100L 2.8, and a Sigma 24-70 2.8
4 Speedlights – Yongnuo 568ex ii
4 Wireless Triggers – Yongnuo 622c
1 Trigger Remote – Yongnuo 622c-tx
My light bag which contains the following:
3 Light Stands – 10ft air cushion light stands
1 Reflector – 43″ 5-in-1 reflector
1 Collapsible Background Kit – 5×6.5 twist pop-out photo backdrop
1 Large Softbox – Wescott Recessed Mega JS Apollo
I am able to roll my bag in and carry my light bag, reflector and backdrop all in a single trip while still being able to open doors by myself. This quick and easy setup also allows me to get myself in and out of the building quickly, as well as work within a decently small area. Here is a shot of a two light setup with the background and reflector.
During this shoot, I needed a black flag for the light that was off to the rear as a hair light. I didn’t have anything with me in my bag, so I grabbed the gaff tape and my reflector carrying bag to make a makeshift half snoot flag for this flash.

It wasn’t ideal or the ‘right’ piece of equipment, but it worked. This next photo was actually taken in the space/setup shown above with the black back modifier for the hair flash:

This photo was done in an empty storage area with the exact same setup but the second light was fired into the background for a brighter feel.

And the final result:

[rewind : ONE LIGHT shooting SETUP FOR UNDER $300]
In a small studio
My personal experience of trying to remain smaller and boutique has led to accepting and learning how to shoot successfully and predictably in small spaces. Now, when it’s your own and it’s a constant this situation does allow a lot more control as well as a permanent roller backdrop system, but it is still confined quarters, and push’s your creativity.


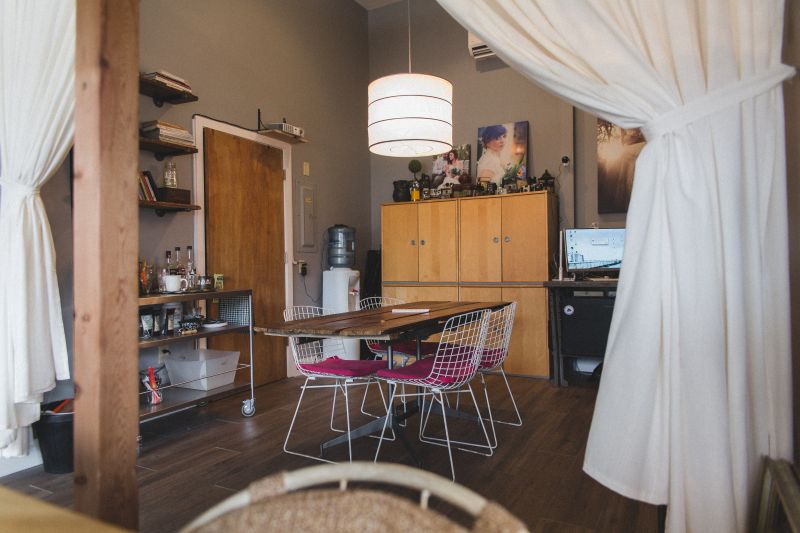
These next shots were all taken in a space that is less than 12×10′. We do have relatively tall ceilings now, but we only recently moved and used to shoot on in 9ft ceiling office where we also moved the conference table out and lights out of the way to shoot (we eventually moved all the lights in that smaller office because it was such a pain!).


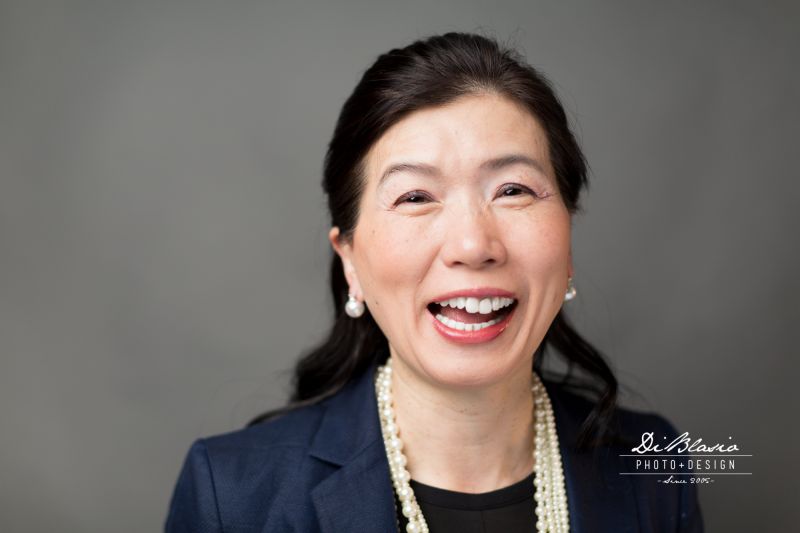
Professionals of all walks need great head shots; Shots that are technically well executed and highlight a bit of their individuality and personality. Learning to love working with what you’ve got and the challenge presented by limitations is laborious but worth it. It will make you better and allow you to capture images in locations you might think unimaginable.
[learn : advanced lighting techniques with lighting 201]
Don’t forget you can now “go Premium” with education materials and webinars from the SLR Lounge! It’s an excellent way to invest in yourself and your business by always seeking to learn from best and brightest in our industry!
And I’ll leave you with one of our most fun sessions with a photographer/artist from recently.


Get Connected!