Everybody knows how to click a photo these days, but, do you really know photography? Whether you know just a little bit, or nothing at all, here is your complete introduction to photography! This guide will provide you with an overview of all the basics, from the technical to the creative side of capturing stunning photos.
Photography Basics Guide | Table Of Contents
- Exposure & Metering
- Autofocus & Manual Focus
- Lenses, Angles, & Depth of Field
- White Balance
- Creativity In Photography
Before we get to the best part, (the creativity!) let’s break the technical basics of photography down into these simple categories- Exposure & Metering, Focusing, and Lenses, Angles, & Depth of Field. Oh, and the oddball of the bunch, White Balance!
After we’ve covered these technical things, we’ll talk about how they all play a role in the creative process too, and how you can harness it all for your own personal artistic vision!
Photography Basics | Exposure & Metering

Portrait under the Milky Way | Shutter speed: 10 sec | Aperture: f/1.4 | ISO: 3200
Are you scared of trying something new in photography because you
don’t know where to start? Always start with the right exposure!
First, if you haven’t heard of the exposure triangle yet, you should definitely introduce yourself to it. Basically, there are three camera settings which affect the final brightness of your images: aperture, shutter speed, and ISO.
Each of these camera settings also affects other things besides brightness, too. Your shutter speed can be used to freeze action, or create blur with a fast or slow shutter speed, respectively. Your lens’ aperture can be used to either blur a background, (shallow depth- apertures such as f/1.4 or f/2.8) …or get everything in focus (“deep” depth- apertures such as f/11 or f/16).

ISO is a bit of a complicated subject, due to the way it actually works with digital cameras compared to film, and you can read all about it in our dedicated article here. For now, all you need to know is that when you raise your ISO, it makes the final result appear brighter.
However, it also reduces image quality in a couple of ways, mostly adding noise to the image, especially in the shadow areas. (In other words, the lower the ISO, the less noise your images will have, especially in the shadows.)
Setting Your Camera Exposure

Shutter Speed: 1/640 sec | Aperture: f/5.6 | ISO: 100
In every introduction to photography, you’ll find complicated information about exposure settings. For this article, let’s keep it incredibly simple: Each of the three exposure settings can make your final image brighter or darker. You measure this brightness level by counting “stops” of light, or EVs (EV stands for Exposure Value).

One stop of light, or one EV, is either twice the amount of light, (1 stop brighter) or half the amount of light. (1 stop darker)
This can sound complicated if you’re trying to understand how much light 2 or 3 EVs is, but here’s the good news: In the real world, doing that much math isn’t required. Just count each stop, and make your image brighter or darker until it looks good!
You can brighten or darken your images in whole (1) EV increments, or 1/2 or 1/3 EV increments, using any of the three exposure settings.
Okay, for those of you who love a, “info dump” and want all the tech stuff in one single place, here you go!

For those who are interested, here’s the in-depth, advanced exposure triangle!
Here’s a hint, for those of you who got a headache just glancing at that diagram: All you need to know is that there is more than one way to arrive at a specific brightness in your final exposure. Because remember, you can always brighten one setting while you darken another setting. You would do this for creative reasons, based on a specific aperture and/or shutter speed you want.
Again, if you’re just learning photography, don’t over-complicate it: just make your exposure brighter or darker, and remember to watch out for the secondary effects your settings have on the creative side of things. You’ll get the hang of it very quickly!
Exposure Modes: Manual, Program, Aperture & Shutter Priority
How you choose to set your exposure can have a huge effect on how quickly you master the thought process. Manual Mode is often the best way to learn how to set exposure because it forces you to change all three of the exposure settings instead of the camera controlling some or all of the settings for you.

Besides Auto “green box mode” (or the user-friendly “running stick figure” modes that beginner cameras might have), there are usually four main exposure control modes for you to choose from: Manual, (M) Program, (P) Aperture Priority, (A or Av) and Shutter Priority. (S or Tv)
In Manual mode, you control all three exposure settings, of course. In Program, the camera chooses both your aperture and shutter speed but lets you control your ISO. In Aperture and Shutter Priority modes, you control the respective setting, but the camera adjusts the other setting to give you a correctly metered exposure.
By the way, in all four of these modes, you can either control your ISO manually or you can set it to auto, (yes, even in Manual exposure!) and once again the camera will decide what your exposure should be based off its metering.
What Is Camera Exposure Metering?

No matter what exposure mode you choose, your camera will guide you to what it thinks is a correct exposure using its built-in light meter. In any automatic exposure modes, this means that the camera will always choose settings that satisfy its metering. Or, in Manual exposure, the camera will simply display its meter reading on a scale, and you can decide how “correct” you want your exposure to be.
Keep in mind, of course, that “correct” is relative when it comes to exposure; you may decide to set your exposure differently based on your creative vision. But, we’re getting ahead of ourselves!

There are a few different ways that a camera can meter a scene, and these different metering modes may result in a significantly different exposure:
If the camera is metering the entire image and trying to balance it all out, then this is called “Matrix” or “Evaluative” metering mode. This is useful if you’re a complete beginner, but many pros also just leave their camera in this mode too!
If the camera is attempting to place emphasis on the central area in the image, and pay less attention to the edges, this is either “Partial” or “Center–Weighted” metering. With many subjects like portraiture where the edges of the image simply aren’t very important, this metering mode can actually be more reliable than Matrix/Evaluative!
If the camera is metering off a single, small point in the image, and completely ignoring the rest of the image, this is known as “Spot” metering. This metering mode is a lot of fun to use, because it gives you an exact meter reading for whatever you point your camera at, and ignores the rest, but it can take a lot of practice to master.
As before, this can seem complex, but it won’t be with just a little bit of experimentation. Many photographers just leave their camera in Matrix or Evaluative metering all the time, though, because with digital cameras (especially with an electronic viewfinder) you simply dial your exposure until it looks right!
For learning purposes, try them all and see what works for you in different lighting conditions.
What Is A Histogram?

The last, most essential step in the whole process of choosing your exposure is the histogram. Yet again, it’s something that looks fancy and complicated, but is so simple once you realize what it means: It’s a graph of the tones in your image. The left edge of the graph is pure black, and the right edge is pure white. A “bump” on the histogram means that a large part of your image contains that tone.
In the image above, you can see the blue sky, the green bushes, and the dark reddish rocks represented quite clearly on the graph!
A “bump” at either end of your histogram is usually a bad thing; it means that some of the image is either completely black or completely white. So, unless that is a creative look you are trying for, the goal is to set your exposure so that the whole graph lies within the histogram edges.
Want to learn more? Here is our complete guide to mastering the creative use if your histogram!
Photography Basics | Autofocus & Manual Focus

Compared to all the numbers, math, and graphs of setting your exposure, focusing might seem like a basic subject. However, it deserves its own separate discussion simply because the more advanced you get in photography, the more complicated all the focusing settings get on your camera!
Of course if you’re starting off with a cell phone or an entry-level digital camera, focusing might be quite basic indeed: point and tap on your subject, and take the picture!
However, many advanced cameras have lots of different focusing modes, so we’ll explain the two main categories of autofocus settings here:
Autofocus: Continuous versus Single Focus

Advanced amateur cameras and professional cameras all have at least two different autofocus options, single-focus and continuous. They’re self-explanatory, really:
Single Autofocus (One-Shot, Single) will autofocus on your subject once, and wait for you to click the picture, even if that subject moves. To re-focus, you have to lift your finger off the shutter release completely, and then half-press it again. (Or tap on the subject again, if using a touchscreen.)
Continuous Autofocus (Continuous, AI-Servo) will attempt to track your subject while it moves, in any direction. Some continuous focus modes will even move the focus point around the viewfinder and use AI to track the subject. This, however, falls under focus point selection, which we’ll get to in a minute)
The question is, which focus mode should you use, Single or Continuous? The answer might seem obvious- use single focus for subjects that aren’t moving, and use continuous focus for subjects that do move. However, there’s something else to keep in mind- even a subject that is trying to hold relatively still may actually be moving a little bit, and in many cases with the latest high-end cameras and lenses, continuous focus may be better to keep any subject in sharp focus if you are shooting hand-held and your subject is moving even a little bit.
The best thing you can do is, test your camera and lens for the shooting scenarios you find yourself in most often, because each camera’s autofocus system is different. Use whichever mode gives you the most consistent results!
You may also be interested in the very popular technique known as back-button autofocus, or AF-ON, which doesn’t use the shutter button for autofocus at all, but instead a rear (use your right thumb) button!
Focus Point Selection

The most complicated, technical aspect of cameras these days is definitely your autofocus points themselves, and how they’re controlled. Don’t panic, though; we’re going to attempt to break it down and make it simple, just like everything else!
There are two main ways to set your focus point: Either let the camera do it for you, using technology like face/eye detection, or control the focus point manually so that the camera only focuses on whatever subject you place the AF point over in your frame.
Your camera will probably have many different options for focus point control, and it can seem very complicated at first. It’s totally OK to just stick with one or two preferred methods of AF point control, and ignore the rest! Some cameras even allow you to completely hide whichever AF point selection options you aren’t going to use.
What do we recommend? Start by simply controlling one, small or medium-sized focus point, and get in the habit of using it to make sure your main subject is the sharpest thing in the scene.
Don’t worry about all the fancy “dynamic” or “zone” focus point settings just yet.
Photography Basics | Lenses, Angles, & Depth of Field

The camera body and exposure itself is only a small part of the technical side of photography, of course. In fact, it’s really the camera lens that makes it all possible! The lens is where your aperture is, and lenses are how you control what framing your shot has.
Everybody probably already understands the difference between wide-angle and telephoto. So let’s start with that basic knowledge, and consider the two main aspects of what a lens controls in your images: the angle of view, and the focus/depth-of-field
What Is Lens Focal Length?

Every lens has a focal length, and every focal length corresponds to an angle of view, whether wide-angle or telephoto. Of course, there’s also “normal” lenses, and ultra-wide, super-telephoto, zoom and prime lenses, etc…
What does it all mean? The best way to understand it all is to just learn the numbers. It seems intimidating at first, but it’s actually quite easy to memorize at least the handful of favorite lens focal lengths that you like to use! For example, 24mm is wide-angle, 50mm is normal, and 85mm is telephoto.
Most photographers will find that they like to have at least two or three different focal length lenses, such as a wide-angle, normal, and telephoto lens. Or, of course, a zoom lens that covers all of the above!
A zoom lens is another easy-to-understand concept: It zooms “in” and “out”, changing its focal length and therefore your angle of view. Some zooms cover a vast range of focal lengths, from wide-angle to telephoto, while other lenses are specifically wide-angle zooms or telephoto zooms.
(For this reason, some photographers may hear the term “zoom” and think “telephoto” lens, but just remember that this isn’t always the case!)
A prime lens has a fixed focal length, such as 50mm or 35mm. Since you can’t zoom in or out with a prime lens, you have to change your framing by moving closer/further to/from your subject, …or by switching a different lens.
Why would you want to do this? Many prime lenses offer a faster aperture, which lets more light into the camera, and allows you to achieve more shallow depth. (We’ll get to that next!) Also, most primes are much sharper and better overall than a zoom that might also reach that same focal length.
What Is Depth Of Field?
One of the most exciting things to experiment with in photography whenever someone first picks up a camera is depth of field, or DOF. You control the DOF in your image with your aperture setting, focal length, and focus distance.
Want to blur a background? Use a “fast”, wide, bright aperture such as f/2.8, f/2.0, or f/1.4.
Want no blur, and everything in sharp focus? Use a “slow”, small, dark aperture such as f/8 or f/11.

You can also control your depth of field and the level of background blur in your image by paying attention to a few other factors.

First, the closer you get to your subject, the more you’ll blur a distant background, and the more far-away the background is, the more it will blur too.

Second, telephoto lenses are capable of creating more background blur, or bokeh, than wide-angle lenses. So, if you ever see an image with a completely blurry background and wonder how it is made, chances are it was made with a telephoto lens such as an 85mm prime or a 70-200mm zoom, with a wide aperture such as f/1.4 or f/2.8

You can still achieve background blur at any focal length, and at smaller apertures such as f/4 or f/5.6, but the blur will be less prominent. This can be good or bad, it just depends on your shooting style and subject matter.
Photography Basics | White Balance
Besides exposure, there is one other important camera setting to pay attention to while you’re shooting, and that is White Balance (WB).

“Warm” White Balance

“Cool” White Balance
Your camera can change how it captures the color of light by using the White Balance (WB) setting. Simply put, you’ll make your images “warmer” or “cooler” by trying out the various different WB settings. There are preset WB settings for daylight, shade, cloudy, or indoor lighting, and on many cameras, there is also a direct WB control scale, which is Kelvin.
Unlike exposure settings, your White Balance can actually be undone later during RAW processing! However, is still helpful to get it as close as possible to your creative vision when you’re out shooting in the field.
Creativity In Photography
Well, it may seem like we’ve spent quite a lot of time talking about the technical aspects of photography. Really, though, almost every technical aspect of photography also plays a huge role in the creative process! You’ll be surprised to find that you already possess all the tools for creative thinking.
As we learned, your aperture and shutter speed can help you determine the sharpness of a subject, and they can blur backgrounds or even blur your subject itself.
Your ISO can help you achieve that final level of exposure brightness, which will, in turn, allow you to set your aperture and shutter speed for those creative effects you want. As long as the noise/grain of a higher ISO is something you are okay with, of course.


Also, of course, one of the biggest parts of the creative process is choosing the right lens, the right focal length. A wide-angle lens will give you a sweeping view of a whole scene, while a telephoto lens will allow you to tightly frame a single subject.

Lens selection is also one of the most exciting, fun things for photography beginners to dive into, so let’s just get right to the final point: break the rules! You’ll probably hear experienced photographers saying that telephoto lenses should be used for portrait photography, or that a wide-angle lens should be used for landscape photography. Really, though, all that matters is, does the final image look good?

If you do “break the rules”, then yes, there’s going to be a risk that your normal or telephoto lens is not wide enough for some breathtaking scenery. Or, there’s a risk that your wide-angle lens might cause unflattering distortion to a face in a close-up portrait. However, the best thing you can do for yourself is to just get out and experiment. Make mistakes, critique the images while you’re shooting, and then click some more!
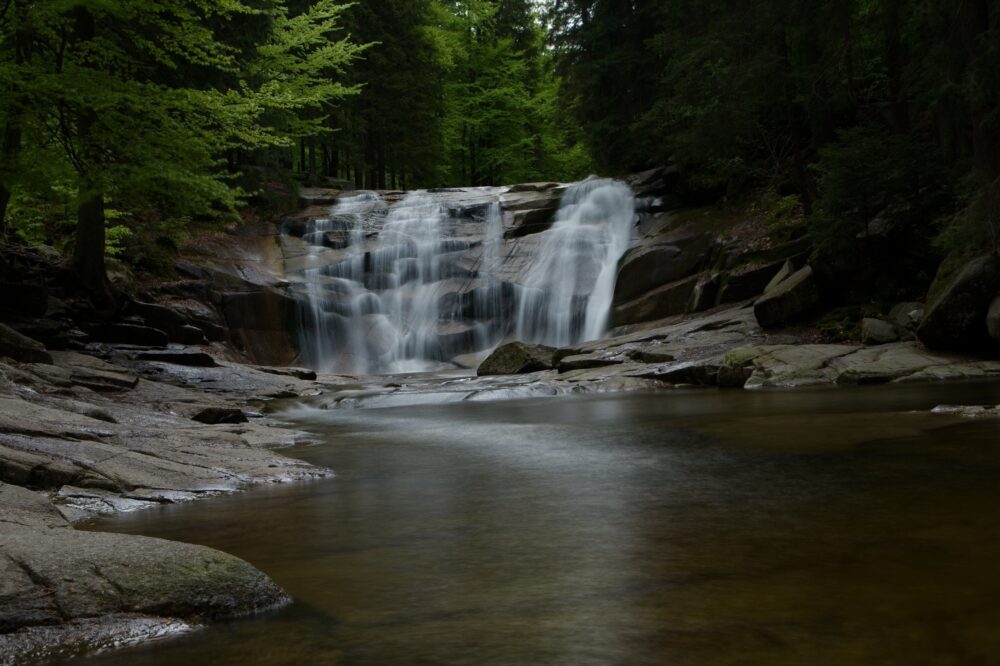
Inspiring Images For Photography Beginners
At this point, if you’ve read through everything in this article and found that it all makes sense, then the best thing you can do next is to just get inspired and go practice!
You’ll learn much more by doing it hands-on, and then by coming back and searching for specific solutions to the more complex obstacles you might face, instead of trying to master absolutely everything before you go take your first picture.


Introduction To Photography | Conclusion
Are you inspired yet? The only thing left to do is to go out and practice photography! Find a subject or a genre of photography that you are passionate about, and dive in. The most exciting part of photography is figuring out how to use the tools you have at your disposal (camera, lens, exposure settings, focus, etc) to create an image that is artistic and unique.
Have any questions about photography? Don’t be shy, leave a comment below!