
Have you recently ventured away from your city or suburban home and seen the night sky, even the Milky Way, with your unaided eyes? Whenever people experience this amazing sight for the first time, or even the tenth time, it is breathtaking. Capturing a photograph in such dark conditions, however, can feel like an incredible challenge due to the sheer lack of available light. How do you compose your frame? How do you focus? How do you get a good exposure? Mastering how to photograph the stars is one of the more intense learning curves in all of modern digital photography. Thankfully, you’re about to overcome one of the biggest hurdles: where to start with your exposure! In this article, we’ll discuss the ideal star photography settings for DSLR and mirrorless cameras.
 Note: The following information is from our workshop, Photographing the Milky Way. It also includes tons more information, from which lenses are the best for nightscape photography, to the post-production workflow of editing milky way photos. Purchase it by clicking the button below:
How To See The Milky Way
The Milky Way is just barely visible to the naked eye, in fact it’s so dim that you simply can’t see until your eyes have taken a few minutes to adjust to the complete lack of light.

If you can escape the light pollution of a big city or suburbia, that’s great! However, even if you’re still relatively close to a city or even a small town, you may still be able to see the Milky Way if you aren’t in the near vicinity of any bright lights, and you let your eyes adjust. This is called “getting your night vision”, (not to be confused with night-vision goggles) and it takes about 10 minutes. So turn off all your phones and flashlights, look up at the sky, and wait!

But, how do you capture this with your camera? It is so dark, you are going to have to push each of your camera settings to the absolute edge of the envelope.
Hack For Finding The Ideal Star Photography Settings
Okay, so you’re out in the middle of nowhere, and it’s pitch-dark. Or maybe you’re just barely outside the city and you can see plenty of stars but there is still quite a bit of light pollution around you. What do you set your star photography settings to for the right camera exposure?
Here is the one trick that will save you a few seconds (or minutes) every single night. Turn your camera’s ISO all the way up to its highest setting, whichever ISO is right before “Hi-1”, if your camera has such a setting. Why? Because even though this ISO may not provide acceptable image quality, it will at least allow you to check your histogram quickly.
In other words, why wait around for a 30-second or even 60+ second long exposure, only to find out your exposure is way too dark or way too bright? Instead, using ISO 12800 or 25600 allows you to check your histogram with just a 4-8 second exposure.
Then, once you’ve decided on a correct exposure using that “extreme” ISO, put your understanding of the Exposure Triangle to good use and re-calculate a correct exposure using a more reasonable ISO.
Correct Exposure For The Milky Way
Are there correct star photography settings for the Milky Way Core itself? Artistic subjectivity aside, the Milky Way itself is always the same brightness, just like sunlight from our very own star. However, even though the Milky Way itself has a fixed luminance, numerous other factors come into play which may cause you to severely over-expose your image, if you start by going to these settings. One aspect is known as “Blue Hour“, or the time of day just after sunset or right before sunrise, when the ambient light is still present. This can cause your exposure to differ by many stops, even though the Milky Way is still visible.

Camera: Canon 5D mk IV Lens: Sigma 50mm f/1.4 Art
Correct Milky Way Exposure: 10 sec @ f/1.4 & ISO 3200.
 Camera: Nikon D750 Lens: Tokina 17-35mm f/4
Correct Blue Hour Exposure: 30 sec @ f/5.6 & ISO 12800
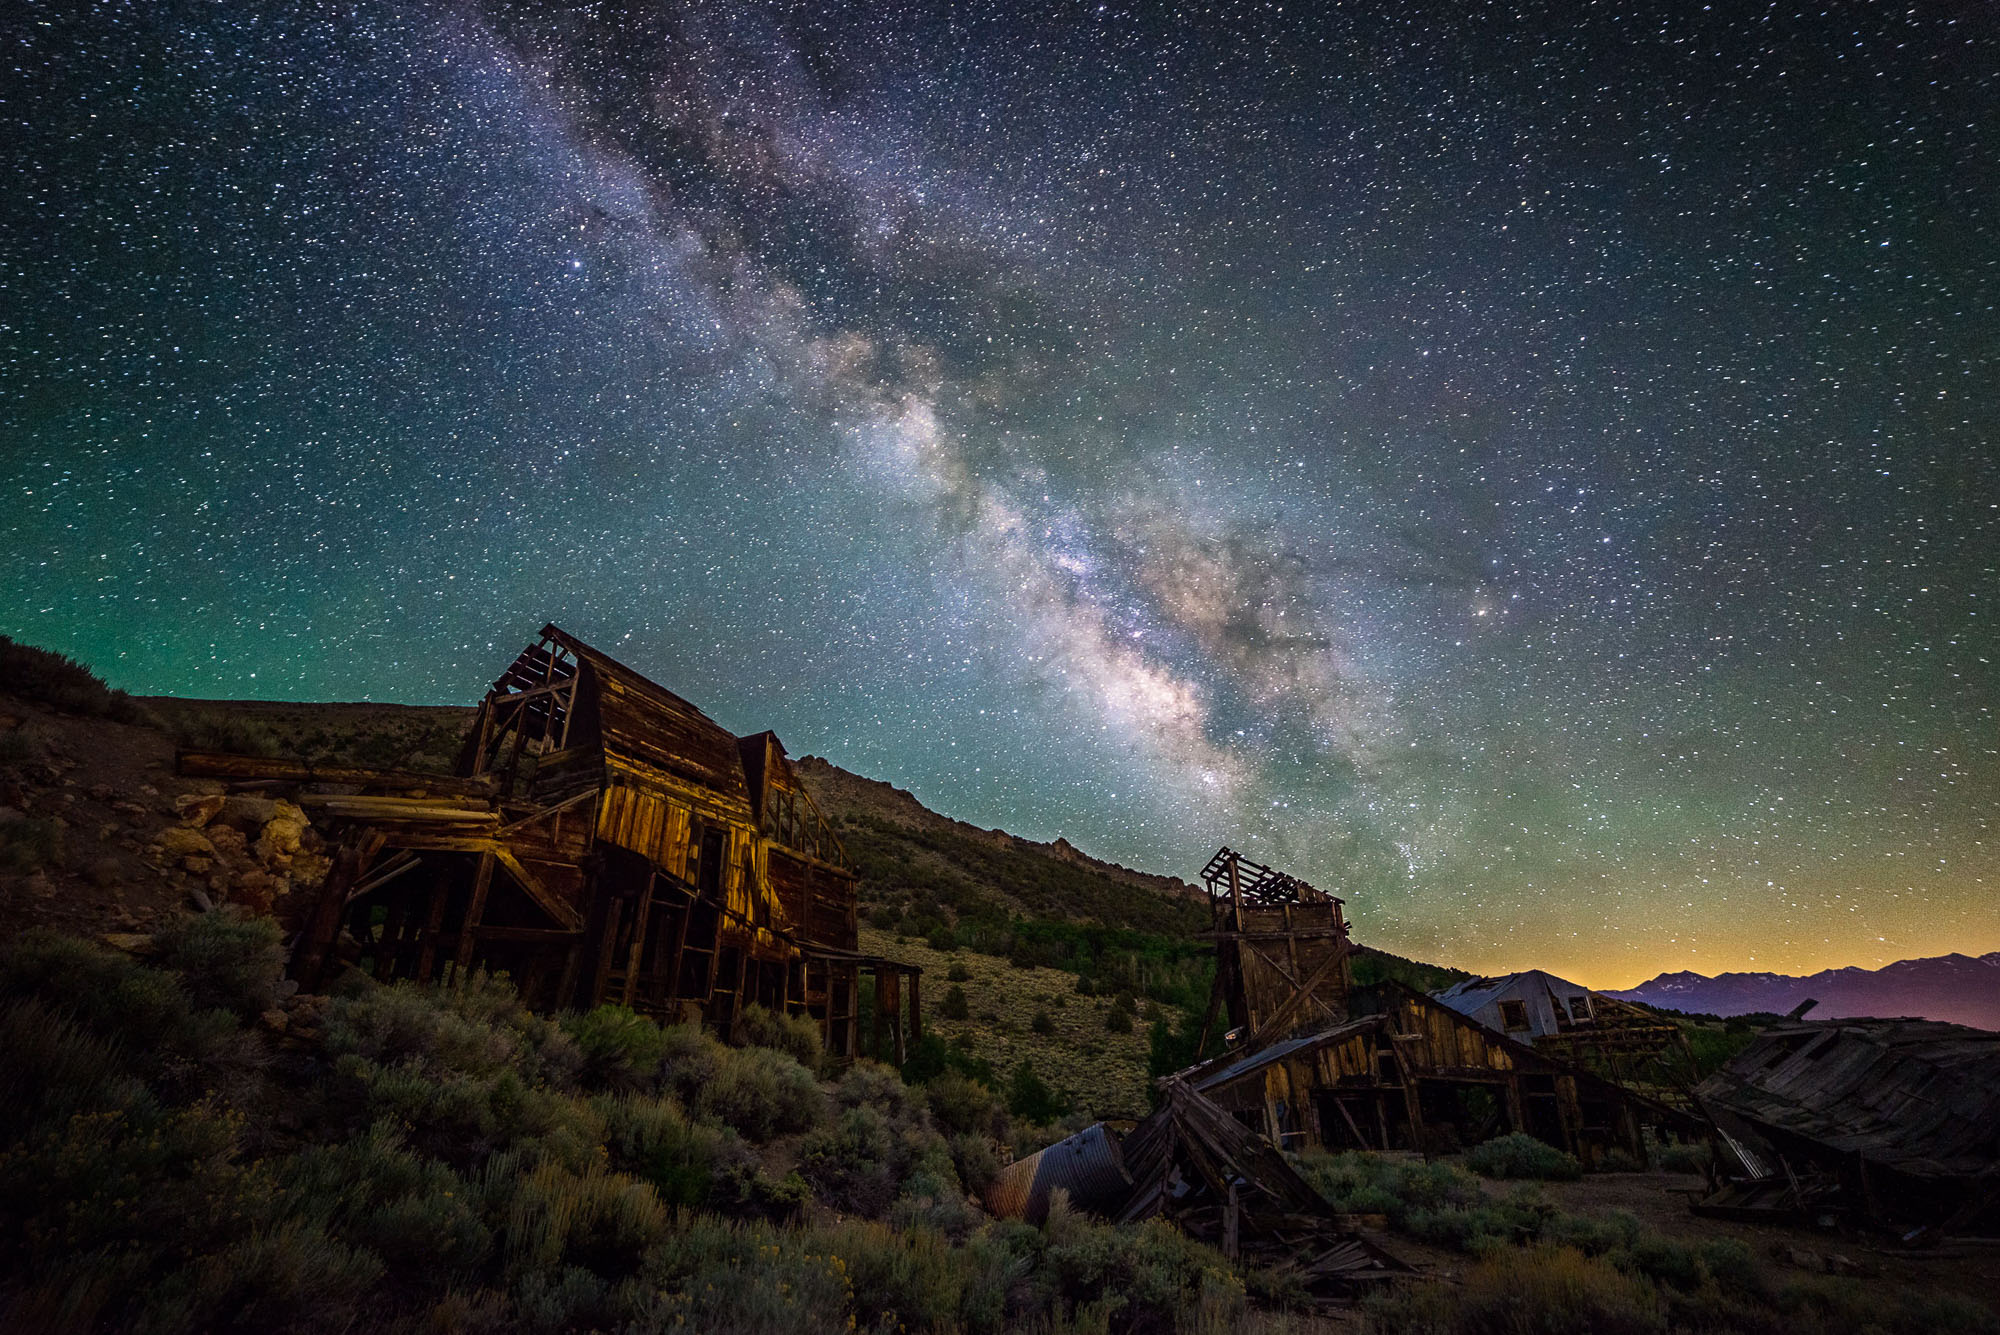
Another issue is light pollution. Even if you are far away from the nearest city, if you are framing your shot in that general direction then it can result in a bright over-exposed blob on the horizon. In these cases, it may be wise to under-expose by one or two stops, depending on how bright the light pollution is.
 Camera: Nikon D750 Lens: Nikon 14-24mm f/2.8
Correct Light Pollution Milky Way Exposure: 15 sec @ f/2.8 & ISO 3200
Starting Point for Star Photography Settings
No matter what your shooting conditions are, the important thing is to know where to start and how to quickly determine whether or not your nightscape photo will be exposed correctly. If you would like to quickly check your histogram, try ISO 25600, f/2.8, and 4 seconds, and then use the exposure triangle to determine a correct exposure at a more reasonable ISO. If you’re ready to go, and you want to try and make your first exposure, try ISO 3200, f/2.8, and 30 seconds. Then, adjust as needed for your exact conditions, using your knowledge of the exposure triangle.
The 500 Rule
 To capture ideal star photos, you’ll also need to understand the interaction between shutter speed, focal length and the movement of the the earth and stars. For this, you’ll need to have a basic understanding of the 500 rule. The 500 rule states that to obtain a clear image of stars without trails, take the number 500 and divide it by the focal length to get your exposure time. For example, a 20 mm lens would call for an exposure of about 25 seconds and theoretically, still obtain the stars without trails.
Portraits Under The Stars
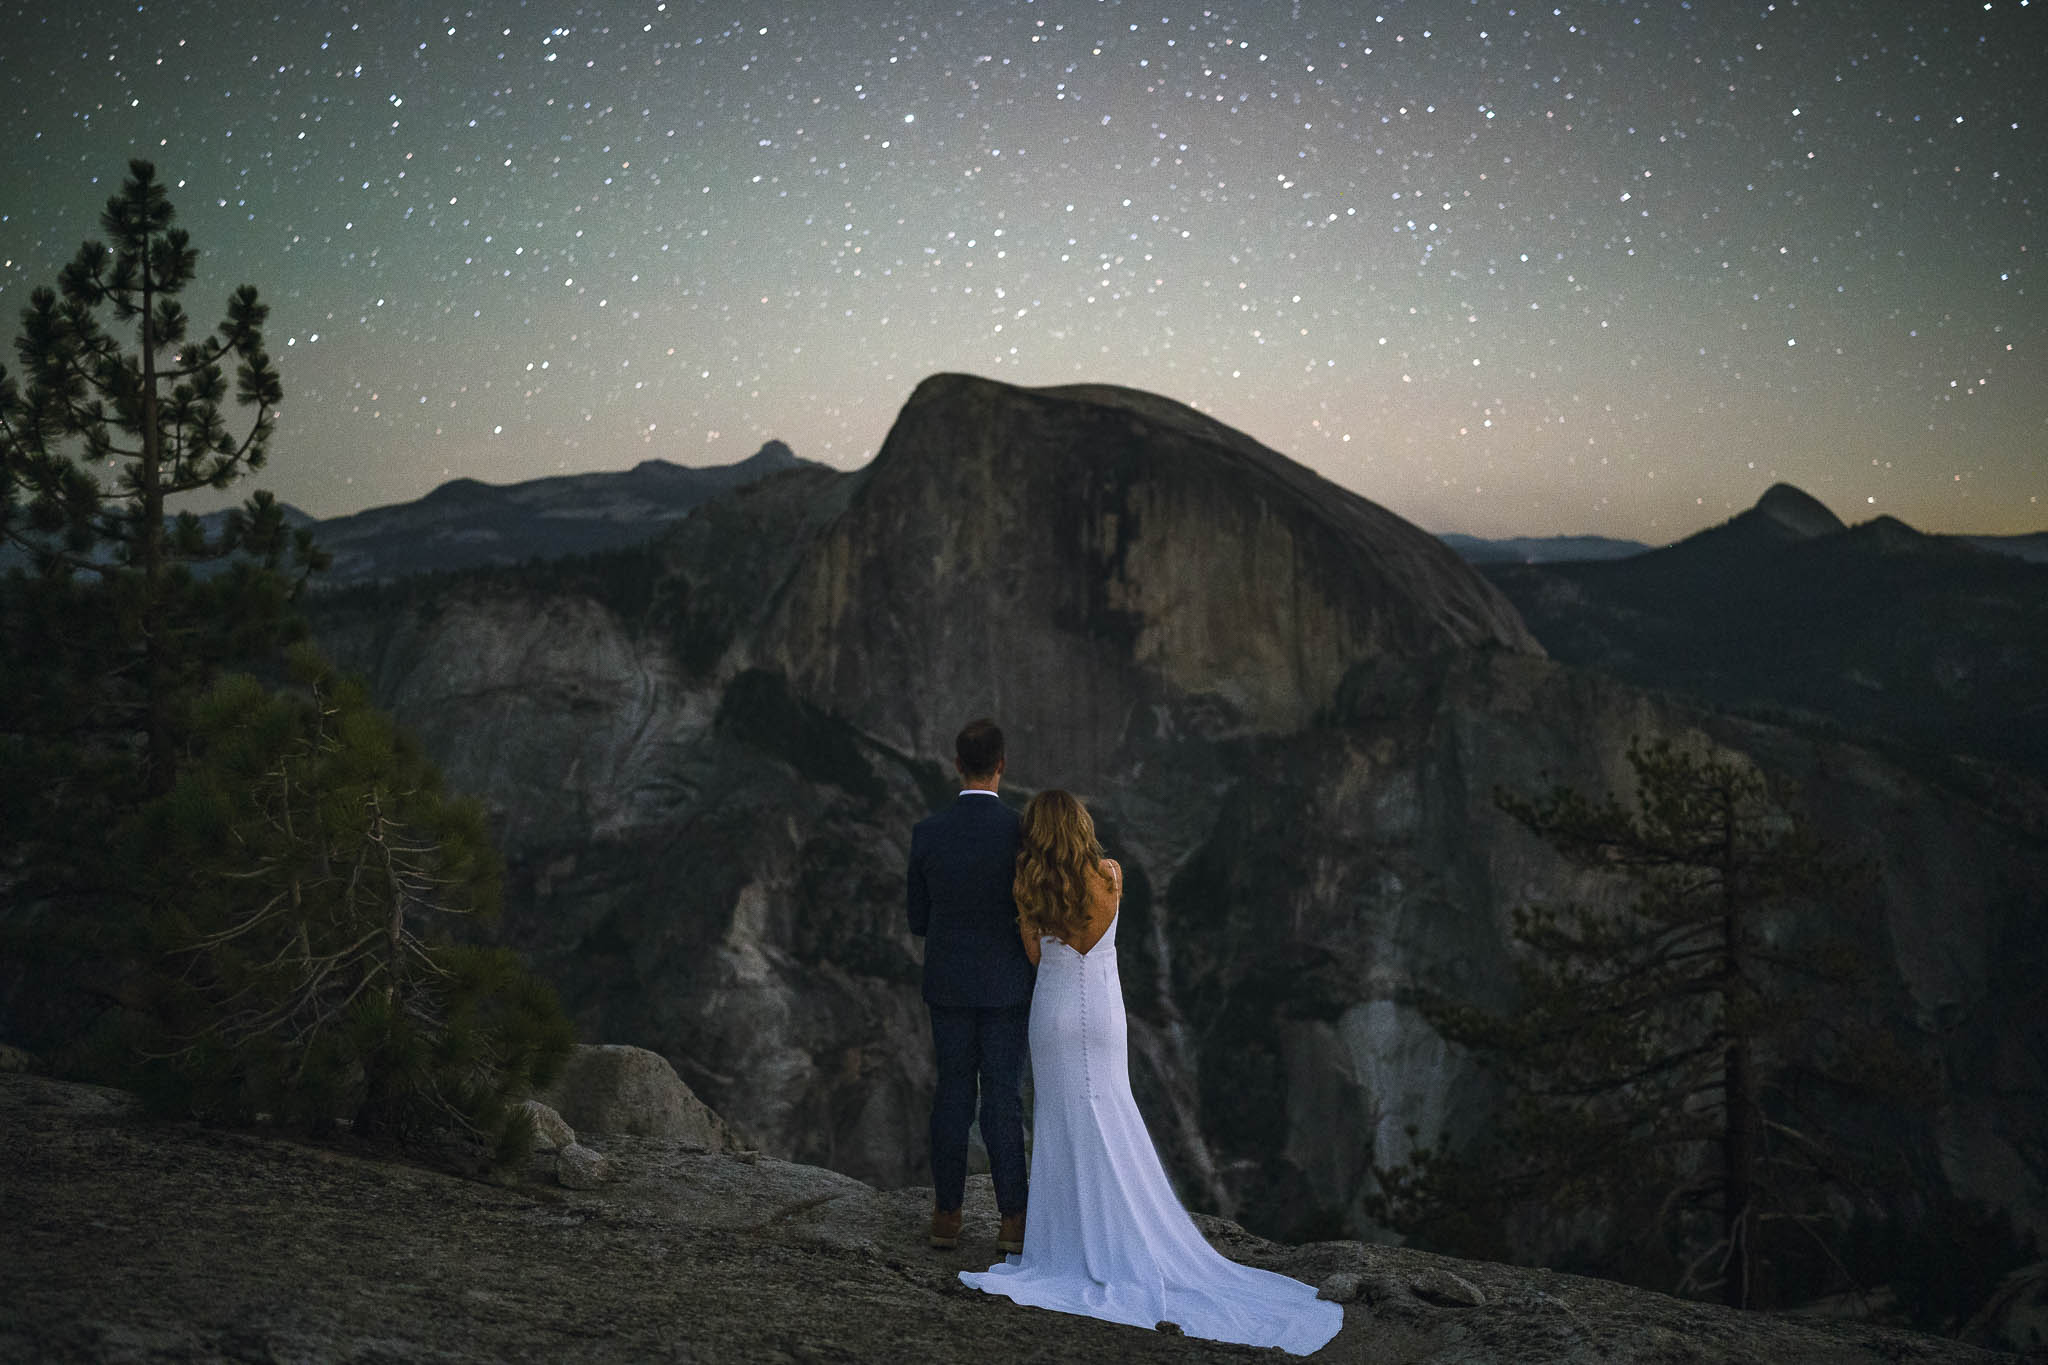
If you thought photographing the stars was difficult, wait until you try to capture a human subject under the stars! Photographing portraits under the stars is an amazing challenge, but the rewards can be even more impressive than an ordinary nightscape, honestly.
The technique is relatively simple, once you are have a mastery of basic technical skills: All you really have to worry about is, can your subjects hold still for 10, 20, or even 30 seconds!
We have an entire article dedicated to this topic, however, here’s the biggest trick: Max out your aperture and ISO, just a little bit moreso than you normally would for a regular nightscape. An f/1.4 or even f/1.2 prime can be a huge help. Then, try and keep your shutter speed around 5-10 seconds, and choose a pose for your subject that makes it easy for them to hold still. (Smiling at the camera is usually not an option, unfortunately, unless you add flash. Also, a little bit of moonlight can go a VERY long way, or in a pinch, a very faint headlamp or even some distant light pollution can help illuminate things.
Star Trails for Capturing Movement
Of course, there are times when you may want to capture the movement of the stars. These are known as “start trails,” and they can be used to create interesting and beautiful works of art.

To capture star trails, use these star photography settings. Set your camera to manual mode and use a wide-angle lens with a wide aperture (f/2.8 to f/4 is ideal) to collect as much light as possible.
The shutter speed is critical and should be set to a long exposure time, often several minutes to several hours, depending on the desired length of the trails; this may require using the bulb mode if exposures are longer than 30 seconds. A remote shutter release or intervalometer can help avoid camera shake when starting and stopping the exposure. ISO settings should be kept as low as possible to reduce noise but high enough to capture the stars (ISO 400-800 is a good starting point). Finally, turn off any image stabilization and set the camera to shoot in RAW for maximum post-processing flexibility. Experimentation with these settings will help achieve striking star trail images that vividly capture the earth’s rotation.
Conclusion
If you’re interested in learning more about star photography settings and everything else there is to know about Milky Way Photography, be sure to check out the full workshop. Click the button below to purchase or stream it now in SLR Lounge Premium.


