There’s a reason fashion magazines, album covers, and social media campaigns are obsessed with the “raw” direct flash look right now. It’s bold. It’s honest. It’s unfiltered. But here’s the truth: direct flash never actually went out of style; it just cycled out of trend, as pretty much all things do. When you understand how to control and shape hard light, direct flash becomes one of the most powerful and versatile tools in your lighting toolbox. In this tutorial, we’ll walk through a three-step process to nail that editorial, in-your-face aesthetic, and then dig into the why behind the look so that you can use direct flash intentionally, whether it’s trendy or not.
Gear List
Here’s a quick overview of the gear used in this tutorial:
- Camera: Any camera will work
- Lens: 28–70mm
- Flash: On-camera flash in TTL mode
- Modifiers: Magmod MagGrid, MagSphere
- Bonus technique: Flash zoom + grid stacking for control
Video: Mastering the Editorial Raw Flash Look: Why Direct Flash Never Went Out of Style
Why Direct Flash Works
Direct flash gets a bad rap for being harsh or unflattering, but that’s only when it’s used without intention. When you understand how to control it, direct flash creates depth, attitude, and character that soft light often can’t. It’s the perfect choice when you want your images to feel gritty, raw, and real rather than polished and posed.
Whether you’re shooting a wedding after-party, a street-style editorial, or a high-fashion portrait, direct flash delivers a high-impact, cinematic edge that instantly grabs attention.
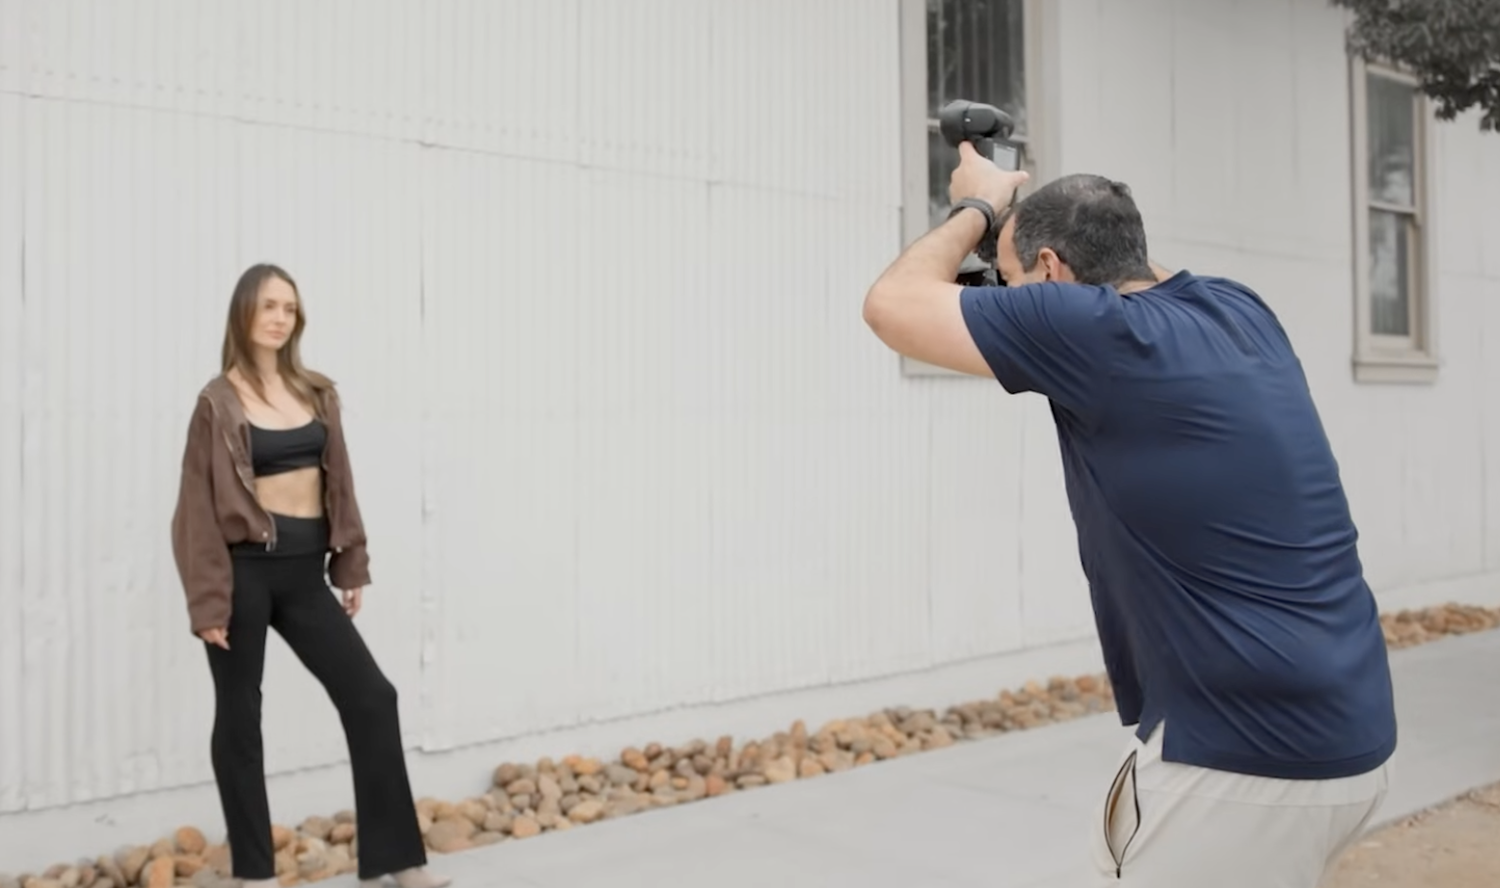
The Three-Step Direct Flash Process
You can pull off this look with any camera, any lens, and a basic on-camera flash. For this tutorial, we used a 28–70mm lens and MagMod modifiers, but the technique works with any setup.
Here’s the simplified breakdown, which is adapted from our C.A.M.P. Framework (Composition, Ambient, Modify, Pose).
Step 1: Start with Intention
Turn your flash off and set your ambient exposure first. This will help you realize your intention. Ask yourself: What do I want this scene to feel like? Do you want a dramatic look, or something more bright and airy? Depending on your answer, you’ll set your ambient exposure to match.
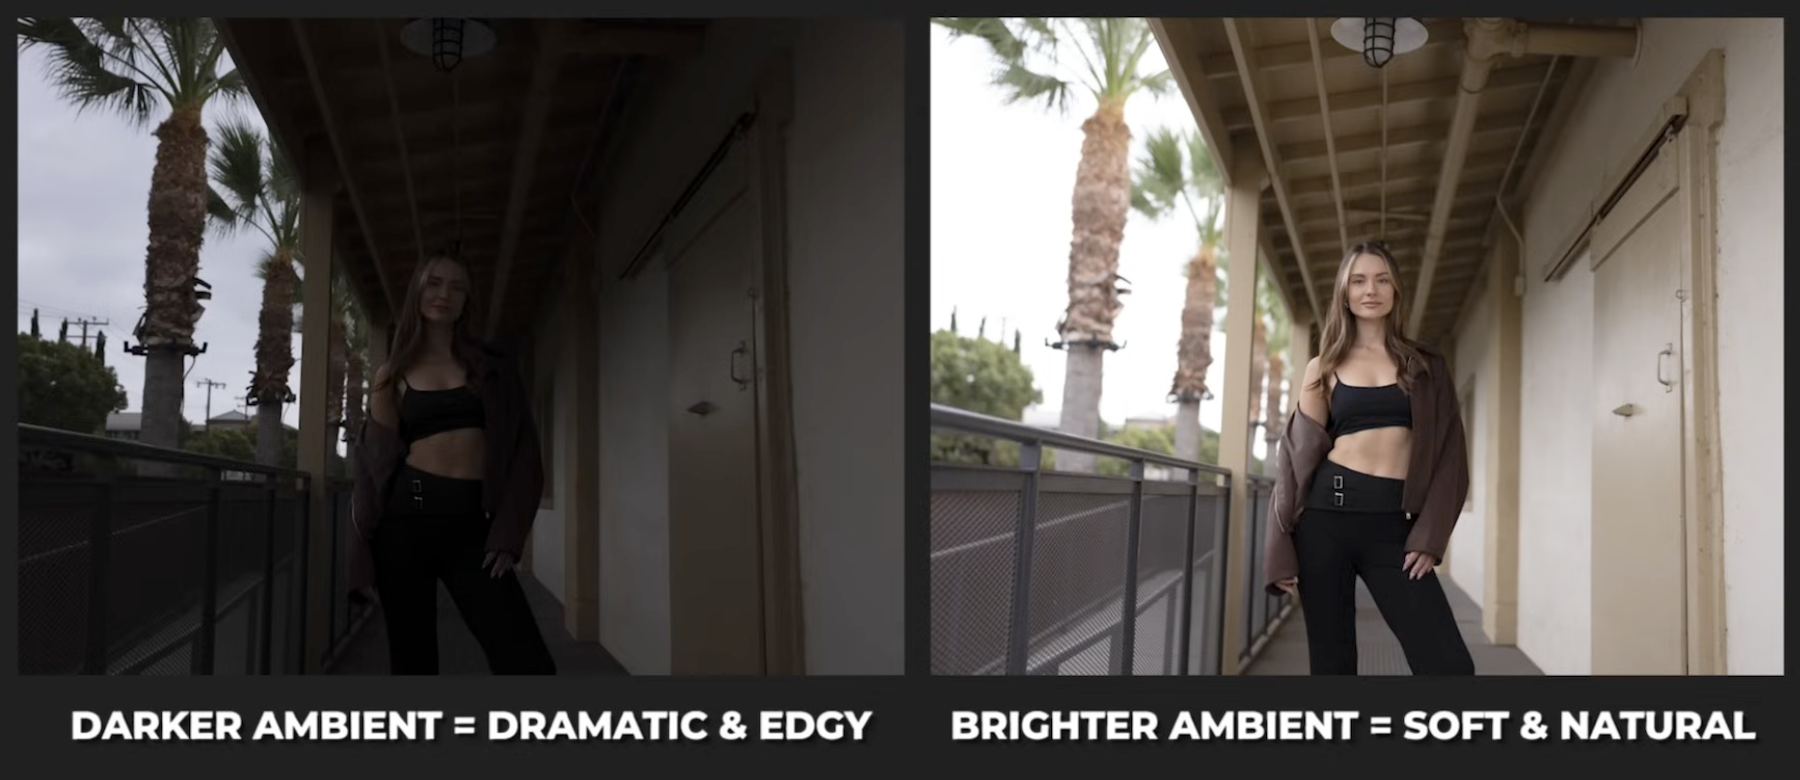
- A darker ambient exposure feels dramatic and editorial.
- A brighter exposure feels natural and open.
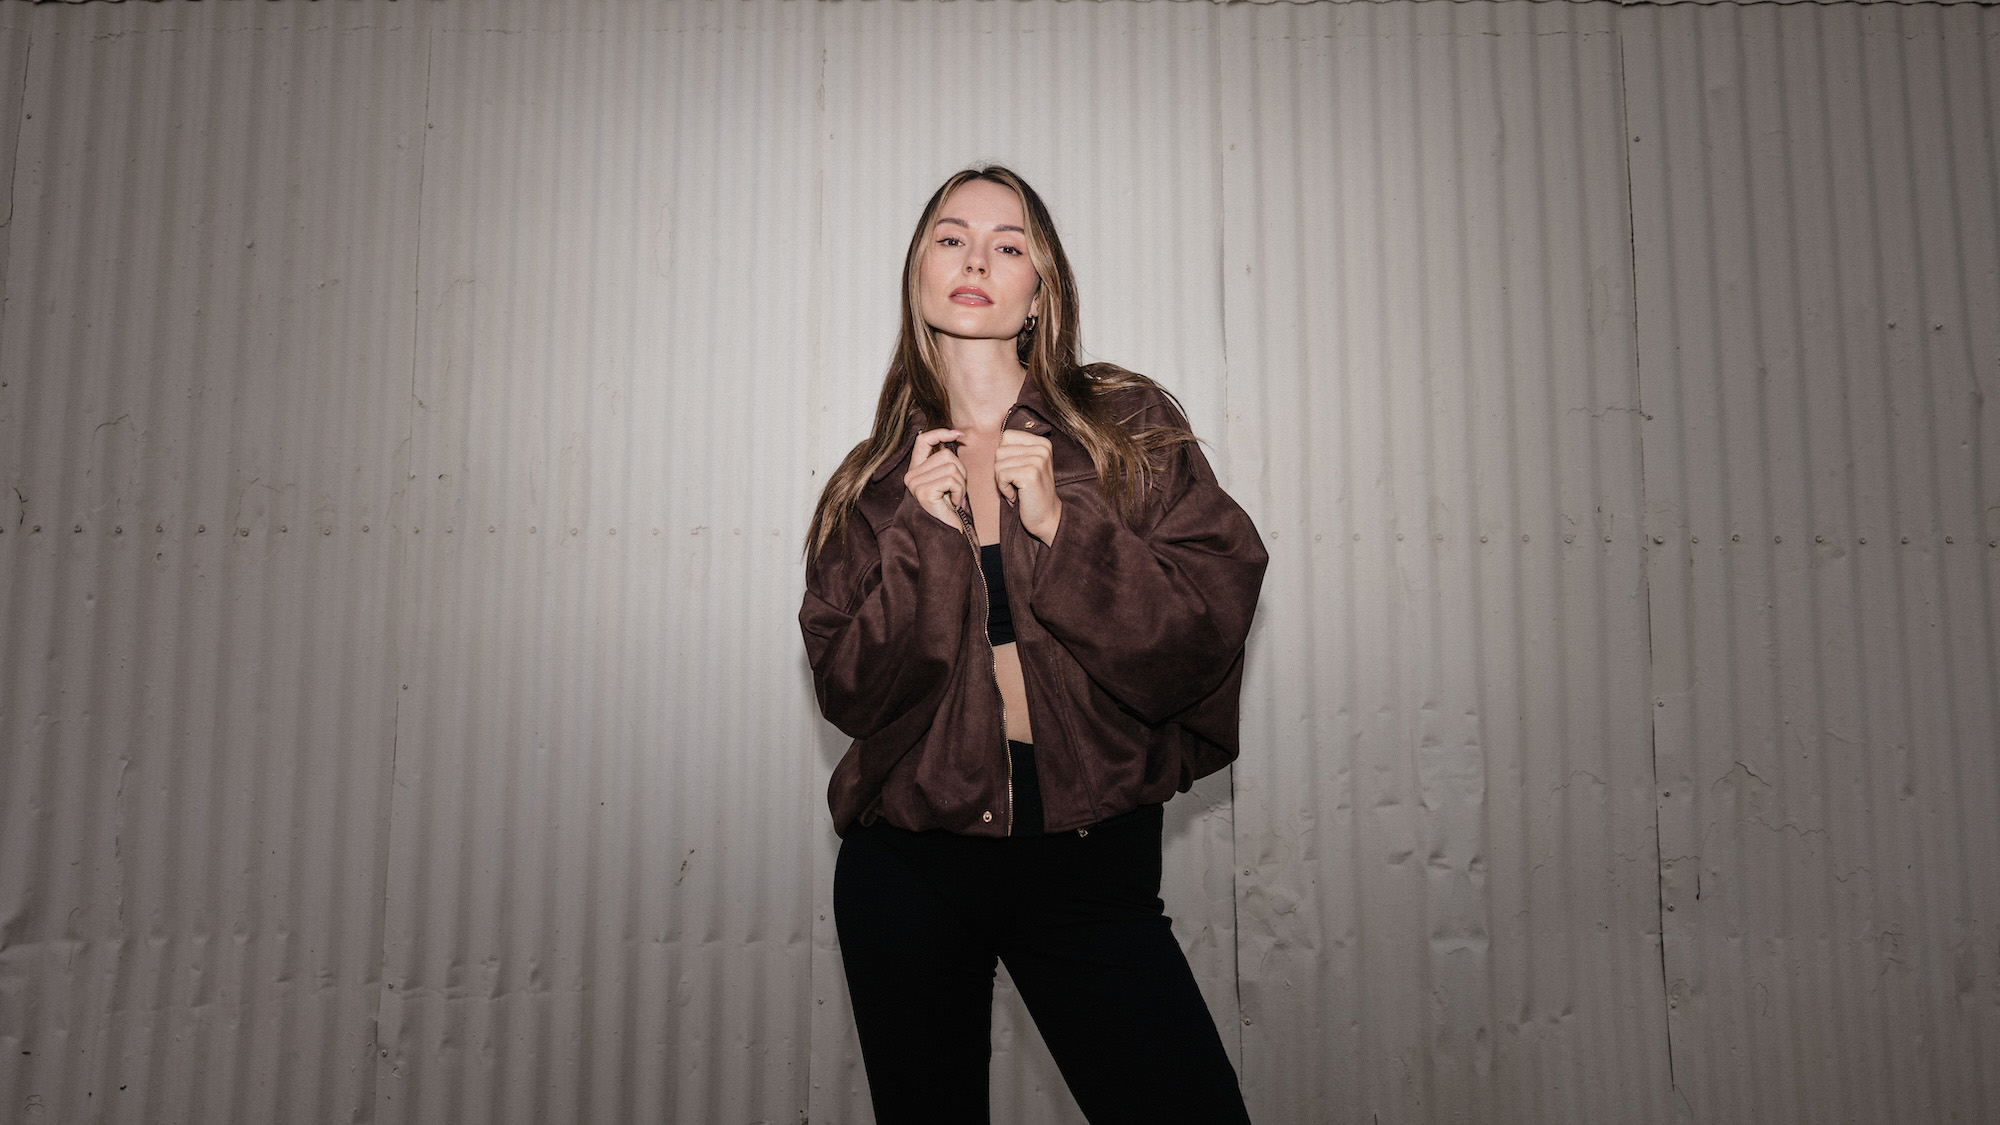
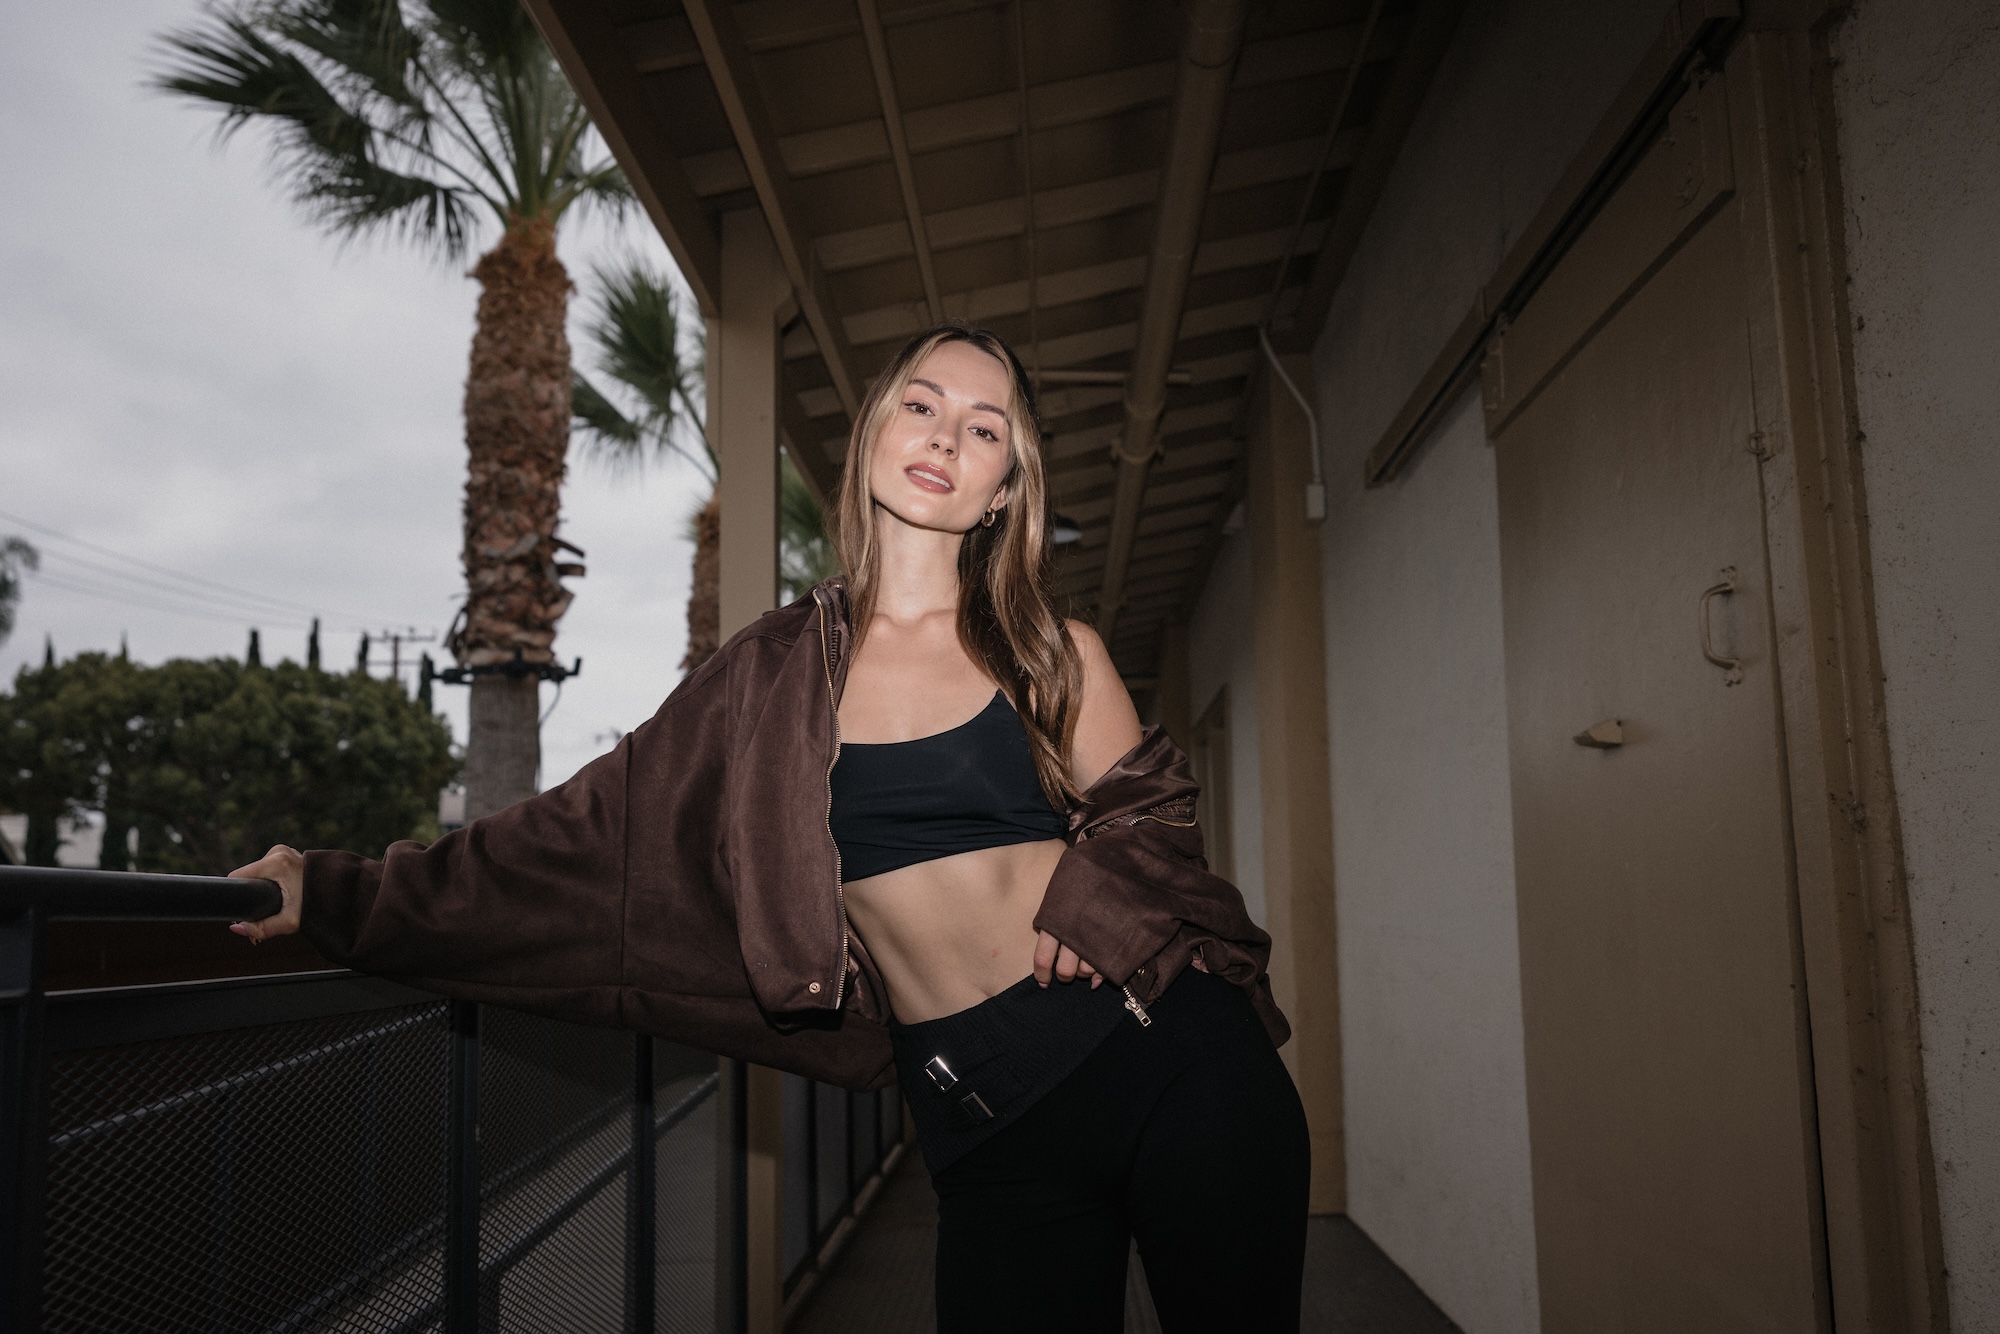
For the editorial flash look, we lean darker, which is the direction we’ll take for the sake of this tutorial.
Once the background exposure feels right, you’ll also want to frame your shot intentionally. Maybe drop the camera lower for a more cinematic angle, and direct your subject into a confident, edgy pose that matches the vibe. The key is setting the tone before you ever turn on your flash.
Step 2: Add and Test the Flash
Now, it’s time to add or power on your flash. For on-camera flash, TTL works beautifully because the system automatically compensates as you change settings. This might not necessarily the case when using off-camera flash. Your mileage may vary, of course.
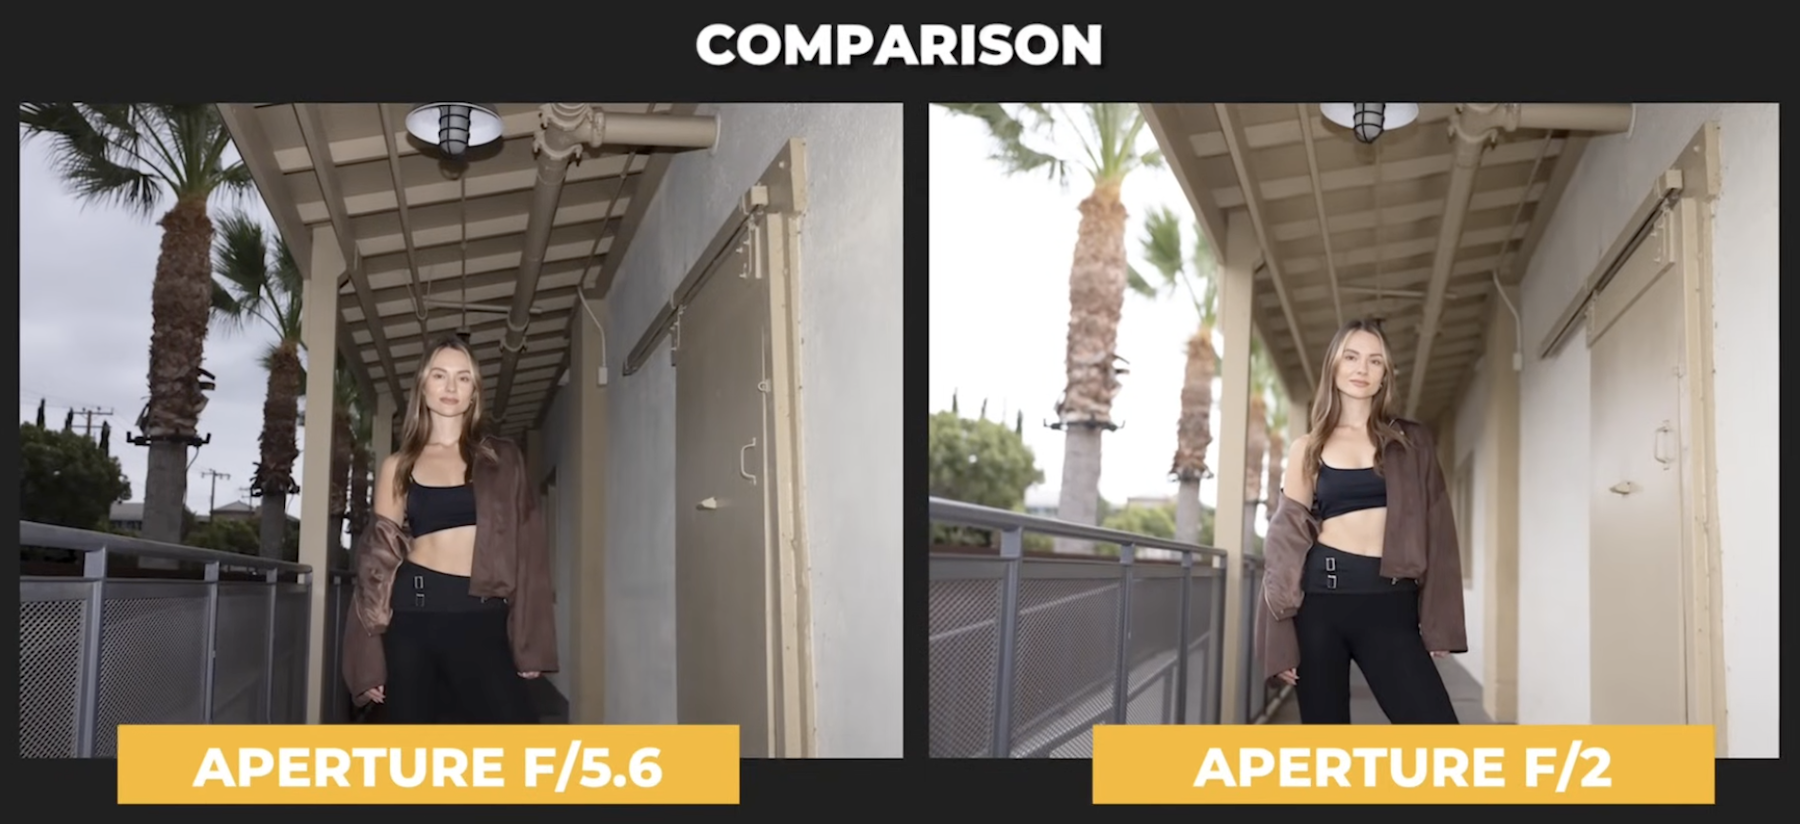
We took our first test shot at f/5.6. The flash, using TTL, landed around mid-range power (e.g., 1/8 or 1/16). When we opened up the aperture to f/2, the flash automatically dropped in power to balance the exposure.
If you want more drama, lower the ambient light and let the flash take over. On the other hand, if you want something more natural, raise the ambient and pull back flash compensation.
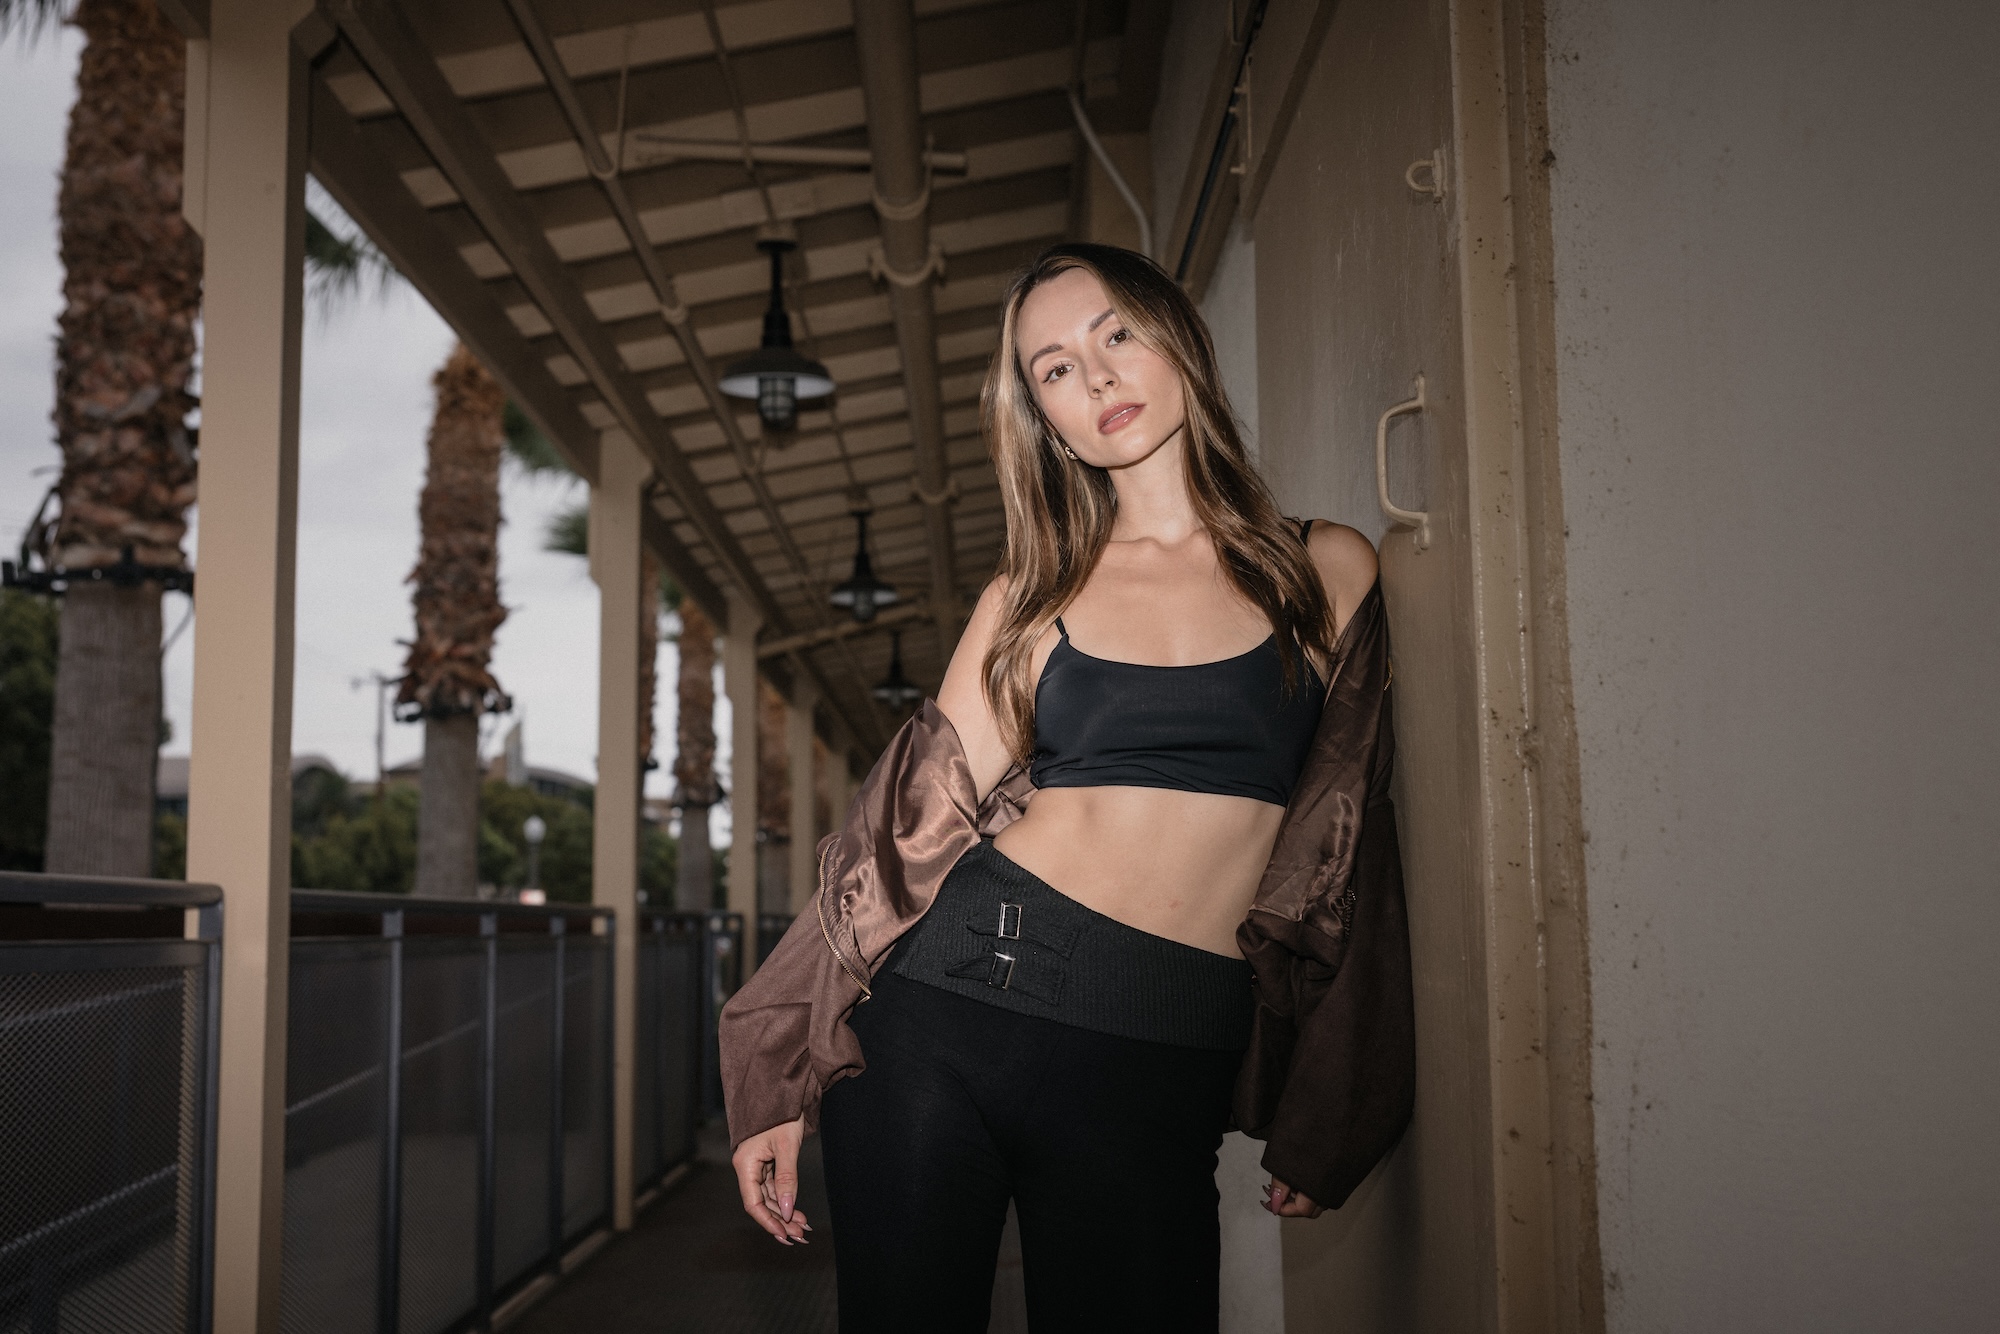
Step 3: Modify and Shape the Light
Once you’ve got exposure locked, it’s time to modify your light. This is where your creative control comes in. Here are a few easy modifiers and effects to try:
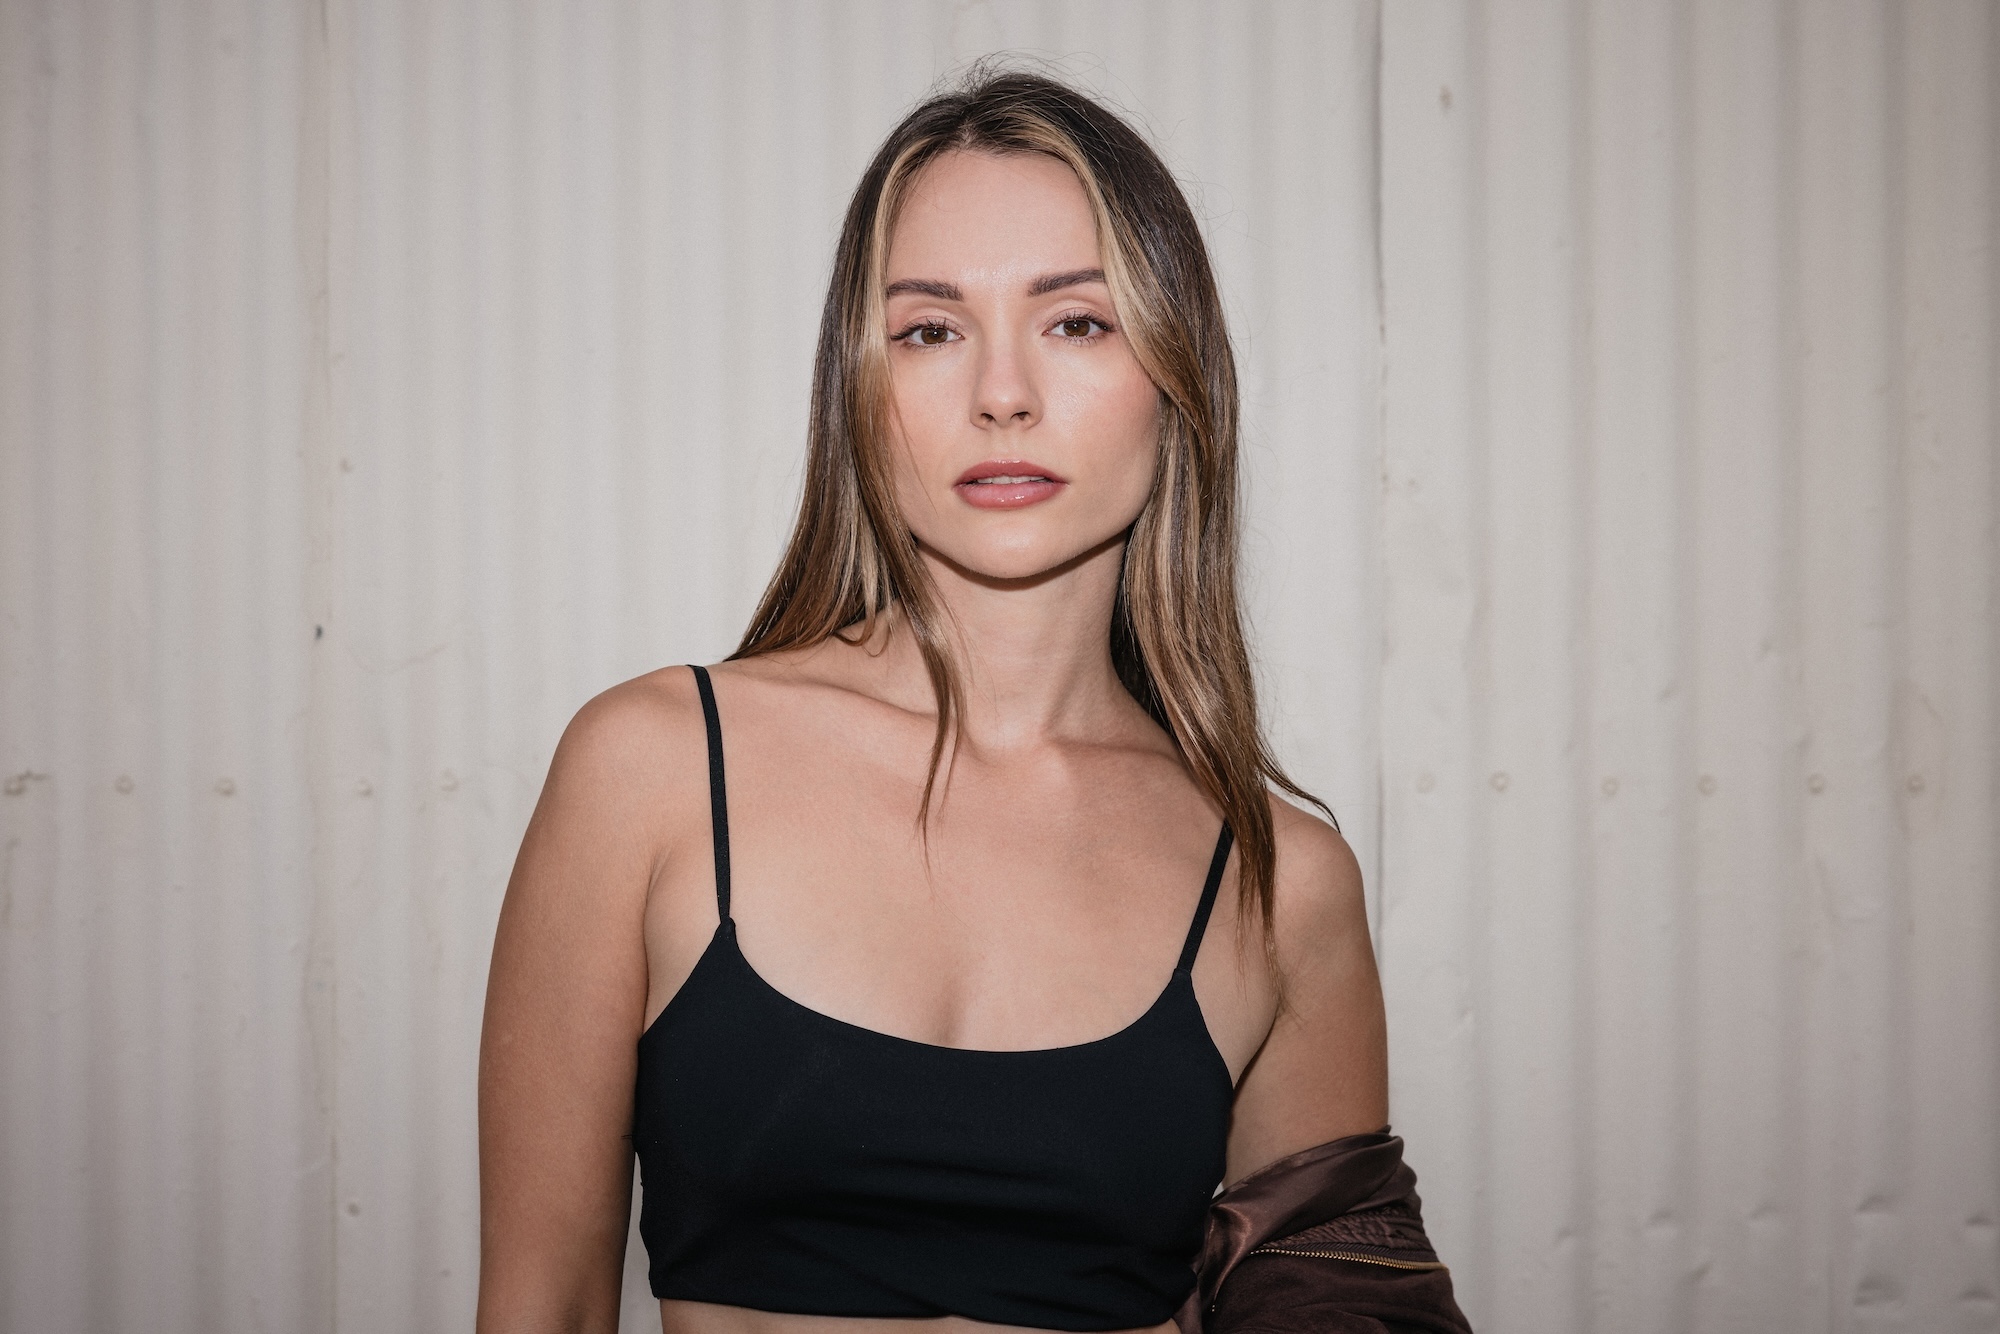
Grid
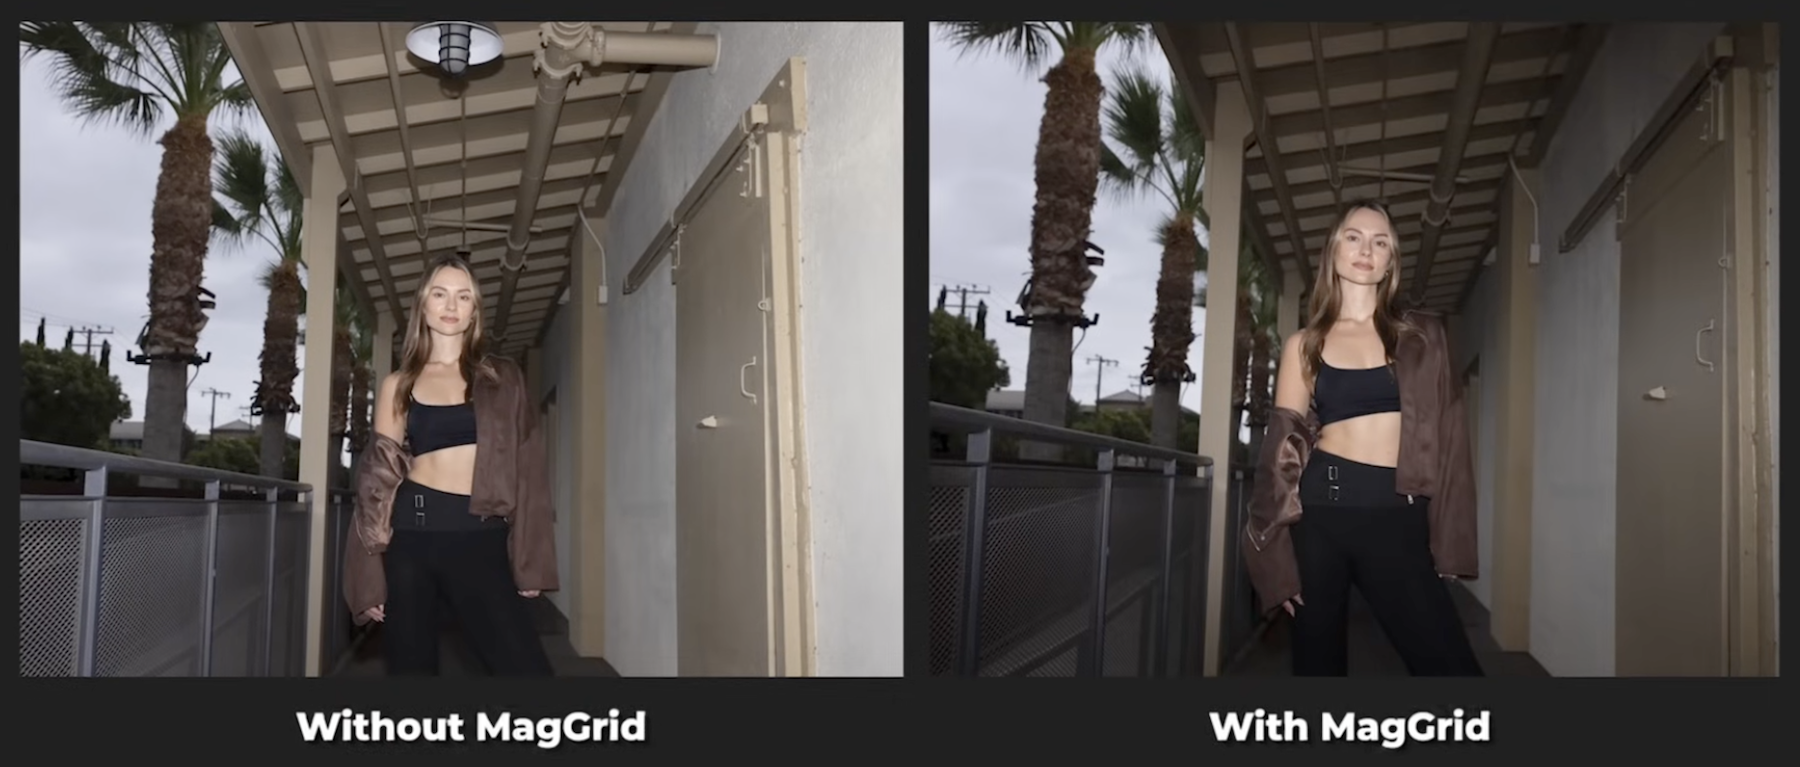
Attach a MagGrid to control spill and focus light precisely where you want it. It’s perfect for isolating your subject against textured backgrounds and keeping the light off the walls.
Here are a few final shots with the MagGrid added:

Zoom
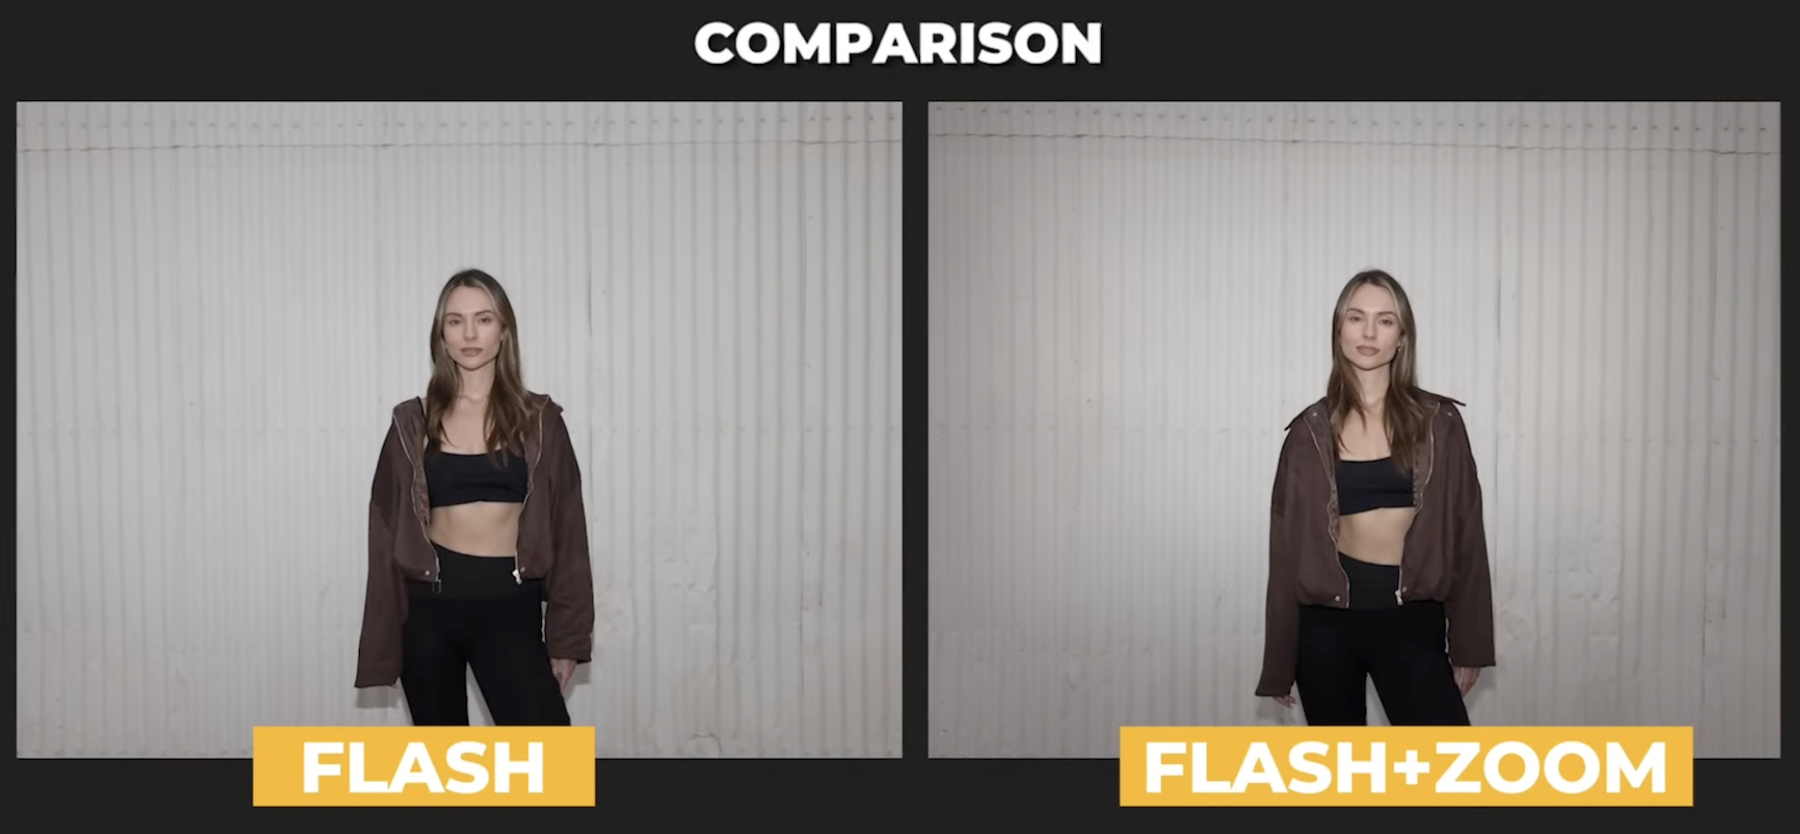
Use your flash zoom to narrow the beam. By pulling the light back and funneling the light forward, the zoom function on your flash helps concentrate light on your subject and creates a soft vignette around the edges.
Zoom + Grid
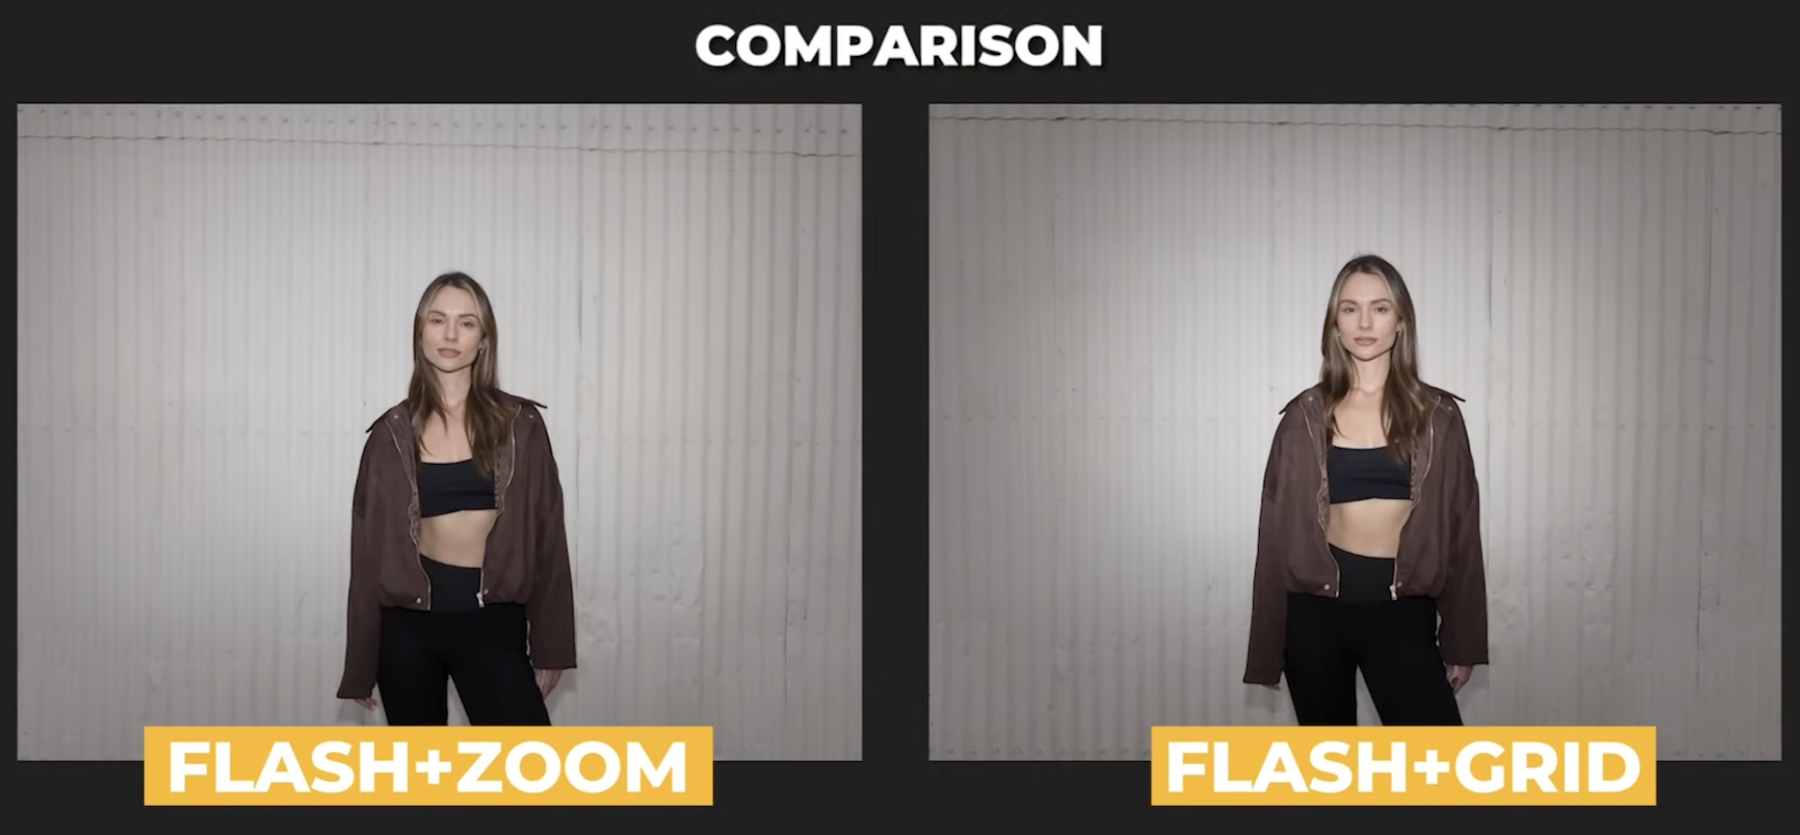
Here’s a look at the effect you get when you combine the zoom feature on your flash with an added grid, or in this case, a MagGrid. As the light tightens, make sure that you direct or point it at your subject more accurately. If you don’t mind this step, you may end up lighting the wrong part of your subject’s body.
Sphere
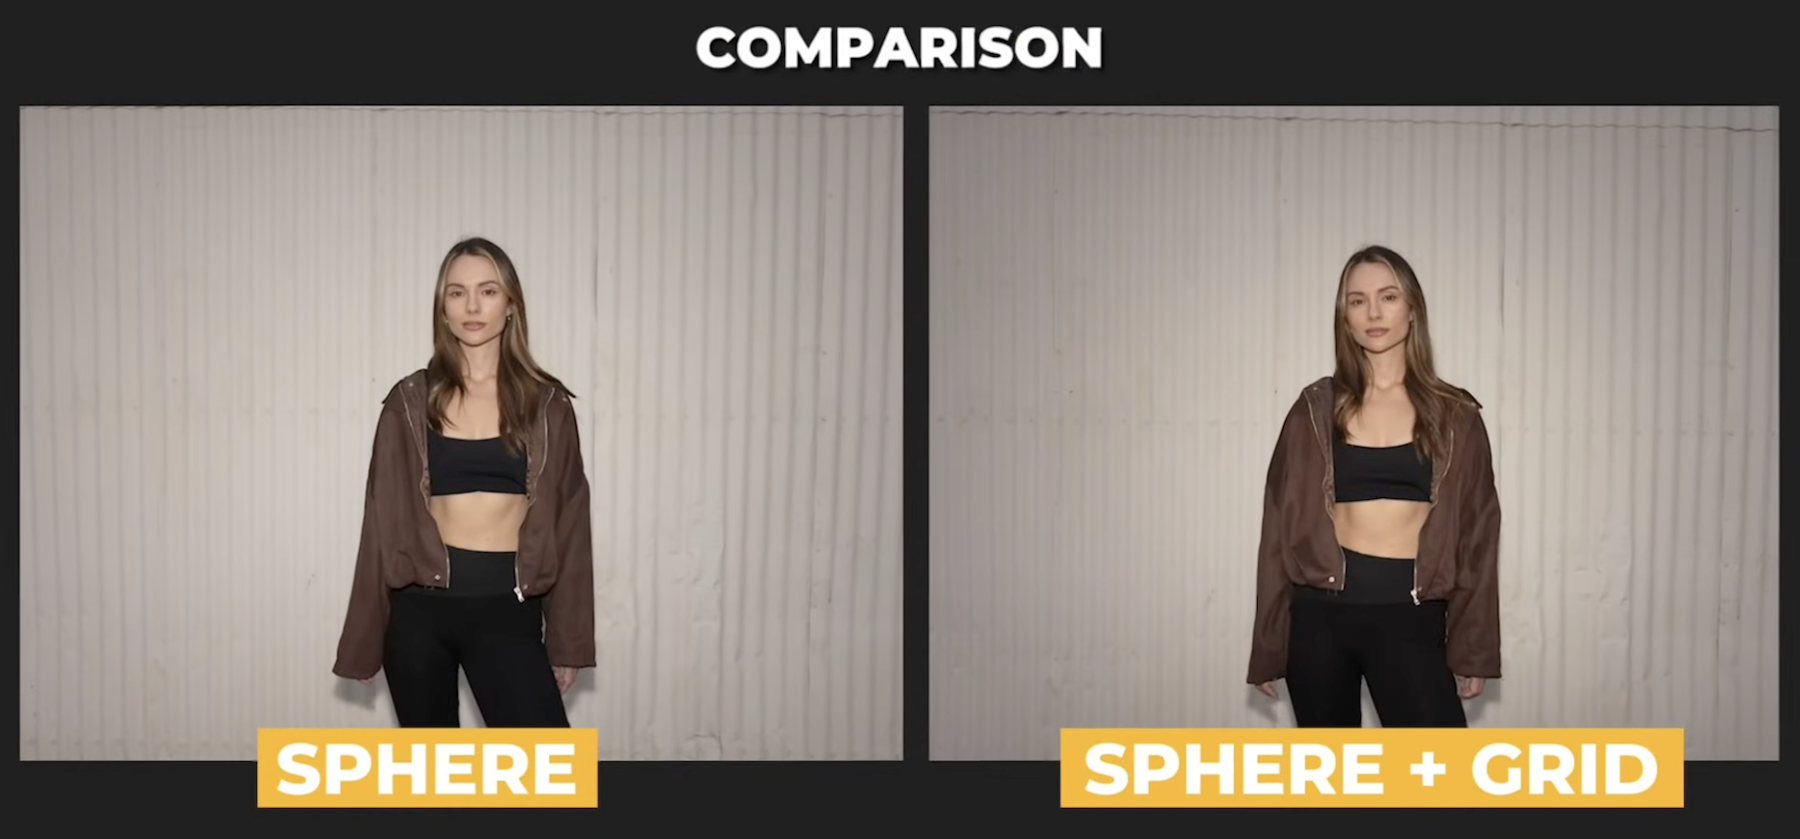
The MagSphere diffuses the flash slightly, softening reflections on skin without losing that crisp, direct-flash look. If you pair it with a grid, you’ll get a subtle vignette plus soft falloff, perfect for portraits that still feel edgy.
Try all three, compare the shots, and notice how each modifier shapes the mood of the image.
Advanced Tips: Avoiding the Awkward Shadow
When you shoot horizontally, your on-camera flash sits above the lens, casting shadows downward, which is great for natural falloff. But flip your camera vertically, and the flash moves to the side, pushing shadows across your subject’s face. This is not usually ideal.
To fix this issue, you can do one of a couple things:
- Use a flash bracket to keep the flash above your camera when shooting verticals.
- Or, go handheld with the “Statue of Liberty” style. This involves using a remote trigger and holding your flash above the camera while shooting.
Both keep shadows falling naturally behind your subject, maintaining that classic editorial look.
Direct Flash Theory: Light with Intention
Let’s wrap up with a bit of lighting philosophy. There’s no such thing as “bad light,” only light that doesn’t match your story. Soft light is perfect for romantic, elegant imagery, like flowing dresses and delicate emotion. Hard light, however, typically communicates traits like strength, attitude, and authenticity.
So if your subject’s story is bold and real, why soften it?
Direct flash helps you strip away the overly produced feel and connect the visual tone of your light to the emotional tone of your image. That’s what makes it timeless and not just trendy.
Final Thoughts
Direct flash isn’t a comeback, but actually more of a reminder. It’s a reminder that light itself isn’t the enemy. Misuse is. When you understand how to balance ambient exposure, shape your light, and match the story, direct flash becomes one of the most expressive tools in your kit. That said, the next time someone says direct flash is harsh, just smile and show them how it’s done.


