On December 1, 1913, the Ford Model T began rolling down the moving chassis assembly line at the Highland Park plant in Michigan, completely changing how automobiles were built. The innovation reduced the time it took to build a car from more than 12 hours to just 93 minutes. In turn, it also had an immense influence on the world, how we created things, and the expansion of industry during the 20th century. What does all this have to do with workflow tips in Lightroom and relate to us as wedding photographers?
If you’re ready to use a more productive workflow in Lightroom, you need to think like the assembly line. Here are some ways to do it. In this tutorial, we’re going through our pre and post-production workflow and giving you the best tips on how to make your own workflow as efficient as possible. When mastered, these tips are guaranteed to save you time in your workflow so you can spend more time doing things that matter, like taking more pictures!
Lightroom Workflow Tips: At a Glance
This guide covers the essential Lightroom workflow strategies that will help you edit faster and more efficiently, from import to export.
- Import Through Lightroom – Why direct import prevents file conflicts
- Cull in the Library Module – Faster previews for quicker selections
- Keep Your Culling System Simple – Streamline your selection process
- Master Every Method of Batch Processing – Sync, Previous, and Auto Sync techniques
- Avoid Advanced Production Until Batch Processing is Finished – Prevent rework and wasted effort
- Post Produce High ISO Photos Separately – Targeted noise reduction by ISO
- Export Images to Every Format You Need – Save time on future requests
- Don’t Save Every Single Raw File – Smart storage management for photographers
Import Through Lightroom
There are two options to import your images from your card to your computer. The first option is to copy your memory card onto your desktop and then manually import into Lightroom. The second option is to import directly into Lightroom, and we recommend sticking to this option. We recommend this because the desktop operating system is not designed for image management. This can be a problem when you have images with identical file names because the desktop will treat them as the same image and you will only be able to keep one.

In our studio many of our photographers shoot with the same camera make and model that don’t have custom file naming options. We frequently run into this problem where we have unique images coming from different cameras with the same file name. When we import directly into Lightroom, it automatically takes care of the identical image file names, ensuring that all images that should be uploaded are uploaded.
Additional Import Best Practices
Beyond handling duplicate file names, importing directly through Lightroom gives you the opportunity to set up your organizational system right from the start. Consider renaming your files during import using a custom naming template (such as “ClientName_Date_SequenceNumber”) so your files are clearly labeled from the very beginning. You can also apply metadata presets during import to automatically embed your copyright information into every file, which is especially valuable for wedding and event photographers who deliver hundreds of images per job.
Another important import setting is your preview rendering option. If you plan to start culling immediately after import, select “Standard” or “1:1” previews so Lightroom builds usable previews right away. This takes longer during the initial import, but it saves significant time once you begin reviewing images because you won’t be waiting for previews to render on the fly. If you’re stepping away from the computer after import (maybe heading to bed after a long wedding day), go ahead and select 1:1 previews and let Lightroom work overnight while you rest.

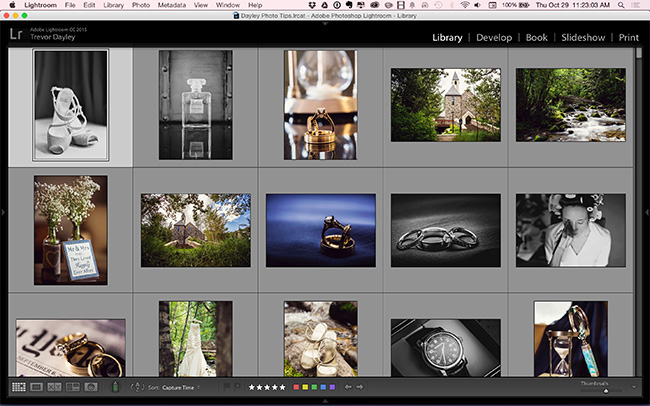
Cull in the Library Module
When you begin your culling process, we advise that you do all of this in the Library module. You can choose to cull in the Grid view or the Loupe view in the Library module, just as long as you’re not culling in the Develop module. The reason is because the Develop module uses a different type of image preview than the Library module, and these previews take more time to load. That will slow down your workflow significantly, especially when you’re working through hundreds or thousands of images from a wedding or event.
Culling is the act of looking through the images quickly and choosing the ones you want to edit. While culling, don’t start editing any photos. Even if you see one that you like but it was exposed improperly, and you are therefore unsure if you want to keep it, just keep it for now and try to fix it later during the next step. If you find out later it’s beyond repair, then you toss it out. But don’t stop to bring a photo into the Develop module and start editing it. While culling you can use numbers to rate images, color labels, or “P” to flag the images you like, then filter for those later. There are lots of ways to do it. The key is to only cull the images as your first workflow step.
Use Caps Lock for Auto Advance
One of the most helpful culling shortcuts in Lightroom is turning on Caps Lock before you begin. With Caps Lock activated, Lightroom will automatically advance to the next image every time you pick, reject, rate, or label a photo. This means you never have to press the arrow key to move forward. It sounds like a small thing, but over the course of a thousand images, it shaves off a surprising amount of time and keeps you in a rhythm. The fewer interruptions to your flow, the faster your decisions become.
Keep Your Culling System Simple
Lightroom gives us many culling options such as rating, flagging, and coloring our photos, and you may feel the need to cull using all of them at once. Our tip is to keep your initial culling process simple. When you’re looking through your photos, simply ask yourself if you want to keep or discard the photo. That way you’re only focused on one thing, and your culling process will become much faster.
For many wedding photographers, a simple flag/reject system works best for the first pass. Press “P” to flag a keeper and “X” to reject an image, then move on. You can always go back and assign star ratings or color labels in a second pass if you need a more refined selection (for example, sorting images for an album versus social media versus the full delivery). The point is that your first pass should be binary: keep or discard. Trying to assign five-star ratings and color categories while also making keep/reject decisions splits your attention and slows you down considerably.
Master Every Method of Batch Processing
Once you’ve culled the photos, you need to filter for those images you picked, and you can now start the editing process. Switch over to the Develop module and begin editing the images. Most of your edits will happen in the Basic panel of the module (white balance, exposure, contrast, vibrance, clarity, etc.). During this process, you can also apply any Lightroom presets. Be sure to take advantage of the Sync and Previous buttons. Where many photographers get held up here is when they come across an image that needs some extra editing, they right-click on the image and choose to open it in Photoshop. Don’t do this. It will slow you down. We will do that part later.
Lightroom’s greatest strength over Photoshop is its ability to batch process. From using the Previous button, to synchronizing, to Auto Sync, and other batch processing functions, nothing will speed up your workflow faster than mastering these batch processing techniques.
Understanding the Key Batch Processing Tools
The Previous button applies the exact same develop settings from the last image you edited to the currently selected image. This is perfect when you’re moving through a sequence of photos shot under similar conditions, like a ceremony or a portrait series with consistent lighting. The Sync button lets you select multiple images and synchronize specific settings from one image to all the others. You get to choose exactly which adjustments to sync, so if you only want to push white balance and exposure across a batch but leave cropping alone, you can do that. Auto Sync takes it a step further by applying your adjustments in real time to every selected image as you make them. Toggle it on by clicking the small switch next to the Sync button. This is incredibly powerful when you have a block of images shot in identical conditions and want to make one adjustment that applies everywhere simultaneously.

Batch processing is your best friend when processing large amounts of images in an efficient manner, and this is also why we recommend shooting in manual mode on your camera. Batch processing works best when images are similar in terms of exposure and color, and if your camera settings are consistent from scene to scene, then the batch processing workflow becomes much quicker and smoother. Wedding photographers who lock in their settings for each part of the day (ceremony, reception, formals, etc.) will find that they can process entire sequences of shots with just a few clicks, rather than adjusting each image individually.
Avoid Advanced Production & Photoshop Until Batch Processing is Finished

We want to avoid rework and loss in efficiency, so we save the heavier post-processing until we are finished batch processing our images. If you’re constantly stopping to do advanced post-production on your images, then you’re not taking full advantage of your batch processing workflow. You may also decide later that you find a better image to apply advanced post-production to and not want to use the image you’ve already edited. All that time spent editing the initial image is now wasted.
Once you have all the JPEGs exported into one folder, open up Photoshop. Now is the time you can drag the JPEGs that need additional editing into Photoshop, make the edits, and resave the photo. Edits in Photoshop might be advanced cloning, healing, and skin retouching. I also like to do some color toning in Photoshop using an action I haven’t been able to replicate yet in Lightroom. The key here is that you are using Photoshop on JPEG files that have already been exported out of Lightroom. No going back and forth between the programs like before. Remember, think like an assembly line. Only focus on one particular job at a time.
An Alternative Approach for Non-Destructive Editing
Some photographers prefer to send files to Photoshop as TIFFs rather than JPEGs to maintain higher image quality for retouching work. If you go this route, wait until your entire Lightroom batch edit is complete, then use the “Edit In Photoshop” option only for the select images that truly need pixel-level work. The important principle remains the same regardless of your file format: finish all of your Lightroom batch edits first, then tackle the Photoshop work as a separate phase. Trying to bounce between the two programs during editing is what creates the bottleneck.
Your “assembly line” might look different. The key though is to keep yourself from bouncing between one thing and another. If you are culling and decide to open one image in Develop, then go back to culling, you are doing it slower than you could be. If you are opening images from Lightroom into Photoshop, then saving the edits before jumping back into Lightroom, you are also doing it slower than you could be.
Post Produce High ISO Photos Separately
Once you’ve finished editing all your images, use the Metadata filter in the Library module to sort your images by ISO. Choose the high ISO images. Fix the noise in one photo and then sync just the noise reduction of that one image to all your other photos shot at the same ISO. Do this for each level of high ISO images you would like to fix.
This approach is far more effective than applying a blanket noise reduction setting across your entire gallery, because noise levels vary dramatically based on ISO. An image shot at ISO 3200 needs significantly more luminance and color noise reduction than one shot at ISO 800, and applying the same amount to both would either leave the high ISO shots too noisy or make the lower ISO shots look unnaturally smooth. By grouping images by ISO and syncing targeted noise reduction settings to each group, you get clean results without sacrificing detail where you don’t have to.
Lightroom Classic also offers ISO Adaptive Presets, which automatically adjust noise reduction values based on each image’s ISO metadata. If you frequently shoot in mixed lighting situations where your ISO is constantly changing (such as during a wedding reception), these adaptive presets can handle the heavy lifting and save you even more time during this step.
Export Images to Every Format That You Plan to Use in the Future
You’ve finished editing all the images. Your next step is to select them all and rename them before moving on to the export process. The easiest way to do this is going to the Library module, select all, then press F2 (on both PC and Mac) to bring up the Rename dialog box. On some Mac keyboards, you may need to press Fn+F2 if your function keys are mapped to system controls like screen brightness.
During the export process, we recommend exporting the images to any format you might need in the future. So if you need full-sized JPEGs and web-sized photos, export for both.

The reason is because if you need a particular image sometime in the future, you’ll always have it available to you in the size you need, and it’s available quickly. If you have to re-import your catalog, find the image you need, and export, that can be very time consuming, especially if you have to do it over and over again. Although this process will take up a bit more space on your hard drive, the time you save will be worth it.
Create Export Presets for Consistency
To make this even faster, set up export presets in Lightroom for the formats and sizes you use regularly. For example, you might create one preset for full-resolution client deliverables (long edge 5000px, quality 90, sRGB), another for web/social media (long edge 2048px, quality 80, sRGB), and a third for blog images (long edge 1200px, quality 75). Once these presets are saved, you can select all your images and run multiple exports back-to-back without reconfiguring settings each time. Some photographers even use Lightroom’s post-processing option to automatically upload exports to a client gallery service, further streamlining the delivery process.
Don’t Save Every Single Raw File
As photographers we tend to save every single photo we take. This is where we encourage you not to be a photography hoarder. If you have rejected images that are duplicates or are simply not as good, don’t feel shy when it comes to deleting them from your hard drive.
Although when it comes to professional shoots, or when we’re shooting for clients, we reset our rejected images and export them as JPEG files just so we have them available to us if we need them in the future. Sometimes a client might ask, “Do you have any more shots of…” and even though the photos may not be the best, the client will appreciate them. So as JPEGs we still have the images if needed, while not taking up the enormous amount of space that RAW files do.
To put this in perspective, a single RAW file from a modern mirrorless camera can be anywhere from 25 to 80+ megabytes depending on your camera and settings. Multiply that across a 3,000-image wedding day and you’re looking at potentially 100GB or more for just one event. Converting your rejected images to moderate-quality JPEGs reduces that storage footprint dramatically while still keeping a visual record that you can reference if a client comes calling. Over the course of a year, this simple habit can free up terabytes of drive space.
Frequently Asked Questions About Lightroom Workflow
What is the fastest way to cull photos in Lightroom?
The fastest approach is to cull in the Library module using Loupe view with Caps Lock turned on for auto-advance. Use a simple flag system where you press “P” to pick keepers and “X” to reject images. Avoid switching to the Develop module during culling, as the higher-resolution preview rendering will significantly slow you down. Build Standard or 1:1 previews during import so your images load instantly when you’re ready to begin.
Should I edit photos in Lightroom or Photoshop first?
Always complete your Lightroom edits first. Lightroom is designed for batch processing, so you can apply global adjustments like white balance, exposure, contrast, and presets to multiple images at once. Save Photoshop for the images that need pixel-level work such as advanced retouching, compositing, or detailed cloning. Finishing all of your Lightroom work before opening Photoshop keeps your workflow linear and prevents wasted effort on images you may not end up using.
How do I batch process photos in Lightroom Classic?
Lightroom Classic offers several batch processing tools. The “Previous” button applies the last image’s develop settings to your current selection. The “Sync” button lets you choose specific adjustments to apply across multiple selected images. “Auto Sync” applies your edits in real time to all selected images as you adjust sliders. For the best batch results, shoot in manual mode so your exposures are consistent, which makes your synced adjustments more accurate across a series of similar shots.
How long should it take to edit a full wedding in Lightroom?
Using an assembly line workflow, most experienced wedding photographers can cull and edit a full wedding (800 to 1,200 delivered images from 3,000+ shot) in roughly 4 to 8 hours total. The key is separating each phase: cull first, batch edit second, handle noise reduction third, and save Photoshop retouching for last. Photographers who bounce between these tasks often spend two to three times longer to reach the same result.
Should I delete RAW files after delivering photos to clients?
For rejected images you have no plans to deliver, exporting them as low-resolution JPEGs before deleting the RAW files is a smart compromise. This preserves a visual reference without consuming massive amounts of storage. For your selected and edited images, many photographers keep their RAW files for at least one to two years after delivery in case the client requests additional edits or re-exports. Your approach may vary depending on your storage capacity and how your contracts handle image retention.
Conclusion
Just as the assembly line was able to make Ford workers much more productive, you will become a much more productive editor in your workflow. Develop your steps, write them down, and paste them above your computer or on your desk. Don’t break the flow. Form workflow habits. In a short time, you will find your workflow process will be much faster than before.
If you are ready to take your Lightroom skills to the next level, be sure to check out the photography workshops and tutorials on SLR Lounge. They are extremely helpful, comprehensive, and taught very well. I learned a lot just by having them play in the background as I was doing my editing, and every so often I would replay a section of the instruction because it was so beneficial. Time is money, and these workshops have saved me a lot of time.