This video from Photigy shows us a great method for creating an inexpensive but highly effective shooting table for product photography. Alex Koloskov of Photigy, a voice I have become very familiar with as of late (more on that below), shows us that with just a few simple things, we can create the perfect shooting table.
What Do You Need?
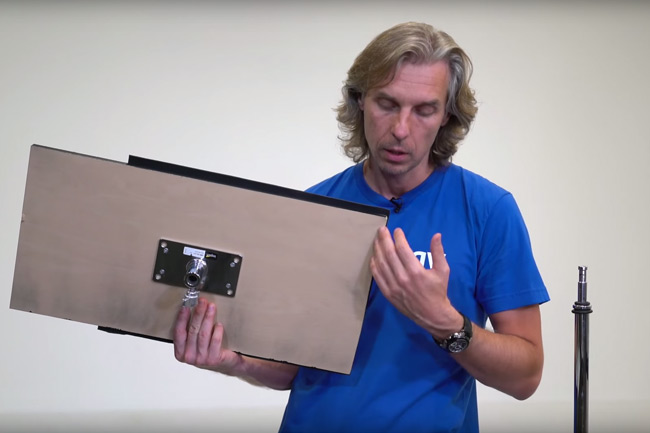
A lighting stand with a standard 5/8” mount, an Avenger 301 Baby Wall Plate or the Impact 3.0” Baby Pin Wall Plate (depending on the stand your using) and some double sided tape. As you’ll see from the video, using those three things we can create the perfect shooting table for the majority of products. Alex even has a solution if you need to photograph items that are a little larger.
Here are some links to find the various items you’ll need:
SIDE NOTE – For those of you in the UK, it was difficult to find this item at a reasonable price. I eventually found it here.

Why Can’t I Just Use A Normal Table
Great question. In fact, it’s one which I only recently discovered the answer to. When working with products, this type of shooting table has two distinct benefits over using a bog standard table. Firstly, due to its size you’ll be able to get your modifiers in much closer to your subject, which can be really useful when photographing anything small (most products). Secondly, so much of product photography is about controlling reflections. In the last few weeks, I have come to realize this through no small amount of frustration.
If you photograph a subject with any shape to it, you will suddenly realize that EVERYTHING in your studio can suddenly become visible, even the table you are shooting on. It sounds so obvious when I write it now though it was anything but when I began delving into this world. By using a small table like this, you are reducing the amount that table will reflect on your product.


