
Mastering portrait photography has surprisingly little to do with equipment. Outside of lighting, the single biggest factor separating a compelling portrait from a forgettable one is composition — how you arrange the elements in the frame, where you position the subject, and how you direct the viewer’s eye. The right lens, the right light, and a technically sharp image still produce a mediocre photograph if the composition isn’t considered.
This guide covers twelve composition techniques for portraits, from foundational principles like the rule of thirds and leading lines through to specific setups for couples and environmental portraiture. The techniques apply equally to natural light and studio work, and to photographers at every level.
This article is part of our Portrait & Posing guide.
→ See the complete Portrait Photography guide
The goal of portrait composition
Composition in portrait photography has one primary objective: direct the viewer’s eye to the subject and keep it there. Every element in the frame is either working toward that goal or working against it. Backgrounds, foregrounds, lines, shapes, light, and shadow all either support the subject or compete with it. Good composition is the process of arranging those elements deliberately rather than accepting whatever happens to be behind your subject when you press the shutter.
An important clarification: the subject doesn’t always need to be centered. In fact, centering is often the weakest compositional choice because it leaves the viewer nowhere to travel visually. What matters is that the subject is clearly dominant — that the eye knows immediately where to land and is guided there by the structure of the frame.
1. Simplify your background
A busy background competes with the subject for visual attention. Before worrying about any other compositional element, assess what’s behind your subject and ask whether it helps or hurts. The goal is a background that either disappears or actively supports the subject — not one that demands equal attention.
Shallow depth of field is the most common tool for simplifying backgrounds, but it’s not the only one and shouldn’t be the default solution. Moving the subject to a position where the background is naturally cleaner, finding a background with a complementary color or tone, or using the directional quality of light to darken the background without changing the aperture are all more considered approaches.

The example above shows exactly this. The walk-up shot on the left is flat and artless. By repositioning the subject into the hedge, the background becomes a deep, clean green that creates a natural vignette while the opening above channels soft directional light onto the face. The pattern of the hedge doesn’t distract — it creates depth and makes the subject’s orange outfit read immediately against the dark background.

Watch the full process here:
2. Use the rule of thirds
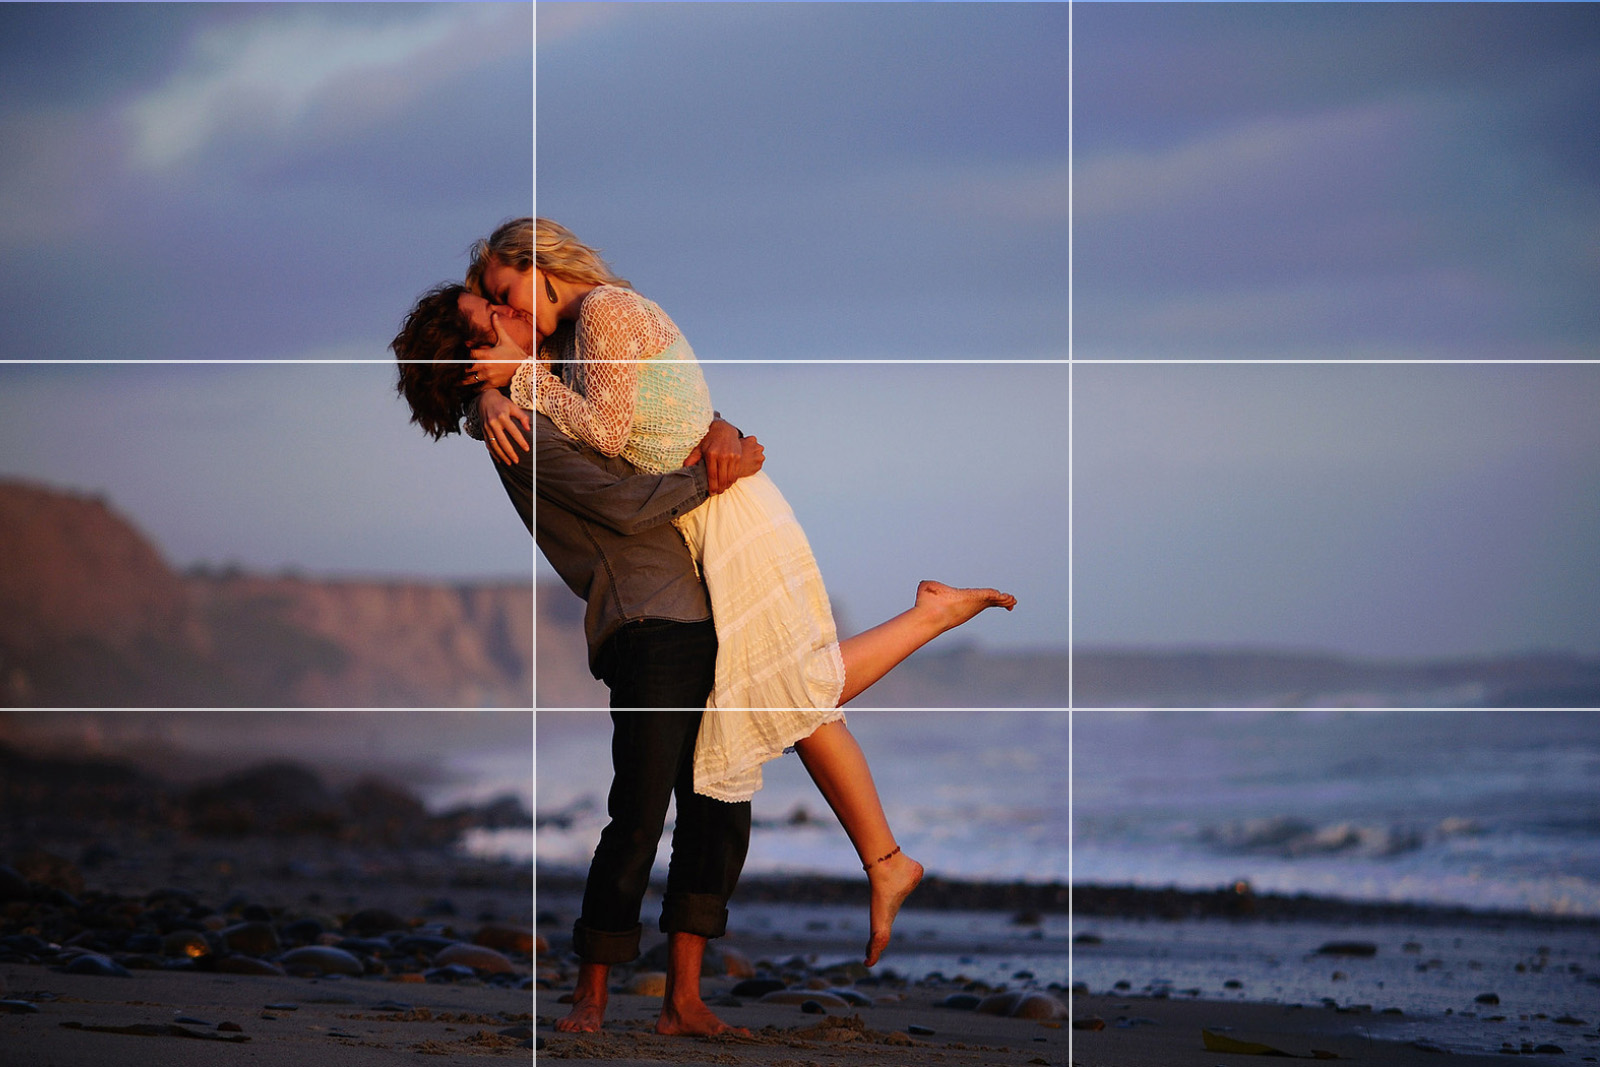
The rule of thirds is the foundational compositional guideline for a reason — it consistently produces images that feel balanced and dynamic rather than static. Divide the frame into nine equal sections with two horizontal and two vertical lines. The four intersection points are your primary compositional targets.
For portrait photography specifically, the near eye is what the rule of thirds most usefully applies to. Place it at one of the upper intersection points — which side depends on which direction the subject is facing and where you want the negative space to sit. A subject looking left with their eye at the upper right intersection has natural negative space on the left side for the gaze to travel into. The same subject centered looks rigid and static by comparison.
For more on this foundational concept, see our complete rule of thirds guide.
3. Frame your subject with natural elements


Natural framing uses elements in the environment to create a visual boundary around the subject — directing the eye inward and giving the subject a sense of place and context. Archways, doorways, windows, tree canopies, tunnels, cave openings, and gaps in foliage all function as natural frames. The framing element doesn’t need to be sharp — in fact, a slightly out-of-focus foreground frame that surrounds the subject can be more effective than a crisp one that competes for attention.
When using natural frames, take your time. Walk the location and look for shapes that could contain your subject rather than defaulting to the first clear spot you find. A window that puts balanced light on both sides of the face while also framing the composition serves two purposes simultaneously.
4. Use leading lines


Leading lines are physical elements in the scene — roads, railings, fences, rows of trees, staircases, shorelines, architectural edges — that the eye naturally follows from one part of the frame to another. When those lines point toward your subject, they become compositional arrows that guide the viewer exactly where you want them to look.
Leading lines add depth and dimension that flat, background-only compositions can’t achieve. A road receding into the background toward a subject places the viewer in the scene. A railing that converges toward the subject adds perspective and scale. Look for these lines before you position your subject — let the environment’s geometry inform where you place them, not the other way around.
See the full demonstration of these concepts:
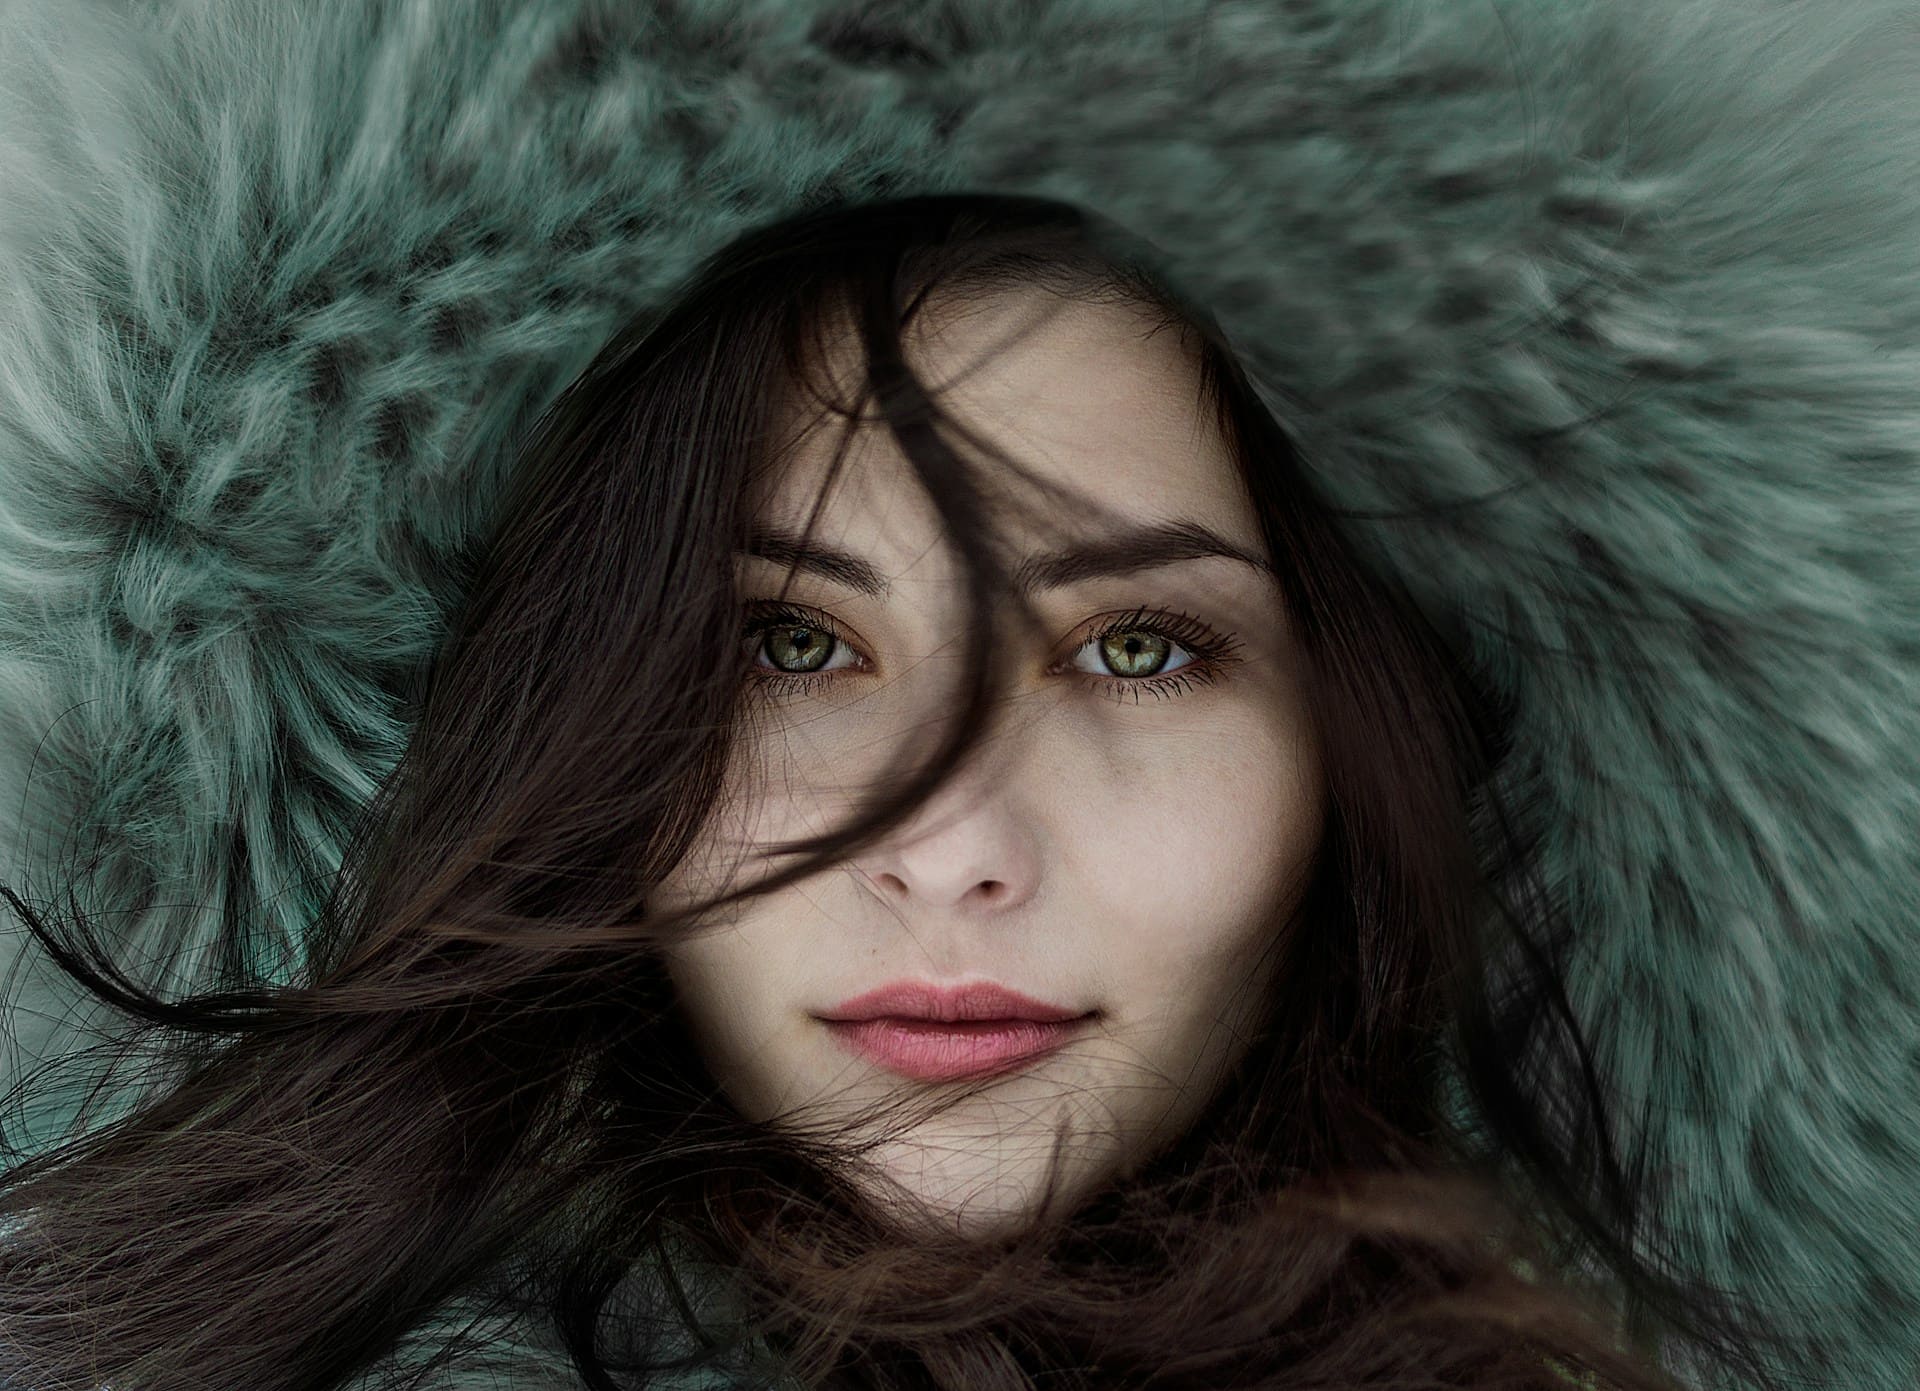
5. Embrace negative space


Negative space — the empty area around the subject — is one of the most powerful compositional tools in portrait photography, and one of the most underused. When used deliberately, large areas of negative space don’t make the subject feel small or lost. They make the subject feel significant, isolated, and purposeful. The eye has nowhere else to go.
Negative space works particularly well for editorial and advertising contexts because it leaves room for text overlay without covering the subject. It also prints beautifully — the contrast between a small, sharp subject and a vast empty expanse creates visual impact at any size. Salt flats, open skies, clean walls, calm water, and fog are all natural negative space environments that portrait photographers actively seek out.
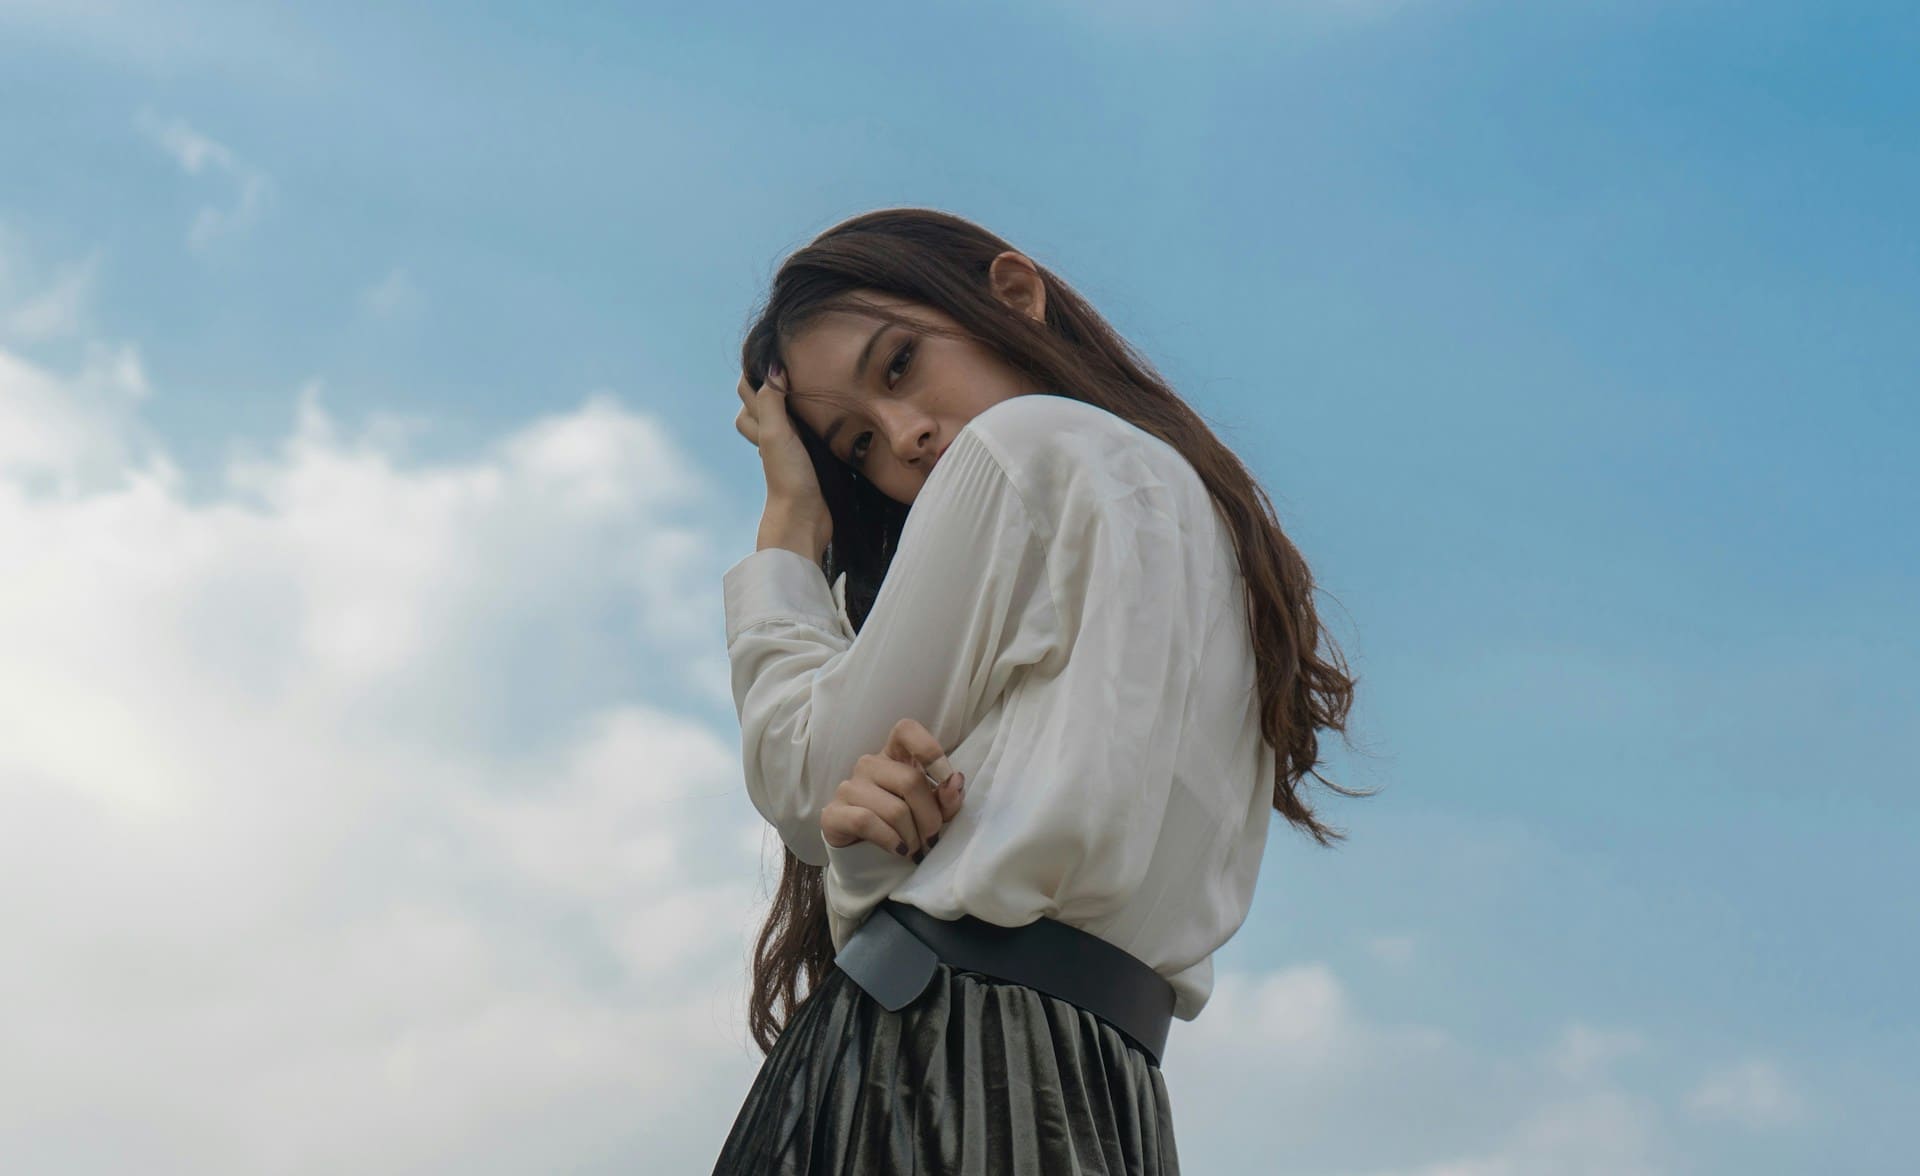
6. Try a lower perspective


Camera angle is one of the most immediately impactful compositional variables and one of the least explored. Most photographers shoot from standing eye level because it’s the natural resting position. Dropping to a lower perspective — crouching, kneeling, or lying on the ground — changes the relationship between the subject and their environment entirely.
A low angle makes the subject tower over the frame, creating a sense of authority, power, and presence. It also cleans up backgrounds dramatically — by shooting upward, you often replace a cluttered ground-level background with a clean sky or a more abstract environment. The behind-the-scenes example above shows a portrait that appears to have been shot in a professional studio but was actually taken in a warehouse parking lot. The difference is entirely the camera angle.
High angles have the inverse effect — they can make a subject appear more vulnerable, smaller, or more approachable depending on how the concept is used. Neither angle is inherently better than the other. The question is always whether the angle serves the story you’re trying to tell about the subject.
7. Frame backlit subjects over shadows


Backlit portraits are a popular look, but many photographers wonder why their backlight rim lighting doesn’t show up in the final image. The problem is almost always the background. When a backlit subject is positioned in front of a bright sky, the rim light blends into the brightness behind it and disappears. The solution is to position the subject so that part of their head — particularly the side where the rim light hits — falls in front of a darker background element.
This doesn’t require dramatic repositioning. A slight tilt of the head, a small shift in the camera’s position, or finding a darker object to sit just behind part of the subject’s profile gives the rim light somewhere dark to register against. The contrast between the lit hair and the dark background is what makes backlit portraits work visually.
8. Shift your angle for an even background exposure

A background that’s significantly brighter than the subject creates an exposure problem that no amount of post-processing cleanly solves. The eye is drawn to the brightest part of the frame, which means a blown-out or very bright background actively competes with the subject for visual attention.
The fix is simple and requires no gear: move. Walk around the subject until you find a camera position where the background brightness is closer to the subject’s brightness. This might mean shifting left or right to put a shadowed wall or darker foliage behind them, or changing your angle so the sky is no longer in the frame. The improvement in the final image is immediate and significant.
9. Add a foreground element

Most portrait photographers think in two planes: subject and background. Adding a foreground element — foliage, a window frame, an out-of-focus architectural detail, tall grass — creates a third plane that adds depth and dimension to a composition that would otherwise feel flat. The foreground doesn’t need to be sharp. A slightly blurred foreground that frames the edges of the image adds visual texture without competing with the subject.
Foreground elements also naturally isolate the subject by surrounding them on multiple sides. Instead of a subject floating against a background, you get a subject embedded in an environment — which tells a more complete story.
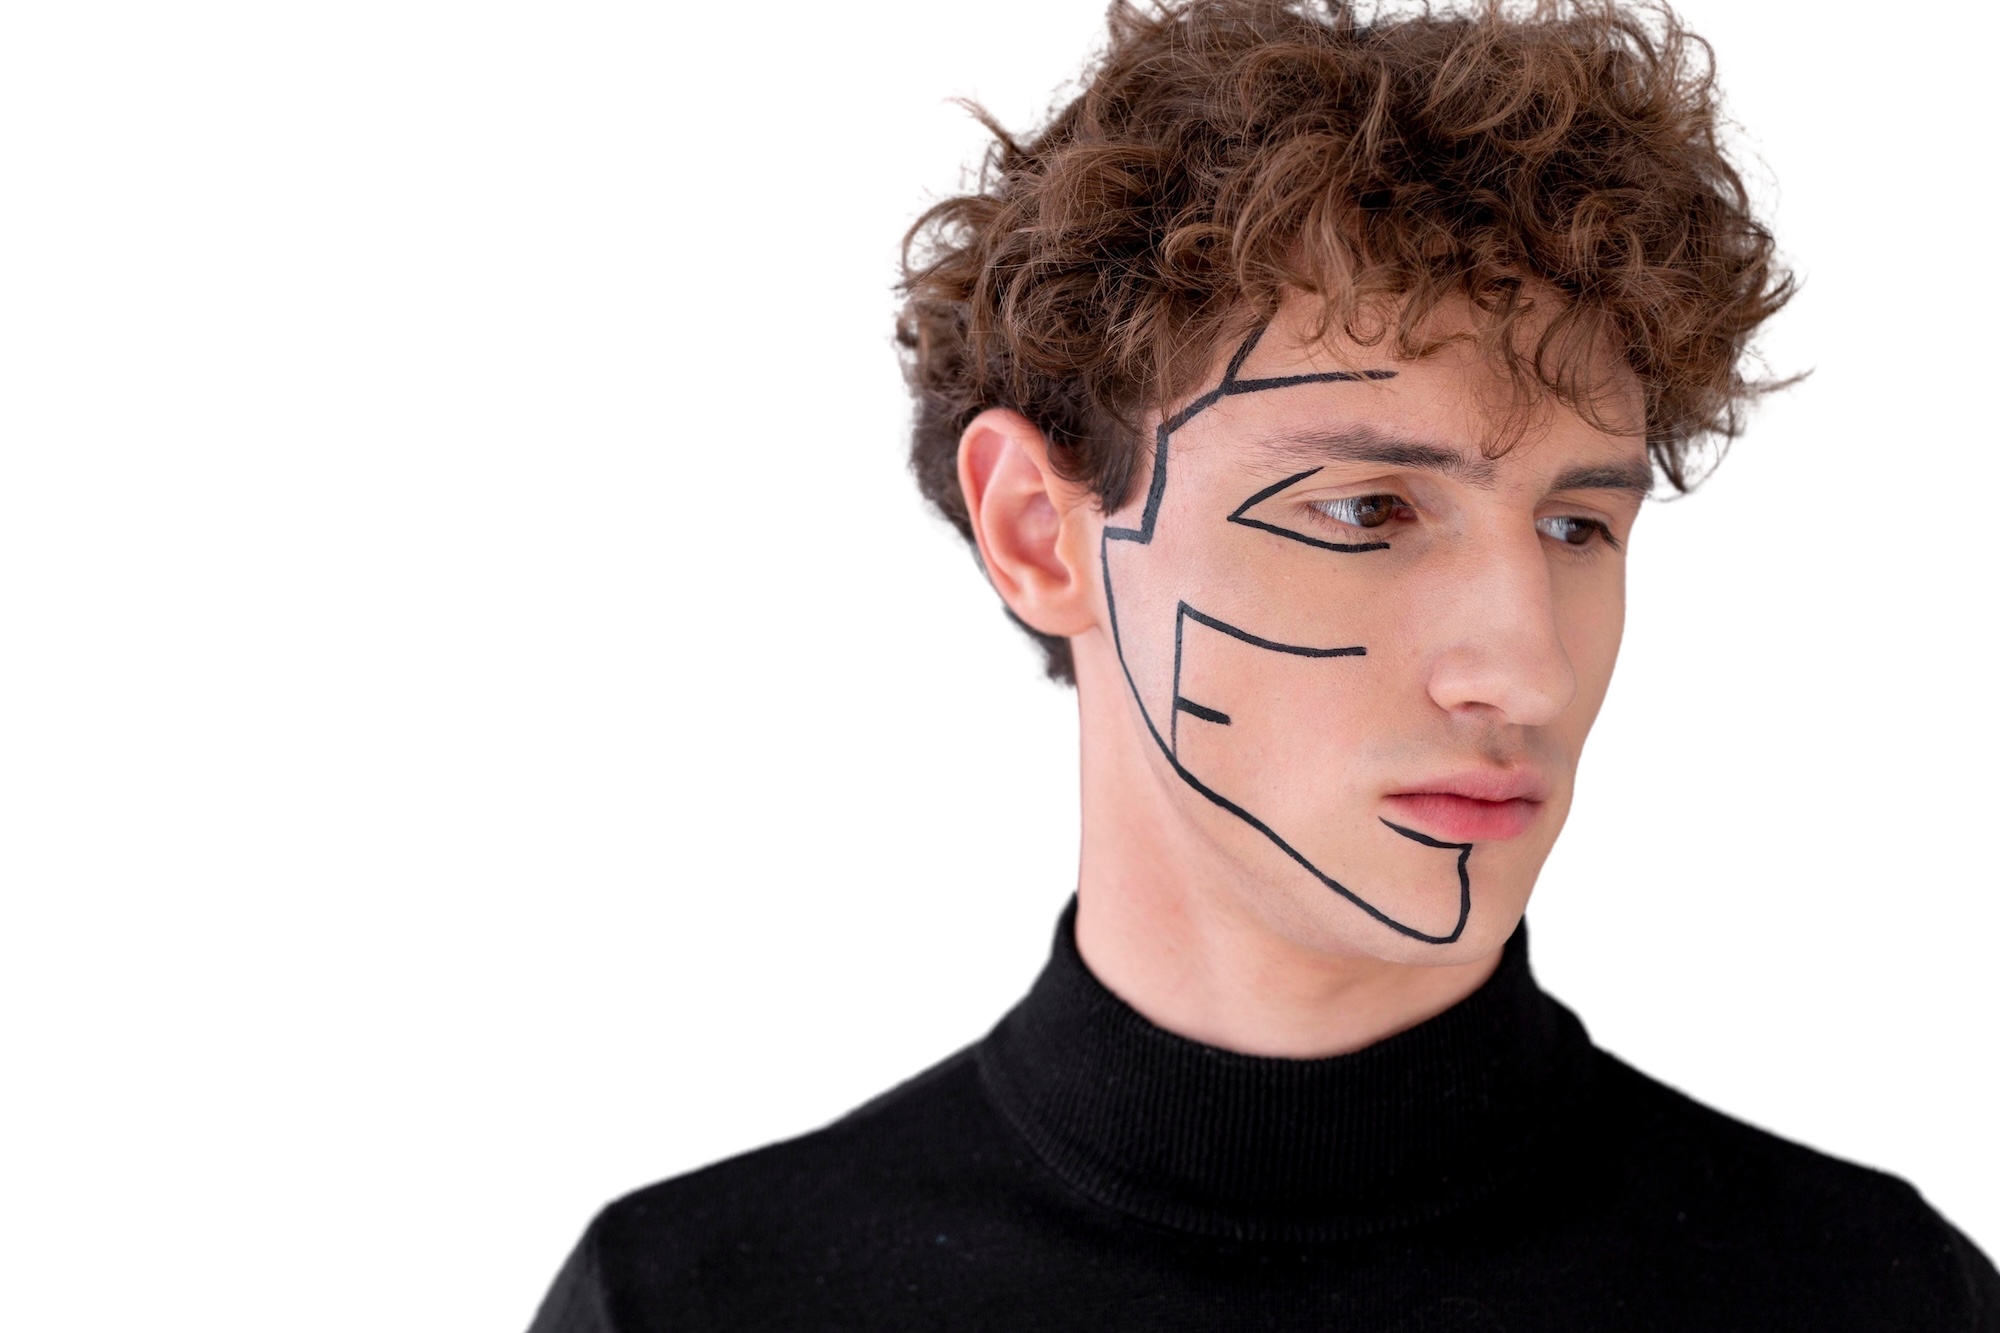
10. Angle your subject toward the light


When the light in a scene is directional, how your subject faces relative to that light dramatically affects the quality of the highlights on their face. Turning the subject toward the brightest light in the scene — even by a small amount — places highlights in more flattering positions: along the cheekbone, across the bridge of the nose, on the forehead. These highlights add dimension and refinement that a face turned away from the light can’t achieve.
This is a small adjustment that takes seconds to make and consistently improves the result. Before you shoot, identify where the brightest light is coming from and orient your subject toward it.
11. Use centered composition intentionally

Centering gets a bad reputation in composition discussions because it’s often the default choice rather than a deliberate one. When used intentionally, centered composition is powerful — particularly for formal portraits, symmetrical subjects, and images where you want to convey authority, directness, or confidence.
The key word is intentionally. A centered portrait works when the background enhances the subject without drawing the eye away, when the subject’s gaze is directly at camera, and when the symmetry of the composition feels purposeful rather than accidental. If you’re centering your subject because you haven’t thought about where else they might go, the result will look like a passport photo. If you’re centering because the scene calls for it, it can be your strongest compositional choice.
12. Composition for couples portraits
Couples portrait composition has its own set of considerations beyond single-subject portraiture. You’re managing two people, two sets of eyelines, and the relationship between them — all while maintaining the compositional principles above. These five setups cover the most effective approaches.
His/Her perspective


This setup places the photographer behind one partner as the other leads. The couple is photographed from the perspective of the trailing partner, creating an intimate, first-person feeling. Have them open toward an interesting element — an ocean view, mountains, a city skyline — and let the eyelines and hand connection guide the viewer through the frame. A 35mm wide angle works best here, allowing you to be close to the action and include the environment.
His/Her profile


One partner is behind the other, both facing each other in profile. The lighting key: the partner in front should face the shadow, allowing the partner in back to receive the primary light. A wide aperture of f/2 or f/2.8 lets the foreground partner fall slightly out of focus, creating depth and drawing the eye through to the back subject. Best shot at 35mm or 50mm.
Natural framing for couples


Step behind a natural element — a tree, rock formation, archway, or dense foliage — and place the couple in the opening. The viewer’s eye travels through the framing element to the couple beyond. Shoot between 24–35mm to show enough of the environment and retain foreground detail. Avoid shooting wide open, which blurs the framing element into a formless mass rather than a readable compositional structure.
Environmental natural


Step back and let the environment be as much of the story as the couple. Use wide angle glass to include the full scene — foreground, couple, background — with the couple naturally embedded in their surroundings rather than posed against a backdrop. Frame to show more landscape than sky, which grounds the composition. These grand environmental shots make excellent centerpiece images in an album or collage, surrounded by tighter, more intimate frames.
Environmental shutter drag


The same environmental concept as above, with a slow shutter speed added — approximately 1/4 to 1/2 sec — to introduce motion blur from the surrounding environment. Traffic, water, crowds, and moving light sources all become compositional tools when rendered as motion blur around a sharp, stationary couple. The blur itself creates framing and leading lines that direct the eye toward the couple. Use a tripod or very stable surface and a wide angle lens to exaggerate the motion effect.
Making it work in post: editing for composition


Composition doesn’t end in camera. Post-processing — particularly in Lightroom — gives you tools to reinforce compositional intent after the fact. Cropping can fix framing that was slightly off. More importantly, selective brightness adjustments direct the eye in ways that complement the in-camera composition.


Our eyes are drawn to brightness. Selectively darkening the background using Lightroom’s AI Select Subject mask — or a radial burn applied over the background — separates the subject from the environment in a way that works with the viewer’s natural visual tendencies. You’re essentially doing in post what you’d do with light in a controlled studio environment.


The workflow: apply a base preset, use AI Select Subject to darken the background, add a radial burn for a vignette, use a gradient to address any bright corners, then create another subject mask to subtly lift the highlights on the subject. Keep the adjustments subtle — the goal is natural separation, not an obvious HDR-style edit.
[Video: youtu.be/TfFm3QISuuY]
For more on portrait lighting that works together with these compositional principles, see our Photography Lighting hub. And for the complete portrait photography progression including posing, lighting, and business, visit our Portrait & Posing hub. Our Photography 101 Workshop covers all of these composition fundamentals with live demonstrations and field exercises.
Frequently asked questions about portrait composition
Where should I place the subject in a portrait?
The rule of thirds intersection points are the most reliable starting position — place the near eye at one of the upper intersection points with negative space in the direction the subject is facing or looking. From there, let the specific scene, lighting, and story you’re trying to tell guide whether you move toward centered, off-center, or into a more environmental placement. There’s no single correct answer, but defaulting to center is almost always the weakest compositional choice unless the scene specifically calls for symmetry.
What focal length is best for portrait composition?
It depends on the composition type. For tight headshots and flattering facial proportions, 85mm to 135mm on full frame is the standard — the compression flatters facial geometry and the working distance gives the subject comfort. For environmental portraits where you want to include surroundings, 35mm to 50mm lets you work closer to the subject while including the context. For wide environmental couples portraits, 24–35mm exaggerates depth and scale. Avoid going wider than 35mm for tight headshots — the perspective distortion at close distances is unflattering on faces.
How do I avoid distracting backgrounds in portraits?
Start by moving, not by opening your aperture. Walk around the subject until you find a camera position where the background is naturally cleaner, darker, or more complementary in color to the subject. Then adjust aperture as a secondary tool if needed. Also check the brightness relationship between subject and background — a background that’s significantly brighter than the subject will compete for attention regardless of how blurred it is. Shifting your angle to find a background at similar brightness to your subject is often the single most impactful compositional move available.
How do I compose a portrait of two people?
The most important element in couples portraits is the relationship between the two subjects — their eyelines, the connection between them, and how they’re positioned relative to each other. Start with one of the five couples compositions covered above: perspective, profile, natural framing, environmental, or shutter drag. Then apply the same background and lighting considerations as single-subject portraiture. Pay attention to what connects the two people visually — hand positions, eyelines, the direction they’re facing — because those connection points are what the viewer’s eye follows through the frame.


