Apple first introduced Portrait Mode to iPhone users back in 2016. With each new annual Apple update, the iPhone camera gets stronger, more capable, and more realistic. Today, the iPhone Portrait mode is a powerful feature that allows users to capture professional-looking portraits with a shallow depth of field. By understanding its capabilities, limitations, and following some essential tips, you can make the most of this feature and create stunning portraits with your iPhone. In this article, we will explore how to effectively use the iPhone Portrait mode to capture captivating portraits.
Video: How to Use Portrait Mode on iPhone
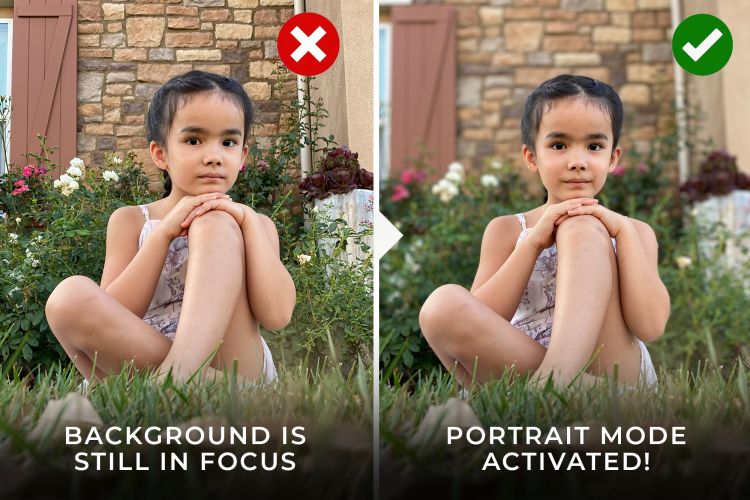
In this short masterclass, we expand on the 20 Tips and Tricks for iPhone Photography that we covered in a previous article and teach you all about the iPhones Portrait Mode. No matter how tempting, I am going to advise you not to photograph something as basic and boring as the image on the left. I’ll walk you through exactly how we achieved the image on the right and how to use Portrait Mode on iPhone so you won’t struggle with it ever again!

Watch the full tutorial below, and if you enjoy this type of content, make sure you check out our newest release: Creative Photography 101!
iPhone Portrait Mode Tips
Here are the tips we presented in the short video, along with additional tips for capturing beautiful iPhone Portrait Mode photos.
Understand when to use it and when not to use it
The Portrait mode is specifically designed for standard portraits, where the subject is the primary focus. It excels at creating a pleasing separation between the subject and the background, blurring the latter for an aesthetically pleasing effect.
However, it may not be suitable for wide-angle shots or environmental portraits, where you want to capture more of the surroundings. It can also struggle with large groups. While in each of these scenarios, the phone will still take a picture, you’re better off using the standard photo mode. Consider the context and intent of your photo to decide whether to use Portrait mode or opt for other shooting modes.
Understand the limitations and sacrifices of Portrait mode
Before diving into Portrait mode, it’s important to be aware of its limitations.
- Firstly, Portrait mode may not support live mode.
- Additionally, there might be a slight delay between pressing the shutter button and when the photo is actually captured. Therefore, timing your shots becomes crucial to capture the desired moment.
- Portrait mode might also result in a slower frame rate compared to regular shooting modes, making it challenging to capture moving subjects.
Find a Background, Less Busier the Better!
In order to create the Portrait Mode look (shallow depth of field), the iPhone camera uses depth mapping to figure out what is in the foreground of the image. Data from the wide-angle and telephoto lenses are used to compute a depth map, which then artificially blurs objects depending on how far they are from the in-focus subject.
Opt for backgrounds that are less busy and less distracting, allowing the subject to be the focal point. Solid-colored walls, natural landscapes, or simple textures can work well. By minimizing visual clutter, you can draw attention to the subject and create a visually pleasing composition.
Create Distance Between You and the Subject

To utilize Portrait mode effectively, create some distance between you (the photographer) and the subject. The iPhone prompts you to ‘Move Further Away’ when it can’t detect a clear subject. This likely means your camera is too close to the subject for the technology to map the depth. This will take some trial and error, but start making small adjustments by taking one step at a time away from your subject until you see the background blur. Portrait mode works best at a moderate distance. If you move too far away, the camera may struggle to detect the subject properly and apply the desired depth of field effect.
Choose a Flattering Perspective
Unlike the standard lens that comes with iPhones (~28mm equivalent), the Telephoto lens is a much more zoomed-in focal length (~52mm). This means that when you switch from the standard lens to Portrait Mode you’re going to see a more zoomed-in image on your phone. In this example, you’ll see that we can still see some of the concrete sidewalk in the frame, and it takes away from the green landscape around our subject. To avoid that, I rotated the lens and brought it closer to the ground to conceal the concrete. Play around with your framing to ensure you’re still in a position to blur out the background.
Pose & Photograph Your Portrait!

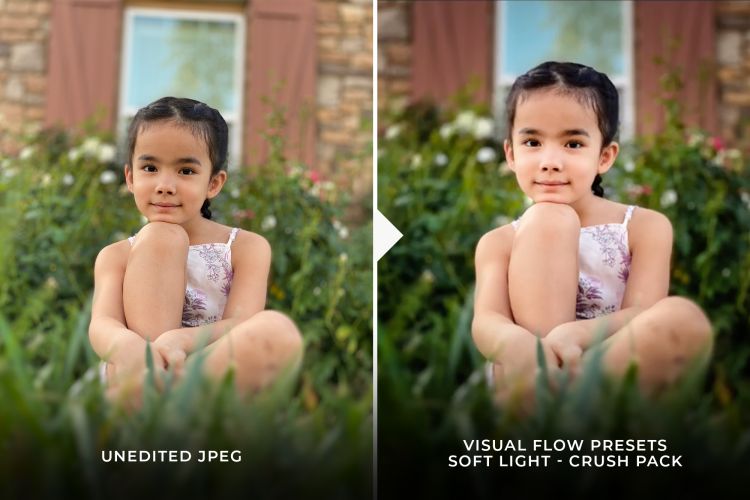
There’s nothing left but to shoot! If you move from your original position or have your subject move, the phone may take a couple of moments to adjust to the new position and give you the same message as we saw in Step 2; however, it should be pretty quick to detect subtle movements. The final image was edited in Lightroom Mobile using Visual Flow Presets using the Crush Pack!
Conclusion
With the iPhone Portrait mode, you have a powerful tool at your disposal to capture stunning portraits. By understanding its strengths, limitations, and following the tips outlined in this article, you can elevate your portrait photography game. Remember to experiment, practice, and develop your own style while utilizing the iPhone Portrait mode to create captivating and professional-looking portraits.
If you enjoyed this tutorial on how to use Portrait Mode with iPhones, check out Creative Photography 101, our newest course dedicated to teaching you how to shoot and edit pro photos with just your phone. All photos in this course were taken on my iPhone 11 Pro Max to emphasize that it isn’t about the gear, it’s about the magic you can create with any camera!


Get Connected!