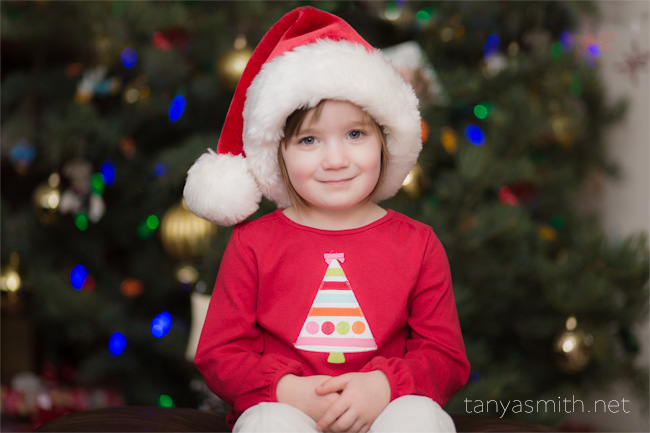
Christmas Bokeh Tutorial
This time of year I like to take a Christmas themed photo of my kids just for fun. We got a real tree for the first time this year and it practically takes up our entire living room. I wanted to create a photo with some large colorful bokeh effects in the background from the tree lights, but since we’re in such a tight space I wasn’t able to get the depth of field I needed for such an effect.
“No problem,” I thought. “I’ll just take some separate photos of the lights and add them in Photoshop.” Of course, it would be a lot easier to just get this one right in camera but when I don’t have the right equipment, time or space to get the look I want, it’s nice to know I have resources available to fix it later.

For the portraits, I used a Canon Speedlite mounted to my camera and bounced the light off the ceiling and wall behind me. This allowed me to have a darker background even though I was shooting during the day with a lot of ambient light. This was shot at ISO 100 with a Canon 85mm f/1.8 lens at f/1.8, 1/200 of a second. My flash was set at 1/2 power.
After I finished with the portraits I turned off my flash and changed the focus on my lens to manual. I moved closer to the tree and shot the lights out of focus. I shot this at the exact same settings as the portraits, minus the flash.
After processing my images in Lightroom with the SLR Lounge Lightroom Presets (I just used the standard import preset and adjusted the white balance) I opened both images in Photoshop. I set the bokeh layer to Linear Dodge. Then I added a layer mask and erased the effect from the face and body. Here’s how it looked:
Next, I wanted to add a little more texture and warmth so I opened one of the foundation textures from the SLR Photoshop Paper Texture Collection in Photoshop. I used a frequency separation action to erase the texture from the face. To read a full tutorial on how to use textures in your images, check out my article from last week: HOW TO CREATE A TEXTURED STILL LIFE FINE ART PHOTOGRAPH.
And here’s a look at the final image.
Christmas Bokeh Conclusion
How would you use this technique? Please leave a link in the comments. I’d like to see what you come up with.
CREDITS: All photographs by Tanya Smith are copyrighted and have been used with permission for SLR Lounge. Do not copy, modify or re-post this article or images without express permission from SLR Lounge and the artist.


Get Connected!