
If you’ve used Lightroom for any amount of time, you’re likely aware that it houses a number of modules: Library, Develop, Map, Book, Slideshow, Print, and Web. Most people are familiar with the Library and Develop modules as they’re the most commonly used for importing and editing photos in Lightroom. However, among the other modules, the Print module is home to an incredibly useful tool that can help you create collages for sharing on your blog, portfolio, or social media platforms. I’m referring to Lightroom’s Print Templates. While other apps like InDesign and Photoshop offer a means to accomplish a similar end product, getting it done in Lightroom eliminates the need to have to export the images and/or learn how to use the other apps if you’re unfamiliar with them.
In this article, we’ll cover how to create a Lightroom template and we’ll show you how to use it. As an added bonus, we’ve included a few free templates that you can download, install, and use for yourself.
What Are Lightroom Templates?
In basic terms, Lightroom templates allow photographers to arrange images, text, and settings for printing or posting on social media, blogs, and so on. Originally designed for the purpose of sending photos to a print lab in a single image/contact sheet (to be cut after printing), Lightroom templates have taken on a more diverse role in the age of social media. Among other uses, the templates inside Lightroom’s Print module can be used to make collages, Facebook Timelines, and other marketing assets.
There are three types of layouts for Lightroom templates in Lightroom Classic:
- Single Image/Contact Sheet: As mentioned above, a single contact sheet would often contain various images to be cut after printing.
- Picture Package: Picture packages allow you to print the same photo in a variety of sizes. One common application for this package is school/class portraits.
- Custom Package: You can use the custom package layout to adjust various printing features for a particular set of photos. For example, you can adjust the spaces and margins between and around your images, add text if desired, or even set your paper size for printing.
Enough with introductions! Let’s get started!
Create Your Own Lightroom Template
Step 1. Open the Print Module
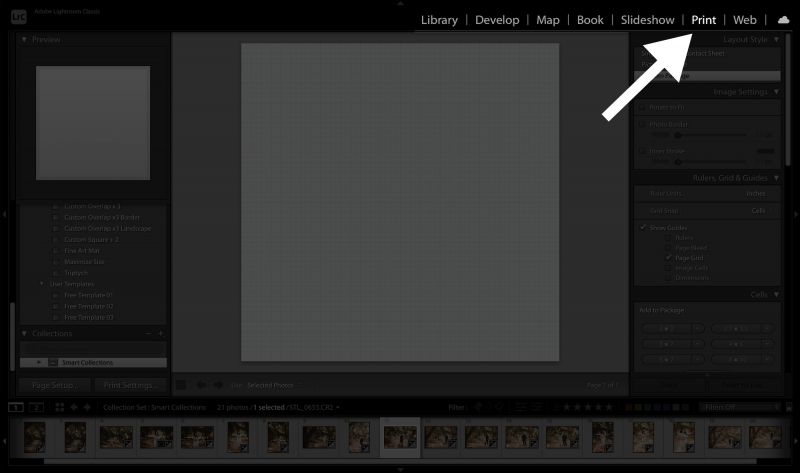
With Lightroom open, locate and select the Print Module. You’ll find it located between the Web and Slideshow modules in the upper righthand corner.
Step 2. Set the Parameters for Your Lightroom Template

Once you’ve opened the Print Module, it’s time to set the parameters for your Lightroom Template. Here are three basic steps to follow for getting through this part of the process:
1. Choose Your Layout Style: At the top of the article, I mentioned the three different types of layouts that you have to choose from: Single Image/Contact Sheet, Picture Package, or Custom Package. Of course, the style you choose will vary based on your purpose. Just know that you can switch it up later, so it’s not the end of the world if you find another layout style works better further into building the template. It’s worth noting that different features (which we’ll discuss below) only work with certain styles. In my experience, the “Custom Package” is best for building a template with a more dynamic design, but you won’t need that flexibility if you’re simply putting together a contact sheet.
2. Select Your Print Job Panel Settings: More often than not, you’ll want to choose the “JPEG File” option for the “Print To” dropdown menu.
3. Set Up Your Page: To set up your page, click the “Page Setup” button in the lower lefthand corner. This button will allow you to choose the size of your page, which you can customize if necessary (see the images below). This comes in handy if you’re creating a template to share a collage on Instagram or a blog, for example. You can also choose from a number of standard paper sizes for printing purposes. To customize your paper size, click on the Paper Size drop down menu, select the “Manage Custom Sizes” option, dial in your settings, and then hit Save and name your custom paper size.

[Related Reading: Lightroom Develop Module Basics | Quick Reference]
Step 3. Choose or Design a Template

You can either choose a pre-designed template from the template browser on the lefthand side of the module, or you can add “Cells” to your blank canvas and design your own. Alternatively, you can combine both methods and add cells to a stock template from the template browser. To add cells, click on the size of the cell you want added (2×2, 4×6, etc.), and then move and/or resize the cell to suit your design.
Be sure to disable the “Lock to Photo Aspect Ratio” option under the Cells panel so that when you add your images (see the next step), the images won’t affect the shape and size of the cells.
Step 4. Add Your Images

Now for the fun part. It’s time to select and add images to your new template. To do this, simply choose an image from the film strip below the template and drag it into the desired cell. Again, be sure that you’ve disabled the “Lock to Photo Aspect Ration” option so that you remain in control of your image cells. Once you’ve added your images, you can further enhance your design by intentionally positioning the images and adjusting the page margins and cell sizes. Here are a couples tips for doing that.
1. Position Your Images: The Image Settings tools you can use to position your images depend on which layout you’re using.

- Zoom to Fill (Single Image, Contact Sheet, Picture Package layouts): If you’re placing a rectangular image (say 4×6) into a square cell, then one of two things will happen. First, if the entire image “fits” into the cell, then there will be leftover white space in the cell, meaning the image won’t “fill” the cell. Or, you can select “Zoom to Fill” in the layout options mentioned above and the image will fill the cell. If you need to reposition your image within a cell, hold the Command/Control button and then click and drag on the image.
- Rotate To Fit (Single Image, Contact Sheet, Picture Package layouts): This tool allows you to rotate pictures if necessary so that as much of the image as possible fits into the cell. Personally, I can only see using this option if your intention is to print and then cut the images; otherwise, it messes with the overall design aesthetic of the template and makes for an odd layout with horizontal images turned over on their side, for example.
- Repeat One Photo Per Page (Single Image, Contact Sheet layouts): You can repeat the same image in each available cell of the entire sheet, which is great for printing and cutting the sheet to share hard copies of the photos with others (see the image above).
- Photo Border (Picture Package, Custom layouts): This option outlines every image with a frame, which you can then adjust to suit your design.
- Inner Stroke (All layouts): Like the Photo Border, this option adds an inner border to the images and also allows you to make further adjustments.
2. Adjust the Page Margins and Cell Sizes: The Guides and Layout Panels allow you to adjust the page margins and cell sizes. You can use the sliders to make adjustments (when available) or click and drag the guides on the actual template and adjust accordingly.

The available “Guides” will change, again, based on which layout type you’re using for the template (see the image below).

The Single Image/Contact Sheet Layout Style includes a “Margins and Gutters” option with sliders while the Custom Package and Picture Package options feature a “Page Grid” option. The sliders definitely make it easy to make adjustments when using the Contact Sheet Layout Style. The “Cell Spacing” and “Page Grid” sliders, in particular, simplify the process of adding images/cells to the layout and quickly spacing them out. The Custom Package Layout Style requires a bit more manual labor when it comes to adding to the layout, and it requires more finessing with “borders” and other options to dial everything in.
Step 5. Save Your Collage

Once you’ve finalized your design, you’ll need to save your collage. Click on the “Print to File” button in the lower righthand corner of the module, name the file, and choose a location in which to save it. You might consider resizing the file before attempting to post it on social media.
Step 6. Save the Template

Do you love the template you created? If you think you might want to use it again, be sure to save the template. Lightroom makes it easy to save templates under the Template Browser for future use. Simply click the “+” at the top of the “Template Browser” panel.
Additional Tips for Using Lightroom Templates
Tip 1. Update Templates

If you decide somewhere down the line to make changes to one of your existing templates, you’ll be happy to hear that they’re super easy to update. After you’ve made your changes, hover over and right click the template you wish to update under the Template Browser. When you see the pop-up menu, select “Update with Current Settings.” That’s it.
Tip 2. Delete Templates
If you want to clean house and remove custom templates that you no longer need or use, Lightroom makes it easy to do so. Follow the same steps as the tip above, only choose “Delete” when the pop-up menu appears. Again, that’s it.
It’s worth noting that you cannot delete the templates that were already included with Lightroom.
Tip 3. Import & Export Templates

In the event you want to share templates with others, which we plan to do at the end of this tip, you can follow these simple instructions for importing and exporting Lightroom templates, which will include a .lrtemplate extension.
1. Import Lightroom Templates: Hover over the “User Templates” panel under the Template Browser and right click to see the pop-up menu. Select import and then follow the prompts to locate the template you wish to import.
2. Export Lightroom Templates: Exporting your templates works in the same fashion. You can follow the steps above and then choose a location in which to save your template.
Free Lightroom Templates
Download these three free Lightroom templates to use at your discretion, or—at the very least—use for practice with importing shared templates.
[Related Reading: How to Create Presets in Lightroom Mobile | Quick Reference]
Conclusion
I hope you enjoyed this article on how to create and use Lightroom templates. Regardless of the the genre in which you shoot, you can use Lightroom templates to save time while creating collages to use on your blog, portfolio, or social media platforms. If you want to dive deeper into your Lightroom education, be sure to check out our Mastering Lightroom workshop, which can help you learn everything from the interface and catalog structure to mastering Lightroom’s raw processing.


Get Connected!