What Is a Grey Card for White Balance?
A gray card is one of those small tools photographers carry to get their exposure and white balance just right. One side is grey and the other is white. It doesn’t look like much, but it can make a huge difference.

Most of the grey cards are collapsible, so they fold down into a pouch. You just open it when you need it, use it, then pack it away again. It even comes with a little instruction sheet. That way, you know exactly how to use it without guessing.
Now, you’ll see a lot of cheap versions floating around online. The problem with those is that the color accuracy might not be right. The white side could be slightly off, drifting toward cream instead of pure white. That tiny difference means the camera won’t be getting a proper reading. The gray side is even more important because it needs to be exactly 18% gray. That’s the middle point between pure black and pure white. If the card is darker or lighter than it should be, your exposure readings won’t be correct. That’s why it’s worth spending the extra money for one that’s reliable.
Why Use a Grey Card to Take an Exposure Reading?
Your camera has a metering system built in. What it does is take the scene you’re pointing at and assume that it should average out to 18% gray. That’s the standard level cameras are designed around. But in real life, that assumption isn’t always true.
For example, you’re shooting a landscape. The sky is usually much brighter than that 18% middle gray, unless it’s a stormy day where the clouds block everything. On the other side, the ground might have dark elements like a deep lake, which could end up looking slightly black.
The camera doesn’t know this, and it just averages everything to gray. This is where exposure problems come in. A bright sky might be brought down too much, which makes it look dull. A dark subject might be lifted too high, looking washed out. The only way to guide the camera properly is to use a gray card. By pointing the camera’s meter at the gray card, you’re telling it, “This is what middle gray looks like.” That gives the camera a neutral reference, and from there, it can calculate exposure far more accurately.
How to Set White Balance with a Grey Card?
White balance is about keeping your colors accurate. Different light sources change the color of a scene. Sunlight, indoor bulbs, or even shade can shift colors to yellow, blue, or green. A gray card helps you correct that.
To set the white balance properly, the first step is to point your camera directly at the gray card so that it fills the entire frame.
On your camera, press the custom white balance button and choose one of the custom slots.
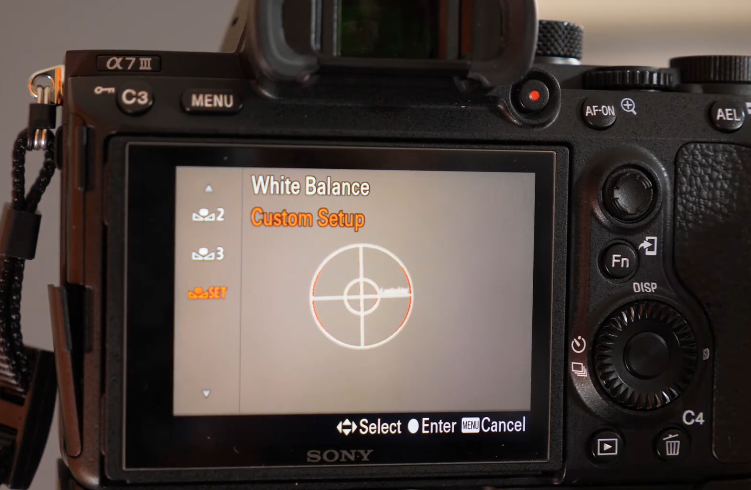
What you do now is go into “Set.” Once there, press the center button. After pressing it the first time, press it again. That second press is important because it tells the camera to actually read the information from the gray card. After it collects that data, you get to choose which custom slot to save it to.

At this point, you’ve taken a proper white balance reading using the gray side of the card.
You can also flip the card and use the white side to take a white balance reading. Before doing this, though, it’s best to put your camera into full manual mode. The reason is that you want to control the exposure yourself instead of letting the camera adjust it.
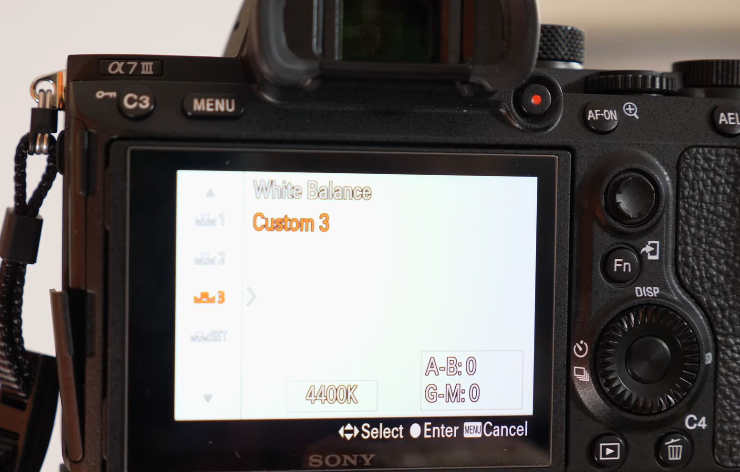
As you point at the white side, you might see zebra stripes appear on the screen. If you adjust your shutter speed, for example, changing it from 1/40th of a second to something higher, you’ll see more zebra stripes showing up, which tells you it’s becoming overexposed. The goal here is to bring the exposure down just enough so there are no zebra stripes showing on the white side when you take the reading. But when you do this, one of your settings in the custom menu, which you haven’t set, shows an incorrect result. That comparison shows how accurate your readings are when saved correctly.
Now, to see what happens if you try this while overexposing, you can intentionally bring the zebra stripes back on by raising the shutter speed too high and blowing out the white card. Then, if you go into the custom menu and try to take a reading, the camera will still let you save it. When you check the saved settings, you’ll notice that one of the custom settings may look off.
Should I Use a White or Grey Card for White Balance?
The histogram is your backup check. If you look at its readings for the white balance using the gray or white card, the difference is clear. In the correctly exposed gray card reading, the red, green, and blue channels stack neatly and line up horizontally in the middle.
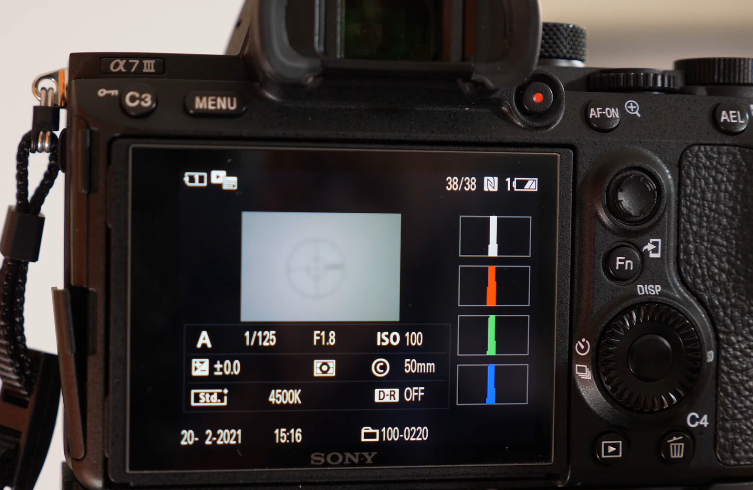
That’s the sign of a perfect white balance reading.
But in the overexposed white card shot, the red, green, and blue channels tend to push all the way to the far right edge of the histogram. That clipping means some detail is lost beyond what the histogram can show, so the reading isn’t accurate.
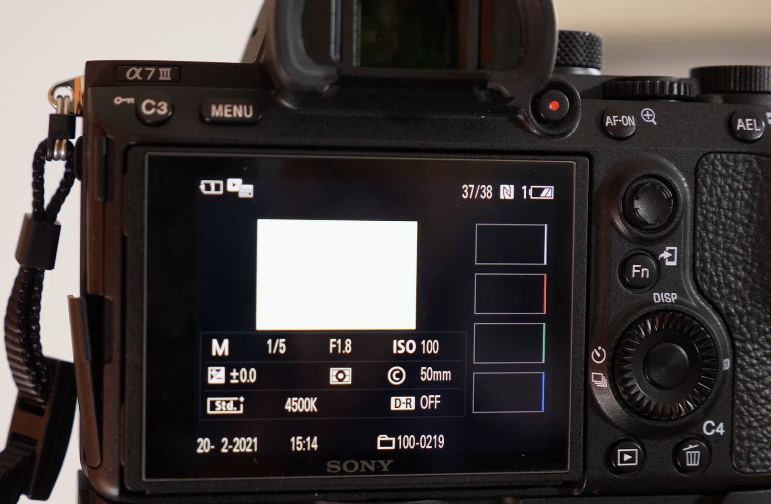
This is why many photographers say you should only use the gray side for white balance. It’s safer, and it avoids the problem of blown-out highlights. But as long as you expose the white side carefully, bringing it down by half a stop or using zebra warnings to guide you, it can work fine too. The key is making sure the white isn’t pushed beyond what the sensor can record.
Related Articles to Grey Card White Balance Definition

Understanding White Balance & Color Temperatures in 8 Steps

Photoshop Tutorial | Secret Tip For Nailing White Balance With Ease