
ACDSee Photo Studio Ultimate 2018 and Professional 2018 are the go-to products for all creative photography workflow needs. These streamlined products supply innovative RAW editing adjustments alongside professional-grade digital asset management tools, and Ultimate rounds out its photo manipulation capabilities with a layered editor.
Using Smart Erase
Has your perfectly beautiful urban shot been photobombed by an oblivious pedestrian? Has your engagement portrait been interrupted by strangers? Do you prefer not to immortalize Venetian graffiti? Have no fear! You can remove unwanted objects from your images by selecting or brushing them and using the Smart Erase function. Smart Erase will analyze the image and predict how to best fill in the brushed or selected area with the most likely, natural background.
Going in, it’s important to realize that you can only remove an area covering 25% or less of your image. There’s no point in trying to erase half of your image. It’s just plain not going to work, so keep that in mind.
Begin by selecting the image you want to manipulate in the File List pane in Manage mode. Then enter Edit mode.

Once in Edit mode, there are two ways you can approach removing objects from your image: brushing or selecting.
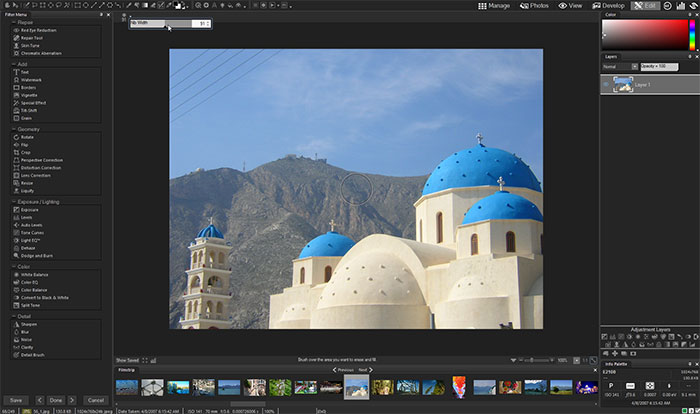
Brushing
To erase an object using the Smart Erase Brush tool, all you need to do is press the Smart Erase Brush button located at the top toolbar, or enable it by pressing CTRL + E.

You can tweak the size of the brush’s nib width by adjusting the slider at the top of the image panel, or by using your mouse wheel.
Then brush the object. As soon as you let go of your mouse button, bam! Smart erasing is applied. If the object is not entirely gone, keep brushing over the area and releasing the mouse button until you get the results you want.
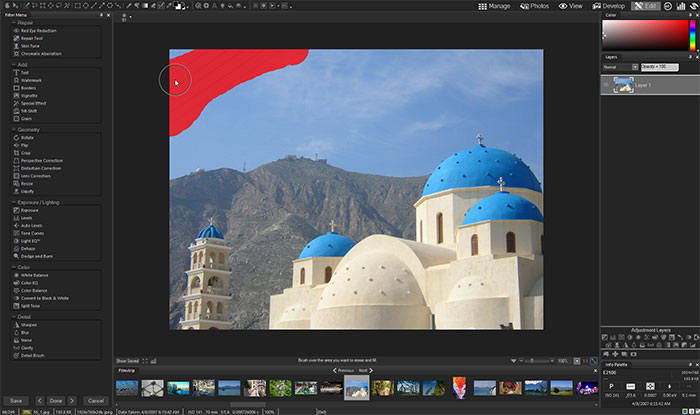
You will find you get the best results by brushing outside of the limits of the object that you are trying to erase. For instance, if you are erasing a telephone pole, do not painstakingly brush only the pole. Use a larger brush and spill over onto the sky and surrounding area. This will help ACDSee to analyze what background Smart Erase needs to blend into.

Selecting
To erase an object using a Selection tool with Smart Erase, you will first need to choose how you want to make your selection. Some work better for this case than others.
I recommend the Freehand Lasso, which involves simply dragging a line around the object, and then when you release the mouse button, it auto-completes.
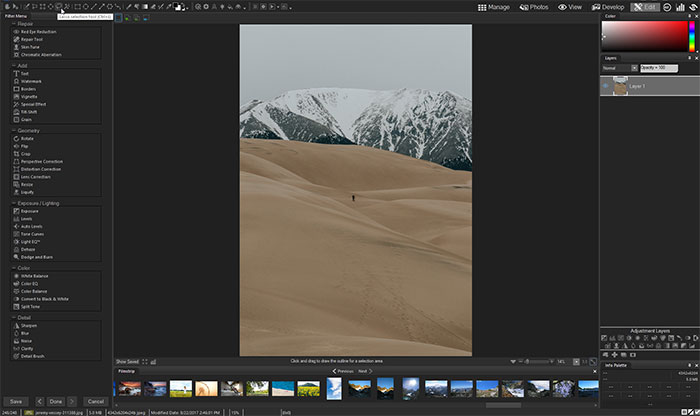
In other words, the end of the line connects to the start. This is ideal for creating a really loose selection so that ACDSee has more background information to work with.
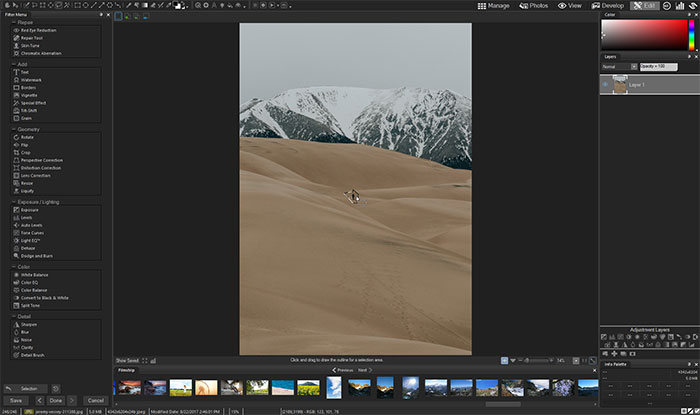
Once you have your selection made, you simply go to Select | Smart Erase. Repeat as necessary until the object is removed to your satisfaction.

Pro tip: If after you have removed the object, the image still doesn’t have the natural look you’re going for, it may be helpful to follow up by using the Repair tool. In the Repair group, choose the Repair tool. Try selecting Clone. You right-click on an area of the image that you want to set as the source point. Then, as you brush with the left mouse button, pixels are copied from the source point and blended into the area you’re brushing. But keep in mind that the source point is based on a location relative to your cursor, so you’ll need to set a new source point often as you brush.
That’s all there is to it! ACDSee Photo Studio Ultimate 2018 and Professional 2018 take all the exertion out of removing what you want from the photo and keeping just exactly what you want.


Get Connected!