One of the best ways to add production value and create more dynamic shots in your video production is by adding a slider. Unfortunately, quality bearing-based sliders can be quite expensive. If you don’t mind going DIY though, we have a great build to share with you that you can make for under $100.

DIY Camera Slider For Under $100
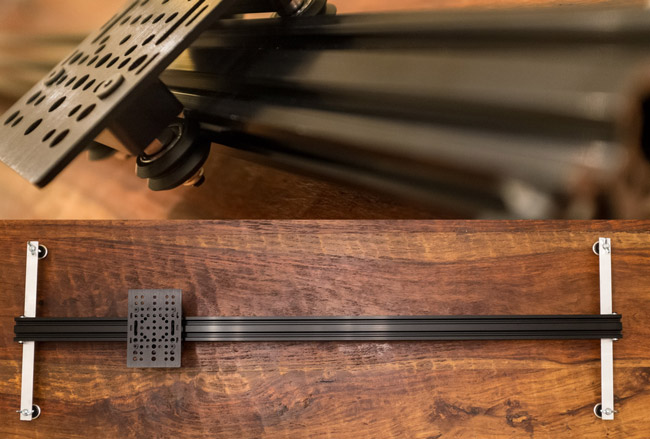
I love a good DIY build, especially one that looks as good as it works. This DIY camera slider, which is based on parts from a shop called OpenBuilds, was developed by Jones Oliver.
The idea was simple: to make a camera slider for as cheap as possible, but still worked well and could be used in front of clients without giving off a bad impression. Oliver did just that, and he was kind enough to share his build over on his blog.

The parts amounted to about $68 from the OpenBuilds.com inventory, in addition to about $9 in parts from his local Home Depot. So, for roughly $77, Oliver was able to build this functioning camera slider that looks good and performs well. The video below is a quick demo on how to put a similar bearing setup together and attach it to a rail.
[REWIND: DIY: BUILD AN ‘INSANELY BRIGHT’ LED LIGHT PANEL FOR $70]
If you like to DIY, and are in need of a good slider, then this is a build you may want to try out. To get the full list of parts and the how-to on putting them together, make sure to head on over to Jones Oliver’s blog to get the skinny.
If you aren’t into DIY, but are still looking for a decent slider, B&H has a great selection of sliders which you can find for as little as $149 (friction based) all the way up to higher end sliders that likely cost close to what you paid for your camera.


