In this post, I’m going to talk about a few common editing mistakes in Luminar 4, using my own images as examples. The advice I give works in most cases and just to be clear, I did exaggerate a bit in the examples to clearly demonstrate the ideas.
1. Saturation – Too Much or Too Little
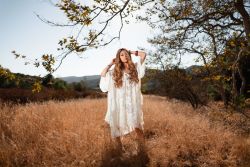
Oversaturation is probably the biggest mistake in landscape photography. When you open a raw file, the colors don’t pop. You want it to be spectacular, so you run to the Saturation slider and push it up… way too much! Saturation can be tricky, as it depends on the photographer’s tastes. But oversaturating an image is rarely a good solution. You also have to consider that your saturation will evolve along with your edits as you play with contrast and other settings.

As you can see, the first image is oversaturated. It looks very punchy, but as soon as you look at it closely, you’ll realize this is not the right approach. So even if you like well-saturated images like I do, don’t push the slider too far.

[Related Reading: How to Recover Lost Or Hidden Details In Your Images With AI Structure In Luminar 4]
If some colors in your image are already quite saturated, use the Vibrance slider. Contrary to the Saturation slider, which will act on all colors equally, the Vibrance slider will selectively increase saturation in the mid-tones and less saturated colors. In this image, for example, the rock on the left is very saturated because of the sunset, so you could push up the Saturation to 12, then push up the Vibrance so you don’t affect this already saturated area as much as the Saturation slider would. After doing so, if you like the general aspect but find that the orange in the sky is too saturated, you can open the Advanced settings where you can set the saturation color by color. In this case, click on the orange circle and bring the saturation down a bit just for that color.
2. Color Balance – Respect The Harmony Of Colors
When you’re setting the hue, saturation, and luminance of colors, be careful. The different tints have to match. It can be tempting to turn your warm tones to some kind of deep red because you like this color, but by doing so you can break the color harmony in your image. Always think about every other color when transforming one.
I’ve chosen this image from the Mer de Glace glacier as an example because there are different colors and each plays its role in creating separation between the different scenes within the shot.
There is the yellow/green and orange/red from the autumn vegetation in the foreground, orange from the light on the background mountains and sky, and the blue of the glacier connecting those two subjects. It creates a constructive color contrast between the warm tones, cold tones, and the rest of the colors.


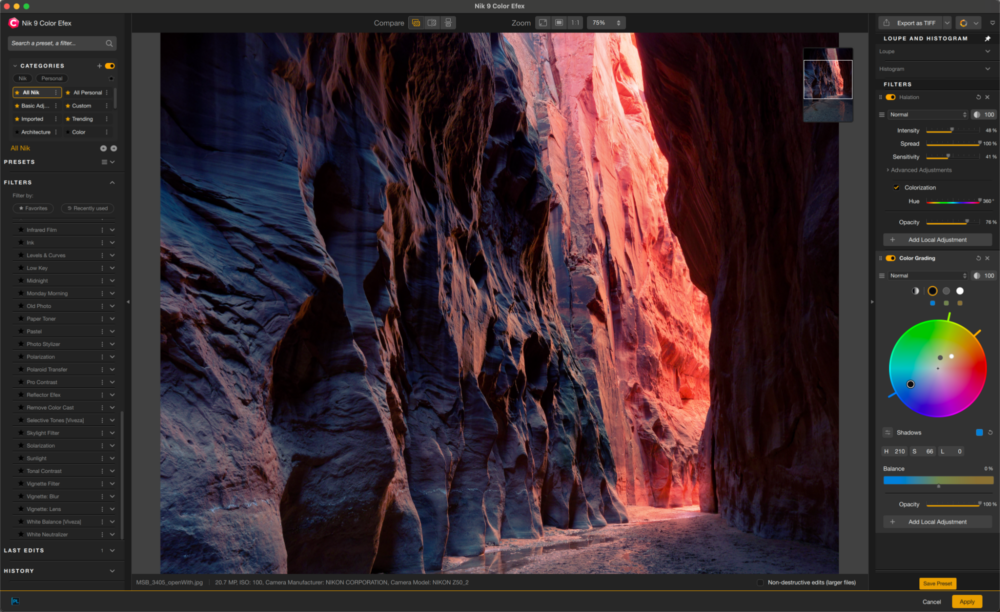
To achieve this, I used some light selective color modifications that can be made with the Advanced settings of the Colors tool in Luminar 4. Just remember to make sure all the colors match realistically.
As you can see, in the first two images, the harmony of colors has been broken and the scene looks unnatural.

Once you are in the Advanced settings menu in the Colors tool, click on the circle representing the color you want to transform and use the Hue, Saturation, and Luminance sliders to increase the color contrast. Making the light areas warmer and the shadow areas colder is a good approach with sunset/sunrise images. To do that, you need to push the blue Hue slider to the right while pushing the orange Hue slider to the left. You rarely need to go further than 15. You can then adjust the saturation of those colors and use the Luminance slider to make the image brighter or darker. You can also try to adjust the other colors.
What’s really handy with the Colors tool in Luminar is how it gathers all the tools you might need to adjust your colors in one panel, unlike in other software where there’s saturation/vibrance, then a separate HSL tool, and then a color balance tool in different panels. The Luminar interface is intuitive and simple to use, making the editing process more comfortable.
This part of post-production is very delicate, and the way you manage your colors really depends on the image. There are no predefined rules on this, but I believe good color management can make a huge difference.
3. Cropping The Wrong Way
Cropping is a powerful way to transform the essence of your image. If you miss it, the story told by the picture can be completely different.
A common mistake is to crop everything around your main subject, leaving nothing else. Empty spaces are very important in the composition of an image, and you should always think about the story you want to tell and the dynamic you want in the shot. If there are leading lines, don’t crop them, and remember the rule of thirds. This rule is not absolute, and being creative and trying a new approach is an important part of the photography process. But you’ll see this rule will help you control the composition.

In this example, the main subject is off-center, and some would try a crop to fix it. But the off-centered mountain is one of the elements that form the dynamic of this image, creating a movement left to right. Another approach would have been to crop all around the mountain, but then we’d have lost the balance between the warm light side and the cold shadow side, which are important elements of the composition. The top version is the right approach here.

My point is that your images are the addition of primary and secondary subjects but also of the empty spaces and how they’re positioned. So a tight crop isn’t always the solution.
4. Sharpening – Too Much or Not Enough
There are many possible mistakes with sharpening. The most common is sharpening too much. Another issue is trying to correct blurred areas by sharpening. In both cases, you’ll add an ugly texture to your image.
Something important to know about sharpening is that it should be done only after resizing your image for a particular use. No matter which sharpening tool you’re using, it will act stronger on a 10-megapixel file than on a 40-megapixel file. For web use, you need to reduce the size of the image first, then sharpen it for good details.

[Related Reading: How to Replace Skies in Seconds: Complete Lightroom to Luminar 4 Editing Tutorial]
In Luminar 4, the Accentuation tool offers multiple sliders, allowing for precise and selective adjustments to the sharpness. The first three sliders can be used to increase or soften small, medium, and rough details. Pushing those sliders left will soften the details, while pushing them right will make the details stronger. The Sharpen slider affects the general sharpness of the image. I would recommend not going further than 40 on this setting and not further than 8 on the Details accentuation sliders for a full-size image shot with a full-frame camera. In the Advanced settings, you’ll also find other sliders that can help you fine-tune the previous adjustments.
This image already had a lot of details that were accentuated by a previous use of the AI Structure tool, so I didn’t have to sharpen it a lot. The first image is too sharpened.

One thing I really like with the Sharpening panel in Luminar is that it allows you to be extremely precise. It not only has a basic sharpening slider. It allows you to work on the general sharpness of the image, then to work separately on the small, medium, and rough details, and then to go back again to fine-tune those adjustments through the use of a Sharpening mask and Softening slider. This is one of the most developed sharpening tools I’ve seen, allowing you to get unique results while being simple to use, even for beginners.
5. Not Developing Your Own Vision Of The Image
When you start to work on a picture, take a few minutes to think about where you want to go with it rather than starting to move sliders to see what’s happening. You could probably achieve nice images by doing so, but I believe post-production should be a way to bring the shot closer to what you envisioned. There will always be different ways to make your picture look beautiful, but what’s important is to find how you want it to be and to make it happen.
What are the main elements in my composition? How can I highlight them? What sort of ambiance do I want to show through this image? Those are some of the questions I’m asking myself before I start modifying anything.
It can take time before you’re able to define your goal for an image while looking at it unedited, but I guarantee it will make your post-production richer and more satisfying.
Conclusion
I think you’ve got the general idea: don’t go too far with sliders and search for balance when editing.
I find that using several adjustments moderately gives better results than using one to the extreme.
I also want to remind you that this is only advice. It’s meant to help you stop falling into common traps and push you to develop your own vision. There are situations where oversaturating can be a fun way to present a subject or going with crazy color management will be an original way to present an image. The important thing is to be free in the creative process but to keep in mind that too much of anything isn’t a good approach in landscape photography.
Visit www.skylum.com for a 14-day trial of Luminar 4. Download it now and start editing immediately.
About The Author

Armand Sarlangue has been a professional photographer for 13 years. The son of a photographer, visual art has been a passion for Armand since childhood. His landscape images won international awards in 2018 and 2019 and are exhibited at the California Academy of Sciences in San Francisco. Being alone in the most remote places and translating the feelings of those moments through images is what motivates Armand, who uses advanced post-production techniques to make his shots match his vision of our world.