Welcome to Time Out with Tanya, where I’ve put my fast paced graphic design career on hold in favor of adventures in motherhood. I’m capturing every moment on camera and you can come along, if you’d like. Sign up for my weekly email here so you’ll never miss a Time Out.

In my recent article, 5 Tips for Effortless On-Location Baby Portraits, I mention how quick and easy it was to set up a backdrop on-location for baby portraits using the Lollipop Props Little Studio System. I think this innovative and affordable solution is so cool that it deserved a full article. Not only is the Little Studio perfect for baby and kid portraits, it would also work for small to medium product photography or even as a pop-up, stand alone diffuser for off camera lighting. Let’s take a closer look at how to take professional baby portraits at home with the Lollipop Props Little Studio system.
One of my favorite features of the Little Studio at first glance, is the handy storage and carrying case it comes in. It’s a heavy duty, black canvas case with a full zipper and carrying handle. The whole thing is very lightweight and easy to carry. It also doesn’t take up much space at all. I could easily store it in a closet or behind the couch. It un-zips totally flat for easy storing of your entire Little Studio System, including extra backdrops.

I was able to set up the Little Studio in less than 5 minutes, without reading any instructions or anything. It’s totally self explanatory. Just pop up the two sides and velcro them together.

After doing so, I realized it might be easier to velcro the vinyl backdrop in place while the studio is lying flat, so I just set it all back down and applied the backdrop. The vinyl backdrop is heavy duty, lightweight and didn’t have a glare or anything. It’s also resistant to stains and moisture, which is important when working with kids.

I was also surprised by how affordable they are. At under $30 each, you could afford to have a variety of backdrop options at your fingertips.

At first, I was a little skeptical of the foam faux-wood floor drop, but the fact that it’s nice and soft for the baby and much better than a cold, hard wood floor is a plus. It’s also free of shine or glare and very lightweight and portable.


The flooring had been rolled up in a box so the corners tended to roll up a bit. I solved that problem by clamping them down on the corners with some binder clips. After storing the floor drop flat for several days, this is no longer an issue.

The baseboard that came with my Little Studio Bundle really completes the look. It’s lightweight and stores nicely in the carrying case with the entire system. Technically, you can just prop it up against the wall of the Little Studio, but I used a simple spring clamp to hold it in place. You can get these clamps for a couple dollars at a hardware store or on Amazon.

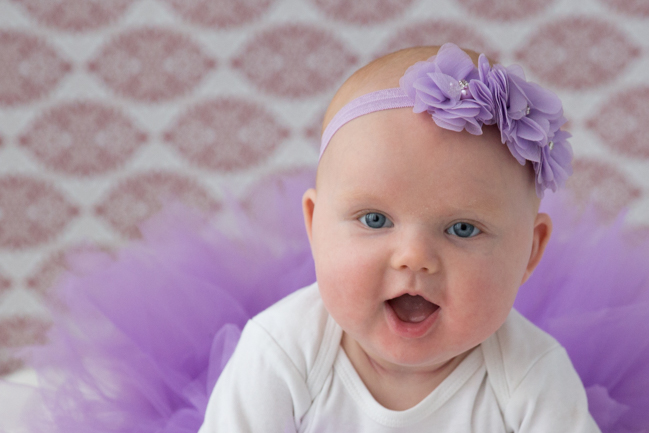
I used all natural light while testing out the Little Studio. My living room is very well lit, and I always keep sheer white curtains on the windows which allows me to diffuse the light as needed. I just set up my Little Studio near the window and exposed for the skin of the baby. I found that using an extra silver reflector (this one is just a piece of styrofoam insulation with a silver side from Home Depot, but you could also use a 5-in-1 reflector) helped fill in the shadows on the side of her face.


The exposure settings for this image are ISO 1000, f/2.8, 1/200 of a second at 70mm. I used my Canon 5D Mark III and Canon 24-70mm f/2.8L II lens. I don’t mind bumping my ISO up so high when shooting with natural light. This camera and lens combo allow me to create sharp images at 1000 ISO with no problem. I used the Lightroom Presets to process the image in a just a few clicks. I know you’ve heard me rave about this system so much in the past, but it honestly has saved me so much time and the recipes specifically formulated for Newborns come in handy for baby and kid portraits, too.
If you don’t have the preset system, you can achieve this soft look by taking the clarity down and adjusting the shadow and highlight sliders in the develop module. Take a look at my settings here:

I should also mention the adorable tutu and headband came from Lollipop Props as well. They have tons of props for newborns and babies, making them a one-stop shop for newborn and baby photography. For more ideas and instructions on how to get started photographing newborns, check out our Newborn Photography Article.
CREDITS: Photographs by Tanya Smith are copyrighted and have been used with permission for SLR Lounge. Do not copy, modify or re-post this article or images without express permission from SLR Lounge and the artist.


Get Connected!