
Polaroid/Instant film had its hay-day some decades ago now, and aside from their somewhat prevalent use within modeling agencies, their use had become very sparse. Safe to say, however, instant film cameras have been steadily making a comeback thanks in no small part to Fuji.
But perhaps most instant cameras aren’t offering the control or looks you want, or you just don’t have one, but you still want to have that look, complete with polaroid frame and all. Well, Aaron Nace and the good people over at Phlearn have put together something to quench your instant film thirst. Here’s how to make a Polaroid framed picture using Photoshop.

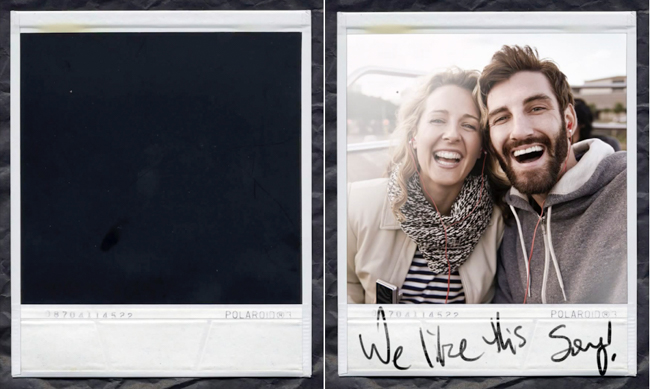
To achieve this look you will, in fact, need two pictures: One of your subject and one of an actual Polaroid. You’ll be opening up both images in Photoshop, and dragging the image of the Polaroid onto the image of the subjects. You’ll then select the black square (where the image will be) on the frame and apply a layer mask so your subjects show up only within the center of the Polaroid.
From this point on, it’s a simple matter of adding effects to give your image a stylized, aged, Polaroid feel. You can do this by utilizing the hue/saturation layer and picking any hue you like, whilst making sure the colorize button is selected, then clip it to the layer underneath. To add to the realism, you’ll not want the edges within the frame to be too sharp, so applying a gaussian blur to the edges will be of some use.
[REWIND: The Best Way To Create, Use, & Alter Lens Flares In Photoshop]

Lastly, if you’re so inclined, you can add some writing to the image. To do this with a mouse or trackpad is an absolute pain, and a gargantuan task to get it to look remotely natural, so you’re better suited to use a pen tablet. If you don’t have one at your disposal, you can write on paper, scan it and put that scan onto your image, then using the sliders in (hold down the option key while adjusting) Blend-If to really make the text appear as if it’s on the print.
You can download the exact same Polaroid stock image used in the tutorial, here.
As always, if you are a fan of Aaron’s teachings (and who isn’t?), be sure to check back here for updates, and follow along with Aaron on YouTube and Phlearn. You should also consider becoming quickly adept at Photoshop with the Phlearn Photoshop 101 & 201 sets as they are extremely comprehensive, and will have you quickly doing things with Photoshop you may have otherwise thought too complex, or didn’t even know you could do.


