![Lightroom’s Dark Knight |The Alt/Opt Key Transforms Lightroom In Ways You Likely Don’t Know [Part 1]](https://cloudfront.slrlounge.com/wp-content/uploads/2016/03/alt-opt-option-key-mac-windows-lightroom-retouch-wedding-portrait-leica-photography-slrlounge-kishore-sawh-3.jpg)
Lightroom’s Dark Knight |The Alt/Opt Key Transforms Lightroom In Ways You Likely Don’t Know [Part 1]
If you were to gather up a group of photographers (let’s say all of you reading this), and asked them what they’d change about Lightroom, what they dislike about it, what makes them at times ponder the cost: satisfaction ratio of beating the bejesus out of their computer, you’d end up with a list as long as Sarah Jessica Parker’s face. And like poking fun at everyone’s favorite blonde pony, it’s good sport if you like shooting fish in a barrel, but if you asked the same group what they really loved in Lightroom or at least a feature they couldn’t do without, the list would be considerably shorter.
Now of course, as a species it seems we have a tendency to devote more time and expel more energy spitting fire and venom when we really don’t like something than when we do. So in a way, Lightroom just does a lot that we just sort of expect it to, and we are hardly grateful for things we expect, or are used to. Familiarity can breed contempt and a sense of entitlement, or at the very least a drought of appreciation.
When something new is introduced, however, things are a little different. But what if I told you that there is, and bear with me here on the hyperbole, but a whole new/secret world within Lightroom that many of you just aren’t aware of? Because there is; It’s the one thing I’d say I couldn’t do without in LR, and it may just give you a whole new appreciation by way of a transformed user experience. It’s the alt/opt key.
(crickets)
Yes, it’s the alt/opt key and the absolute versatility it brings to Lightroom. There’s a good chance many of you know at least one process application for the alt/opt key within Lightroom that you either stumbled upon in use, or were told, but in fact, that single key is a pivot point for Lightroom’s menus and tools, ad the dime on which they can pirouette to work in a completely different manner than what is at first obvious, or apparent.
There’s so much to it that I’m going to break this up into two posts, or more. I’ll get you going with some of the more instantly gratifying and broadly applicable ways in which the key can be used, then push deeper. So, on that note, tally ho…
Alt/Opt To Recalibrate/Reset

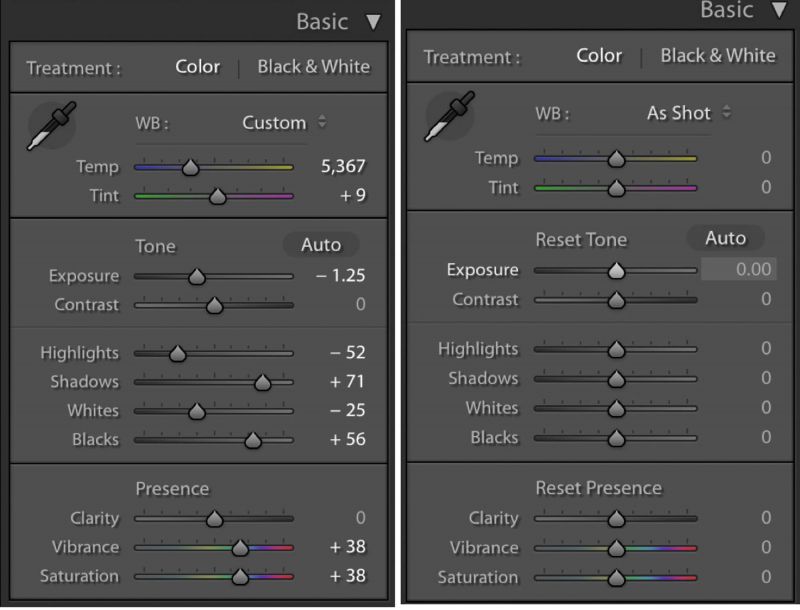
This may be the use that you’ll get the most ‘use’ out of on a regular basis, not that it’s the most valuable, but in terms of easing workflow, it bows to few others. If you’re in the Develop module, and you’re working away to introduce your own creative vision into your images, tweaking sliders as if your livelihood depended on it, you will quickly realize that there are a load of sliders, some 125 or more in fact (including for each tool and alt-menu). And as much as we like sliders as an effective way of altering a condition, with so many they can be a bother to handle, especially if we want to revert some of the changes we’ve made to their original state.
Of course, you could double-click on each slider and they’ll re-center, but say you’re in the basic or HSL panels, and you’ve made a host of changes, but you’re just not feeling the whole thing. With a press and hold of the alt/opt key, you’ll see the menu or sub-menu heading change to ‘Reset’ and clicking that resets all the values you’ve just shifted. It’s incredibly handy, and if you’re using a tablet to retouch (see here why I think it’s invaluable for LR), then you can just assign a button for the alt/opt key to make life even simpler, and cleaner.
Alt/Opt & The Adjustment Brush
Just as the alt/opt key can ‘reset’ a set of sliders, it can have a similar effect elsewhere, right within tools, and not just for global adjustments, but with brushes. With brushes in Lightroom, you can really begin to add your finishing touches and transform your images from something good to great, or, at least, different, from the next person. They also can help you avoid going into Photoshop, which is why we include loads of different brushes in our Lightroom Presets for everything from teeth whitening, skin softening, sun flare and bokeh because we figured by having them pre-made, you’re more apt to use them and see the benefit.
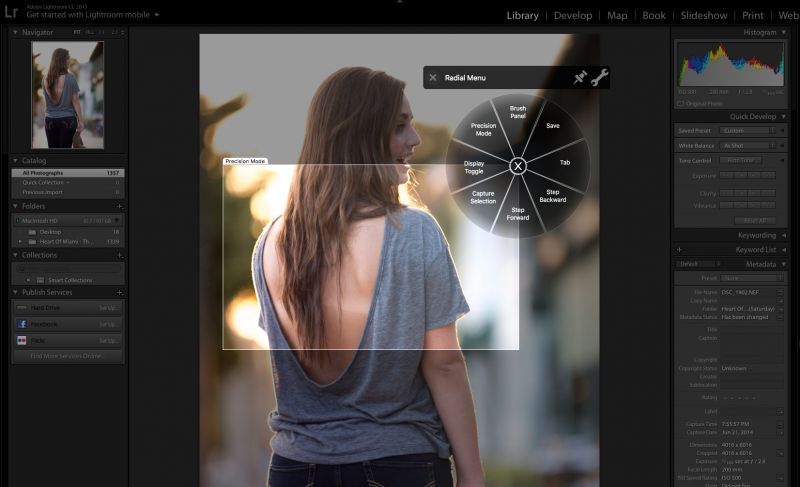
However, currently using the brush leaves you a bit without, as when you are using it, and you brush in a bit too much or in the wrong place, you’ll have to head back over to the menu, click ‘Erase’ and then your brush becomes an eraser with which to remove an unwanted adjustment. Instead of wasting your time and breaking concentration to do this, simply use the brush as you’d like, and when you need to erase, just hold alt/opt, and your brush becomes the eraser. Then when you let go, it’s back to being the brush applicator again.
Alt/Opt For Cropping
You’ve known how to crop something in Lightroom since you first looked at the Develop module because the Crop Overlay button is rather self-explanatory. Generally, you’d just hit the button and then just pick a point on the perimeter of the crop field and drag inwards. If you pick a corner, you’ll notice the opposite corner stays put in its place, as is the case should you pick the a different point – the opposite side will remain stationary. What you’ll likely have to do then, is adjust the other sides for a centered crop you like.
Next time you go into crop, hit the button and then hold alt/opt and drag from the corner, and you’ll notice the whole crop overlay shifts as to keep centered; the opposite corner coming in equally as much to retain equal cropping all around. If you have the crop aspect ratio set and locked, both sides will move, but the aspect ratio will remain. If it’s not locked, you can just free-form it. This can be great for removing unwanted space equally, and, I’ve found, for removing areas of vignetting.
Alt/Opt With The Library Module
Depending on how much time you spend within the Library module will indicate how often you’ll get use of this next option, and if you noticed it as an option to begin with.
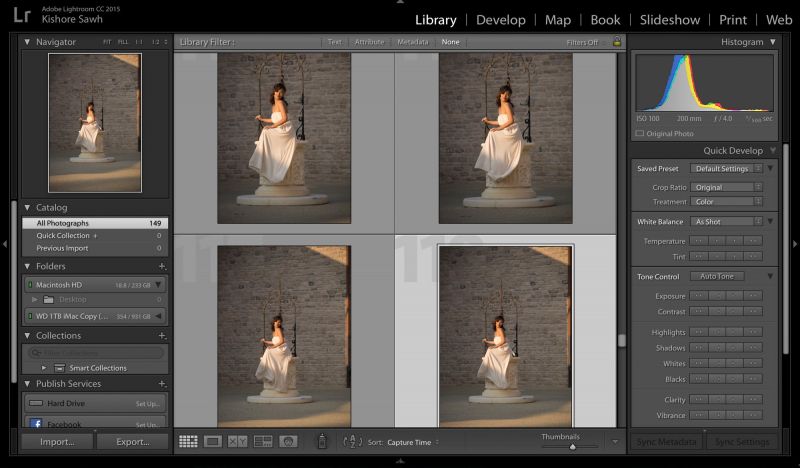
Some time ago, I wrote about and recited the virtues of the Quick Develop panel within the Library module, a panel I feel is both highly unknown, underused, and misunderstood. You can do a hell of a lot from that panel that sits right underneath your histogram, and a click on each arrow in its submenus reveals that (see below). When you expand the Tone Control sub-menu with the Quick Develop Panel, you’ll see Clarity and Vibrance listed at the bottom, and hitting alt/opt will change those to Sharpening and Saturation, thus extending the Quick Develop panel’s utility even further.
Further on down the Library module, you’ll see the Keywording Panel where you can (surprise, surprise), add keywords you want to often use. Hitting the alt/opt key will show numbers next to those keywords and when holding the alt/opt key and hitting the respective number, you’ll be able to assign those keywords with speed and ease.
Conclusion
Incredibly, there’s actually quite a lot more than can be said for the alt/opt key within Lightroom, but this is probably good enough to digest and implement right away. Keep an eye out for the follow-up for more nuanced uses of the key.
If you like this you’ll probably like the following articles:
CULLING IS CRITICAL & LIGHTROOM IS THE TOOL TO DO IT WITH (IF YOU KNOW HOW)
LIGHTROOM’S QUICK DEVELOP PANEL COULD TRANSFORM YOUR LIGHTROOM WORKFLOW
And if you really do and want to absorb lots of this kind of information, I highly suggest you take a look at the Lightroom Workshops in SLR Lounge Premium. They’ll get you up to speed, and fast, allowing you to get the most out of this program we spend so much time with.
– Kish


Get Connected!