
Light painting photography is a creative photographic technique in which long exposure times are employed while moving a light source in front of a camera’s lens. The deliberate movement of the light source during the exposure produces streaks or patterns of light, creating surreal visual effects. This technique allows photographers to craft imaginative and abstract images that are not visible to the naked eye. In this article, we’ll provide tips and tricks for mastering the art of light painting photography.
Light Painting Photography Video Tutorial
In this video, we’re going to show you how to capture a light painted portrait with both a DSLR and an iPhone using string lights to create motion in this quick 4-minute tutorial. This video is an excerpt from our course Creative Photography 101 that dives deep into a whole new world of unique and ingenious photo techniques that will set you apart no matter what camera you prefer to use.
Step-by-Step Tutorial for Lighting Painting Photography
Light painting photography is a fun and creative way to capture unique and stunning images. Whether you’re a professional photographer or a beginner, you can create incredible light paintings with any camera. Let’s discuss the basic steps to light painting photography.
Get the Right Light Painting Gear
While you can create light paintings with just a camera and a light source, there are a few pieces of equipment that can make the process easier and more enjoyable. A tripod is essential for keeping your camera stable during long exposures, and a remote shutter release will prevent camera shake when taking the photo. Additionally, a flashlight or headlamp can be helpful for finding your way around in the dark.
Before we dive into the actual tutorial, let’s discuss what we used to create this technique:
- Cameras and Lenses – Canon 5D Mark IV paired with a Sigma 50mm Art f/1.4 and an iPhone 11 Pro Max to show you that light painting can be done on pretty much any camera, even your phone.
- Tripod – Peak Design Travel Tripod: This has become a staple in our collection, especially when it comes to mobile phone photography. With different mount options available, this tripod helps to stabilize phones for creative mobile photography like you’ll see in this video. For light painting, it is required to have a tripod to stabilize your shot.
- Light Painting Source – When it comes to choosing light sources, there are many options available. Some popular choices include flashlights, glow sticks, sparklers, LED Hybrid Light, amazon String Lightsand even fireworks. Each type of light source produces a different effect, so it’s worth experimenting with different options to find the look that best suits your style.•
- Colored Film Gels or colored tissue paper – If you don’t have a light source that can change colors, use gels to change the color of the light source.
- Wireless Shutter Remote Control Release – A wireless shutter remote will allow you to capture the photos without touching the camera. This will be helpful to prevent camera shake.
- Editing Tools – Both images you’ll see as the final products in the tutorial were edited in Lightroom & Lightroom Mobile using Visual Flow Presets.
Determine Your Light Painting Location
Light painting photography often requires a controlled dark environment to achieve the desired results, and various light sources, such as flashlights, LED lights, or even fire, can be utilized to add a diverse range of colors and shapes to the final photograph. Here are a few things to consider when choosing a light painting location:
- Dark Location – Whether you are shooting in a studio or your home, find a dark space where you can cut away most of the ambient light. Since we are slowing down our shutter speed, we will be opening up the light coming into the camera which means our ambient light exposure needs to be pitch black.
- Interesting Background – Choose a location that will provide interesting backgrounds and surfaces for your light paintings.
- Permission – Make sure you have permission to be in the location and that it’s safe to shoot at night.
It’s also a good idea to prepare your light sources ahead of time. For example, if you’re using glow sticks, activate them and attach them to your light source so they’re ready to go when you start shooting.
Place Your Camera on a Tripod

We mentioned above that the Peak Design Travel Tripod is one of our favorites in our kit; and it’s largely in part because of the multiple mounts that you can get for when you don’t want to lug around your DSLR or mirrorless camera everywhere. A tripod is crucial for this technique because we want to prevent camera shake since our shutter speed is so slow.
Dial-in Ambient Light Exposure
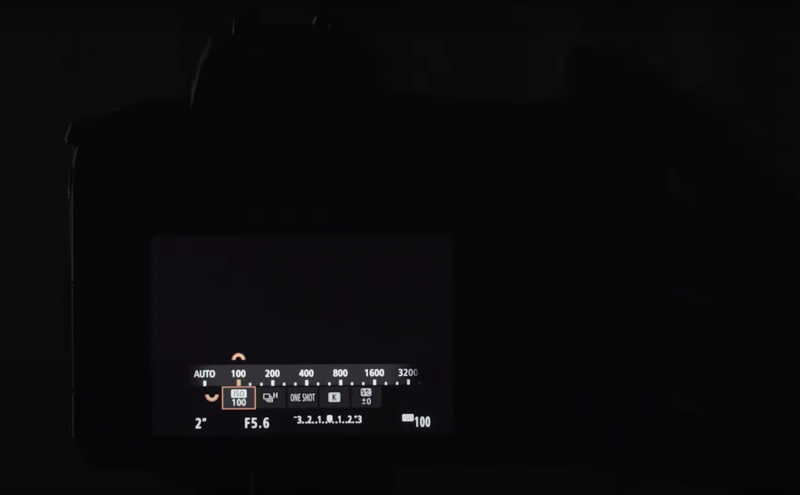
In terms of camera settings, you’ll want to use a low ISO setting to reduce noise in your images, and a small aperture to create a greater depth of field. Additionally, shooting in manual mode will give you full control over your camera’s settings, allowing you to make adjustments as needed. Use an an exposure that doesn’t blow out, i.e. overexpose your light source and retains the highlights.
The key to light painting is using a long exposure time, typically between 5 and 30 seconds, to capture the light trails and patterns created by your light sources. The longer the exposure time, the more time you have to create intricate and detailed light paintings. Start with a shutter speed of 5 to 10 seconds when light painting and then dial your Aperture and ISO to black out the room. Then shorten or extend the shutter speed time to taste as you play around.
Bulb Mode – You can also turn your camera to the B or Bulb Mode, a setting that keeps the shutter open for as long as you need to paint your picture. You’ll control that with your wireless shutter.
iPhone – If you’re on an iPhone, newer models such as the one we used in this video, have Night Mode which allows you to slow your shutter speed down in the native camera app. Fret not – if you own an older model or a different phone altogether you can download the Pro Camera App by Moment which has become one of my must-have photography apps.
Instruct Your Subject to Hold Still
Another crucial element to nailing focus in a shot like this is to advise your subject to remain as still as possible. Since we are creating movement with the string lights, we want our subject to be still throughout the shutter drag. You can even explain to them what you are attempting to do so that they have a clearer understanding of how to pose.
Get Creative with Light Painting
There are many different techniques you can use to create unique and interesting light paintings. One popular approach is to paint light around your subject’s face or body, creating a dramatic and dynamic effect.

All that’s left is to step behind the subject, set your camera on a timer and press the shutter. Once the shutter opens start spinning the lights to create a pattern. For this tutorial, we kept it simple and just had the lights spinning in a circle but you can try different shapes, outline the subject’s body, or even change your positioning. Play around and see which one you like best but make sure to take a couple of shots to ensure that your subject is in fact still and there is no blur of their face or body parts. Here are the final images with Shiv’s shot on the Canon 5D Mark IV and Jae’s shot on an iPhone 11 Pro Max.


Creative Light Painting Photography Ideas
To solidify your understanding of these concepts, here is another Light Painting Video Tutorial. In this video, we’re going to walk through more creative light painting photography effects featuring our lovely model Renee.
These three photos were taken consecutively, as you’ll see in the video. It just goes to show what kind of variety in the imagery you can get with light painting photography.

Creative Idea 1 | Circular Motion Light Painting

To achieve this look swipe the light in a semi-circle or circular motion, depending on how far around your hand can rotate. Keep the light close to the subject to fill more of the frame, or back up and create a circular frame surrounding the subject’s body. With all of these light painting photography ideas, make sure you take multiple shots to ensure that they are sharp and your subject isn’t moving.
Creative Idea 2 | Waves in Light Painting

Adding a bit more motion, swipe the light from left to right in windshield wiper-like motion. This allows you to see the tiny LED light streaks across the frame and adds a bit more interest to the light. Test out a few different wave patterns and make sure they are pleasing to the eye rather than being a distraction for the viewer. You can use these as leading lines as well.
Creative Idea 3 | Highlight with Light Painting

Use the light to paint out the subject and chisel them from the background. You can see that this is a much tighter composition, however, it still shows great detail and graphically interesting.
Bonus Light Painting Tips
To create more than one letter or shape without having them run together, simply turn the flashlight off after you finish one word, then move over a bit and turn the flashlight on for your next letter. You can get some funky effects if you have some light spill onto the person doing the painting.
Conclusion
Light painting photography is a fun and creative way to explore your artistic side and capture stunning images. With the right equipment, techniques, and post-processing, you can create amazing light paintings with any camera. Remember to be patient, persistent, and creative, and don’t be afraid to experiment with different approaches and techniques to find the ones that work best for you.
If you enjoyed this tutorial, make sure you check out our Tik Tok where we’ve been sharing fun mobile photography tutorials just like this one! Be sure to sign up to be the first to know when our Creative Photography 101 course releases to learn more fun tips & tricks to level up your creativity game.


Get Connected!