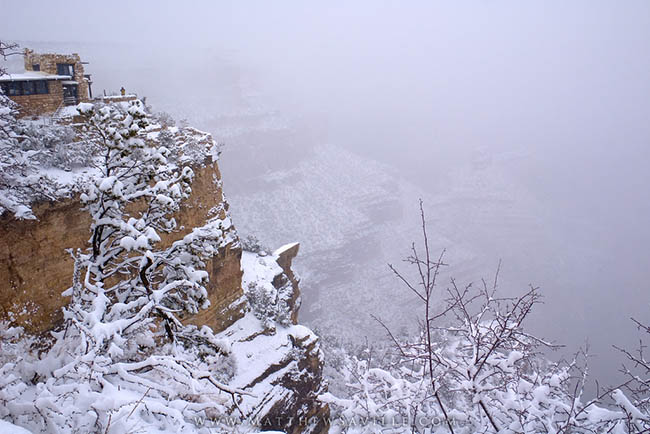
Winter is coming around the corner and that means one thing: More camera gear presents to buy for yourself, yes!! Oh, and snow. Yes, for those of you who get to experience snow every year, or at least can drive up to it like us Los Angelenos can, snowy landscape can provide some terrific photo opportunity. Just a few inches of snow can transform a familiar landscape to one that looks completely different and mesmerizing.

The Grand Canyon by Matthew Saville
But there is one problem when it comes to shooting snow: Snow is white. Your camera’s metering system wants to meter everything as middle gray. As a result, that pristine white snow becomes dull and dirty snow.
When you are shooting into a predominantly white background, whether it is snow or a white seamless paper in a studio, your camera metering has a tendency to want to turn that much whiteness into 18% gray or middle gray. As I mentioned in my other article on metering, middle gray equates to roughly the middle of the gray scale and is called 18% gray because middle gray reflects 18% of the light that is cast upon it. Pure white reflects 100% of the light, while pure black reflects 0% of the light.
So your camera’s metering system assumes that everything it sees should reflect 18% of the light. Snow obviously reflects a lot more light than the 18% gray, but the camera will still try to meter it as if it is gray, not white.
So how do you properly meter for snowy conditions? You could potentially use a light meter and meter for your subject’s skin if you’re photographing portraits. Or you could also follow these four tips to help you get more correctly-exposed images when shooting in snow.
Manually Compensate Your Metering
When you meter in the snow, you can almost guarantee that your metering will underexpose. So what you will need to do is compensate by adding some additional stops. Here are some general guidelines that you can use in different weather conditions:
| Snow and Weather Conditions | EV Compensation |
|---|---|
| Snow with clear sunny skies | +2 to 3 EV |
| Snow with slight overcast | +1 to 2 EV |
| Snow with overcast or in open shade | +2/3 to 1 EV |
So for example, if your meter tells you that at f/11 at ISO100 your shutter speed should be at 1/800, on a clear sunny day, slow down the shutter to 1/200.

Image by Xdrew | Stock Free Images
Use the Spot Meter or Get in Close to Your Subject or a Gray Card to Expose for Them
Just like my previous article, Two Easy Ways to Properly Expose High Contrast or Backlit Scenes, you can also use your camera’s spot meter or just get in close to your subject to read the proper exposure. Both methods will disregard the snow when it comes to metering. If you have a grey card with you, you can get an even more accurate reading from it.
With spot meter, aim for the skin or the center of a gray card to get the best exposure.
To fill your frame with your subject or a gray card, simply move yourself closer or zoom in with your lens until most of your subject or the card fills the frame. This will help prevent the snow from offsetting your exposure reading.

Once you lock in your correct exposure, simply recompose and fire away. Just remember that once you get the correct meter exposure and you recompose for your actual shot, your meter reading will alarm you that you are metering incorrectly. You can ignore that false reading because it will only turn the snow into gray again.

Image by Al_ks | Stock Free Images
Meter off the Sky When It’s Clear
When it is a clear day, the blue sunny sky is also a great way to meter for your environment as long as you meter away from the sun. This will give you a more accurate reading than off the snow-covered landscape. This is also very good when you just want are in a hurry or just want to double check your EV compensation.
All you have to do is just point up to the sky, take your meter reading, and then recompose your shot.


Image by Sstedman | Stock Free Images
Use a Lightmeter
Finally, the most accurate way to get the proper exposure is to take a meter reading by your subject by using a lightmeter like the Sekonic L-358. Just as I explained in my article on lightmeter vs. camera meter, the reason that a lightmeter is far more accurate than an in-camera meter is because it reads off the actual light falling on your subject or landscape (incident light), whereas the in-camera meter reads the light that is reflected back from the subject or landscape into the camera (reflected light).
That being said, the snow on the ground does reflect light back up towards the sky, so if you are taking a meter reading with a lightmeter, make sure that you place your free hand just under the lightmeter sphere to block off the extra reflected light from the ground.
Conclusion
Shooting in the snow is not too difficult once you get a hang of the extra exposure compensation. By using one of the four techniques in this article, you can be sure that when you take photos in the snow, you won’t end up with grey, muddy snow.
Enjoy shooting in the snowy weather


Get Connected!