We’ve teamed up with Adorama to bring you a series of photography tutorials called “Master Your Craft” to be featured on their YouTube Channel. Subscribe to see more of our videos on their channel that cover photography, lighting, posing, and editing education to help you hone your skills and master your craft. To watch the entire series, check out our playlist!
Video: Five Cloudy and Rainy Day Photography Techniques
Don’t let cloudy or rainy days get in the way of taking amazing pictures. It’s easier than you think to use foul weather in your favor. The next time you find yourself scheduled to shoot under a looming cloud cover, use these five cloudy and rainy day photography techniques.
Technique #1: Backlighting

When used correctly, this rainy day photography technique will yield amazing pictures pretty much every time. All you need to do to pull off this backlighting shot is place an external flash (with 200-250 watt seconds of power, such as a Profoto B10 or a Flashpoint eVOLV 200) on a light stand and position it chest-high about 5-6 feet behind the couple. You’ll get different effects based on the distance between the light and the couple, so experiment for best results if time permits.
I like to use a CTO gel on the flash and keep the white balance set to around 4400 Kelvin, which allows me to warm up the image while also exaggerating (or deepening) the blue tones. It also helps to choose a dark background when setting up for this shot, whether it be the sky, bushes & trees, or something else. The darker the background, the more pronounced the illuminated raindrops.
Lastly, because it’s raining, be sure to put a rain sleeve or plastic bag over your flash to keep it from getting wet.
Technique #2: Reflections

One side effect of the rain is the collection of puddles, which you can use to create reflections in your portraits. In terms of framing the shot, you can go for the traditional look by shooting low and including your entire subject in the frame, or you can try something a little different. To capture the image above, I worked more on the model’s pose and shot down into the reflection rather than across it to show the model’s silhouette against the sky. Keep in mind, the negative space is what can make or break a shot like this.
Technique #3: Dynamic Range
If you’ve followed much of my work, you’ll know the emphasis I place on maximizing dynamic range. When you’re shooting on a cloudy or rainy day, you can maximize dynamic range in-camera to take advantage of the textures and occasional colors that the sky provides. One of the benefits of the cloud cover is that it cuts down the direct sunlight, which gives us just enough room to squeeze all of the information we need into a single shot. Some of the best single frame, HDR-type shots come from cloudy or rainy weather.

In the image above, the histogram in Lightroom shows that we’ve pushed the blacks to the edge without clipping them, and we’ve pushed the whites to the edge while retaining as much of the highlights as possible. If I have to bias one side over the other, I usually lean towards preserving all of the shadows to avoid any muddy, green tones in the shadows, and I let the camera keep whatever highlights it can retain.

You can see above, a simple application of the HDR Environmental preset from the Visual Flow Crush Pack and a radial burn from the Retouching Toolkit yields a fantastic final image.

If you don’t have these presets, you can use the settings outlined above for the preset and cloud+sky enhancement brush (which can be used over the cloudy areas to reveal even more detail).
[Related Reading: Cloudy Day Photography | How to Get Great Pictures in “Bad” Weather]
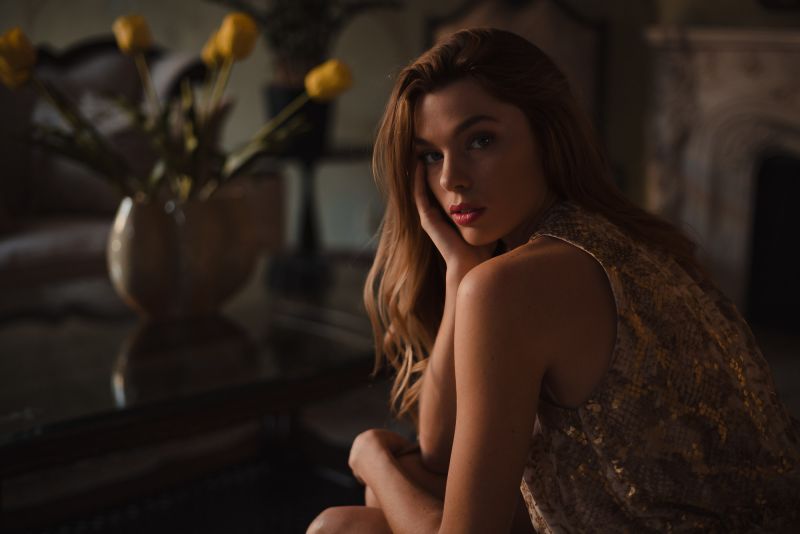
Technique #4: Sky as a Soft Box

If nothing else, cloudy days give photographers the all-time biggest natural soft box for diffused light. To take advantage of this during a portrait session, position your subject so that he/she is facing up toward the sky. In the example above, you can see my subject was sitting in a hedge in a parking lot. By positioning my camera slightly above her and having her look up, we get a naturally beautiful light that captures the catchlight in her eyes and softens the skin.
Technique #5: Golden Hour

We don’t actually need to shoot during golden hour (or even have the sun in the sky) to recreate the look. Even on a cloudy day, we can add our own backlight and mimic the highly sought after look. Here are the basic steps you need to take to pull of this technique:
- Place an external flash behind your subjects. For this shot, we set the flash up several yards back. Basically, the flash needs to be placed far enough back to illuminate the objects in the background in a believable way.
- Add 1-2 CTO gels to the external flash to match the warmth of the sun.
- Use a high-powered strobe (like a Profoto B1, 500-watt strobe at full power) to generate sufficient light, especially if the strobe is placed a considerable distance away from your subjects.

If you adjust your position a little, you can add a flare for an even more convincing look (see above).
[Related Reading: 8 Rainy Day Wedding Photography Tips You Need to Know]
Conclusion
We hope you enjoyed this article/video on five cloudy and rainy day photography techniques. If you’re interested in diving deeper into your photography education, check out our new Creative Photography 101 workshop, which we designed to boost your creativity using any camera, including your smartphone! It’s the ultimate iPhone photography tutorial.
Be sure to catch our next episode of Mastering Your Craft on Adorama’s YouTube channel next week! If you want to catch up on all the episodes, make sure you check out our playlist!