Photographing people always presents a high grade challenge in comparison to other subjects, since faces, and people on a whole, are things our brains are sort of hard wired to recognize. As this is the case, we can pick up with a speed faster than thought, when something is amiss. It could be color, shape, or any other host of things. When you get into photographing people seriously, one of the things that sticks out is blown out highlights, and the effect it has on skin. It’s something we try to avoid.
Cameras have a suite of options nowadays to help the discerning photographer avoid such highlights, from ‘blinkies’ alerts, to live histograms within the LCD or EVF. And, of course, there are techniques to be applied when shooting to do the same. Sometimes, however, it’s unavoidable. I know all too well from living in Miami and shooting outdoors that blown out highlights, or over exposed areas of skin are just things I have to be hyperaware of and expect, to some degree.
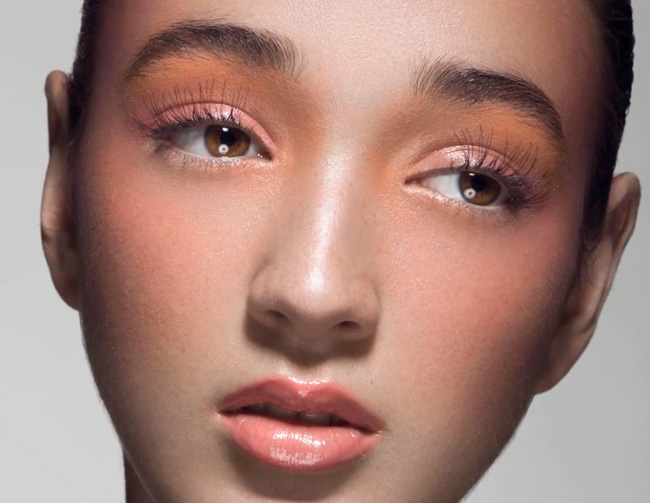
 Highlights themselves aren’t all bad, but present two distinct problems for skin: washes out color, and diminishes skin texture. Of course, it can also create other issues like chromatic aberration around the edges of the highlight, but mostly, we are concerned with the possible loss of information regarding texture and color. In this video, retouching savant Michael Woloszynowicz will teach you how to effectively, and relatively painlessly, recover skin texture, and fix color, from over-exposed areas.
Thoughts
Using a variation of frequency separation, Michael shows how just using a few tools in Photoshop can get the desired result. It’s important to note that he does state at the beginning, how important it is to check to see if the image does in fact have enough data recorded to bring any information back into the blown out area. As noted, older cameras or ones that don’t have very good dynamic range capability, will struggle with this, and of course, shooting RAW will help. In case you’re interested, this was shot on a Nikon D800 with a Nikkor 105mm Macro, and clearly, in studio.

Using the sliders in either Lightroom or Camera Raw can give you a quick way to identify just how much detail there is ‘hidden’ and able to be brought back. This would be a good place to start.
I have to admit that for more than a few viewers, the degree of subtlety with which Michael works, can seem mystifying. I think it’s great since I generally do the same, but for those of you who may watch and may think you’re not seeing much of a change, just wait to the end and you’ll see just how all those subtle actions come together to create something natural and noticeable.


This is just one of Michael’s brilliant free tutorials, and if you weren’t yet aware, there are many more where that came from. Check out his YouTube Channel, and his Facebook, and anything to do with VibrantShot. His paid products have met with real critical acclaim too, and seem to be very comprehensive.


