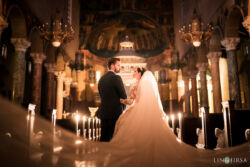
In this video, we’ll show you how you can use a bridal veil to create interesting flares and light leaks in-camera. A special thank you to Bay Photo for sponsoring this video.
Click to Subscribe!
Special Discount – 20% Off Bay Photo
For this week only, receive 20% off all Wall Displays from Bay Photo! This includes MetalPrints, Acrylic Prints, Framed Prints, Xpozer, Wood Prints, Canvas Wraps, ThinWraps, Standout & Bamboo Mounts, Wall Clusters & Splits, and CollageWall.
Code: SLRL20WALL
Link: Shop Now!
Expires: 5/9/2019
Step 1: Set up Camera on Tripod

This step is advised, but not necessary. When working with a moving object like a veil. it can be tricky to get the shot with flare by holding both the veil and the camera, so setting it up on a tripod makes it easy to maneuver.
Step 2: Position Camera & Composition

We don’t necessarily want the light directly behind the couple, otherwise, it’s going to limit our flare. For this shot, the sun is camera right and coming in just at the top of the right side of the frame.
Step 3: Dial in Your Camera Settings
Our settings for this shot are ISO 100, 1/800th of a second, at f/1.4. I’m shooting wide open on this 24mm lens because that shallow depth of field is really going to exaggerate the light leaks and the softness of the veil and all those elements in the foreground. One tip regarding focus: since your subjects are going to be remaining pretty still throughout this shot, what I like to do is dial in and get my critical focus right on their eyes and then switch over to Manual Focus or locked focus, that way it stays there for the rest of the scene.
Step 4: Pull the Veil Up and Over

We do this in order to incorporate the veil into the shot and use it as a foreground element or a way to lead the viewer’s eye into the subject. If you want to learn 4 different ways to photograph with a veil, click here!
Step 5: Control Flare with Object

Use your fingers or an object to block the sunlight in order to control the amount of flare that enters the frame. You can see with the image on the left that there is an overwhelming amount of light over the faces of the couple, making it hard to distinguish who they are. By blocking some of the light, there is a clean line which makes them easily visible while still maintaining some flare characteristics in the frame.
Special Discount – 20% Off Bay Photo
For this week only, receive 20% off all Wall Displays from Bay Photo! This includes MetalPrints, Acrylic Prints, Framed Prints, Xpozer, Wood Prints, Canvas Wraps, ThinWraps, Standout & Bamboo Mounts, Wall Clusters & Splits, and CollageWall.
Code: SLRL20WALL
Link: Shop Now!
Expires: 5/9/2019

Special Discount – 20% Off Bay Photo
For this week only, receive 20% off all Wall Displays from Bay Photo! This includes MetalPrints, Acrylic Prints, Framed Prints, Xpozer, Wood Prints, Canvas Wraps, ThinWraps, Standout & Bamboo Mounts, Wall Clusters & Splits, and CollageWall.
Code: SLRL20WALL
Link: Shop Now!
Expires: 5/9/2019
Step 1: Set up Camera on Tripod
This step is advised, but not necessary. When working with a moving object like a veil. it can be tricky to get the shot with flare by holding both the veil and the camera, so setting it up on a tripod makes it easy to maneuver.
Step 2: Position Camera & Composition
We don’t necessarily want the light directly behind the couple, otherwise, it’s going to limit our flare. For this shot, the sun is camera right and coming in just at the top of the right side of the frame.
Step 3: Dial in Your Camera Settings
Our settings for this shot are ISO 100, 1/800th of a second, at f/1.4. I’m shooting wide open on this 24mm lens because that shallow depth of field is really going to exaggerate the light leaks and the softness of the veil and all those elements in the foreground. One tip regarding focus: since your subjects are going to be remaining pretty still throughout this shot, what I like to do is dial in and get my critical focus right on their eyes and then switch over to Manual Focus or locked focus, that way it stays there for the rest of the scene.
Step 4: Pull the Veil Up and Over
We do this in order to incorporate the veil into the shot and use it as a foreground element or a way to lead the viewer’s eye into the subject. If you want to learn 4 different ways to photograph with a veil, click here!
Step 5: Control Flare with Object
Use your fingers or an object to block the sunlight in order to control the amount of flare that enters the frame. You can see with the image on the left that there is an overwhelming amount of light over the faces of the couple, making it hard to distinguish who they are. By blocking some of the light, there is a clean line which makes them easily visible while still maintaining some flare characteristics in the frame.
Special Discount – 20% Off Bay Photo
For this week only, receive 20% off all Wall Displays from Bay Photo! This includes MetalPrints, Acrylic Prints, Framed Prints, Xpozer, Wood Prints, Canvas Wraps, ThinWraps, Standout & Bamboo Mounts, Wall Clusters & Splits, and CollageWall.
Code: SLRL20WALL
Link: Shop Now!
Expires: 5/9/2019