So, you’ve heard a lot about Adobe Lightroom, and how it’s a great tool for raw photo processing. But have you ever wondered exactly what it is that makes Lightroom so good? Or have you wondered if there are any things which Lightroom might not be so good at?
Welcome to the second chapter in our Official Lightroom Guide series! In this article we will talk about Lightroom’s 3 Strengths and 3 weaknesses, so you can ensure that you are using Lightroom to its maximum potential, while not making any frustrating mistakes!
This article is part of our official guide to Adobe Lightroom, and comes from our full-length course, Lightroom 101. Of course this article, and all of the education on SLR Lounge, is not designed to be a boring technical manual, but rather a highly useful guide that allows you to spend less time at a computer editing, and more time out shooting new photos!
With that said, let’s jump right in and answer the question, what are Lightroom’s strengths and weaknesses?
 Canon EOS R, Canon 16-35mm f/2.8 L mk3
Read our full review of the Canon EOS R HERE!
1.) File management and organization
The first strength of Lightroom, (actually, these are in no particular order, they’re all very important strengths!) …is the Lightroom Catalog itself. What is a Lightroom Catalog? It’s an actual Lightroom file, with the extension “.LRCAT”, which is the file you open when opening Lightroom itself. In other words, if you want to use Lightroom, you start by creating an .LRCAT file.
 Yes, that’s 203 THOUSAND images in a single Catalog!
NOTE: you can create more than one .LRCAT file, and have completely separate Lightroom Catalogs on the same computer, but that is another topic for a future tutorial!
So, what is the purpose of having a Lightroom Catalog? As its name implies, the catalog is where you collect and organize all of the photos you edit. Additionally, the catalog is also where you remember all of the editing that you do to any raw files, or even some edits that you might do to JPG, TIF, or PSD files!
The benefit of this system should be clear: Lightroom will always memorize where your photos are, even if you move them off your computer to an external hard drive, as long as you do it through Lightroom.
Furthermore, Lightroom allows you to render previews for your images, which are stored next to the .LRCAT file, so that you can always view your images even without the original raw file being currently accessible to your computer!
This allows you to stay organized from week to week, month to month, even year to year, with all your photos “at your fingertips” no matter where they actually are.
 Lightroom’s “Library” section offers easy ways to keep thousands of photos organized, using keywording labels, star ratings, and collections.
One benefit of this catalog system is the ease of backup. By backing up your .LRCAT catalog file, you are backing up all the hours of hard work that you’ve put into editing your photos. You don’t need to back up all of your actual raw files every time you edit them, only the LRCAT file. (Most LRCAT files are just a gigabyte or two!)
(Of course, every photographer should already be backing up multiple copies of their raw photos immediately upon download from the camera, and keeping track of those raw files over the years, not just their LRCAT file.)
So, what else is Lightroom good at? Another key feature of the raw workflow that Lightroom offers is what is known as non-destructive editing, which we’ll discuss next.

2.) Non-Destructive Raw Editing
In Adobe Lightroom, (and, admittedly, also in other raw-specific editing software) you never have to worry about actually changing or “harming” your original images. This is because you’re never actually affecting the original images themselves when you edit them. Lightroom is merely creating a preview of the image, with all of your adjustments.
Whenever you open your Lightroom Catalog, work on editing your photos for a few hours, and then close your Lightroom Catalog, the original raw files are left untouched. Unless you actually move them from one folder or hard drive to another from within Lightroom, of course.
 Nikon D750, Nikon 24-120mm f/4 VR, 3 sec @ f/4 & ISO 100
Then, when you’re ready to share your images with the world, whether it be printing them out or simply uploading them to an online photo gallery or social media, you can use Lightroom’s Export feature to create a new JPG or TIF file, using the edits you applied.. Another perk of this non-destructive editing system is, you never have to worry about over-writing an original file,
You don’t actually apply the edits to the raw file until you’re ready ot export the image, and even then it’s not “harming” the raw file, it is merely creating a new file, a JPG or TIF or PSD.
By the way, in comparison, if you edit anything in Photoshop, that image may be permanently edited, and you might have no way to undo those edits. This is what is known as “destructive” editing.
Next, we’ll talk about how to handle all these hundreds/thousands of photos in your Lightroom Catalog, and how to edit them rapidly!

3.) Batch Processing
Adobe Lightroom allows you to edit one image, and then apply those adjustments to other images almost instantly, or even edit multiple images at once.

You can quickly switch between editing just one image and editing multiple images at once, for the fine tuning of slightly different images in a similar scene / location / lighting.

 Nikon D750, Nikon 70-200mm f/2.8 VR2, single exposure @ 200mm
Click HERE to see the timelapse in our Tether Tools Case Relay review!
Lightroom’s 3 Weaknesses
Despite being able to out-workflow all other Adobe applications, (and in our opinion ALL other workflow tools, when it comes to sheer speed alone) …Lightroom is not without a few weaknesses. Three main ones, to be precise. Thankfully, you can overcome these weaknesses in a way that still integrates seamlessly with your overall Lightroom workflow. So, let’s talk about what these weakness are, and how to work around them!
1.) Fine-Tuning In Lightroom
In Photoshop, you can make an adjustment and then fine-tune the total effect of that entire adjustment, using different layers and opacity, etc. Also, there is an infinite number of different types of adjustments you can make! From ultra-precise color tweaking to ultra-precise local brushing, masking, cloning, and warping, Photoshop is brimming with fine-tuning capabilities for “polishing up” your final images, when they need it.
Lightroom’s local brushes and fine-tuning, on the other hand, are a little bit more like “blunt instrument” type tools that are indeed very powerful, but require a lot more “making it work” effort to overcome the overall simplicity of the tools. You can burn & dodge, you can perform basic clone/heal stamp tool work, and you can do basic HSL (Hue, Saturation, Luminance) work. However, beyond that, most intricate fine-tuning is better off being done in Photoshop.
Fortunately, it’s VERY easy to take an image into Photoshop, perform these tweaks, and then bring the image back into Lightroom. There’s even a hotkey for it, (CMD-E or CTRL-E) …and when you’re done in Photoshop, merely saving the TIF or PSD file and returning to Lightroom will magically reveal that the image has automatically imported itself into your Lightroom catalog, so that you can export it as part of your overall workflow with any other raw files that didn’t need Photoshop edits.
 Non-Destructive, Raw Panoramic Images in Lightroom CC!
2.) Compositing in Lightroom
For now, Lightroom’s only built-in composite blending/stitching capability is limited to merging bracketed HDR exposures, and/or putting together a panoramic scene.

The newest update to Lightroom can even do both of these things at once, however if you’d like to actually control the exact edge between any image layers, or the opacity of certain layers, or……the list is long. Basically, you need to go into Photoshop for anything and everything else.
 Sony A7 mk3, Sigma 24mm f/1.4 Art, Panorama of 4-5 images
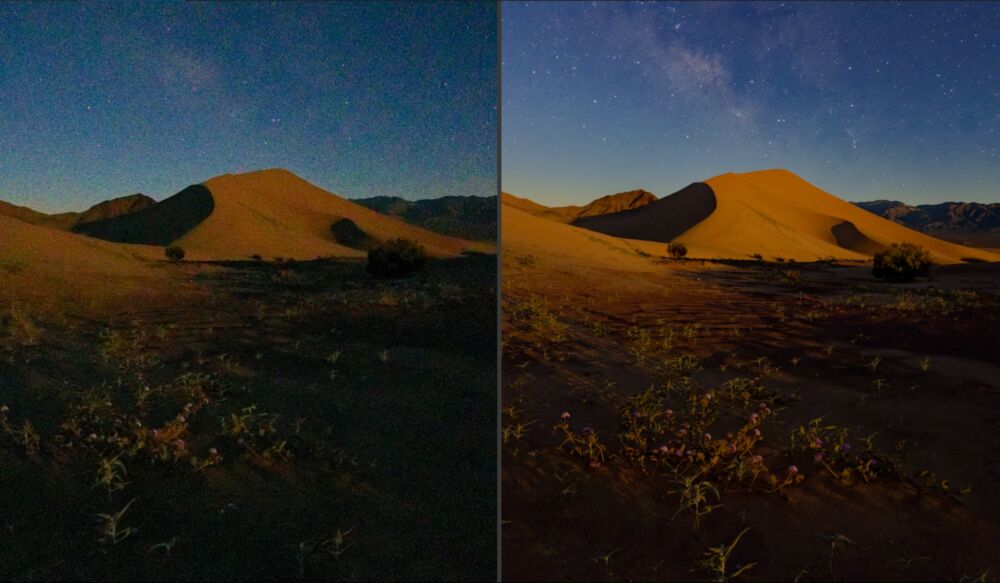
20 sec @ f/2.8 & ISO 6400
Learn Milky Way Nightscape photography HERE!
For example, if you would like to use different layer blending modes to create a star trail image, Photoshop can offer you numerous options, while Lightroom just can’t do it.

 Nikon D750, Laowa Venus 12mm f/2.8 Zero-D
30 sec @ f/2.8 & ISO 12800,
43 images stacked in Photoshop using Layer Blending Mode “Lighten”
3.) Special Effects in Lightroom
Photoshop has many more opportunities than Lightroom for special effect filters, plugins, and all sorts of other retouching tools.
For the vast majority of images which only need “basic color correction” (which you can learn all about in Lightroom 101) …you thankfully don’t need to go into Photoshop, probably.
However, when the retouching gets extremely complex, or when the special effect you want to achieve is, well, very special, there’s a good chance that you’ll have to hit “CMD-E” or “CTRL-E” again, and take your raw image into Photoshop, then re-import it as a TIF or PSD or JPG file back into Lightroom for final export and catalog archiving.

Final Recommendation for Using Adobe Lightroom
Now that you understand Lightroom’s main strengths and weaknesses, here’s our final recommendation: start your workflow in one Lightroom catalog, organize some photos, play around, and get used to the catalog system. Then, when you’re ready, consider the more complex workflow possibilities, such as creating a new LRCAT for every single paid job you shoot, or each different big adventure/vacation you go on, etc.
In the long run, you’ll be able to maximize Lightroom’s strengths and use them to your advantage, while avoiding any frustrating drawbacks.
To become a complete master of basic and advanced Lightroom raw photo editing, check our Lightroom 101 workshop!
If you have any questions about Lightroom Catalog organization or overall workflow, please comment below, or start a discussion on our Facebook Group! Thanks for reading.
Written by Pye Jirsa and Matt Saville