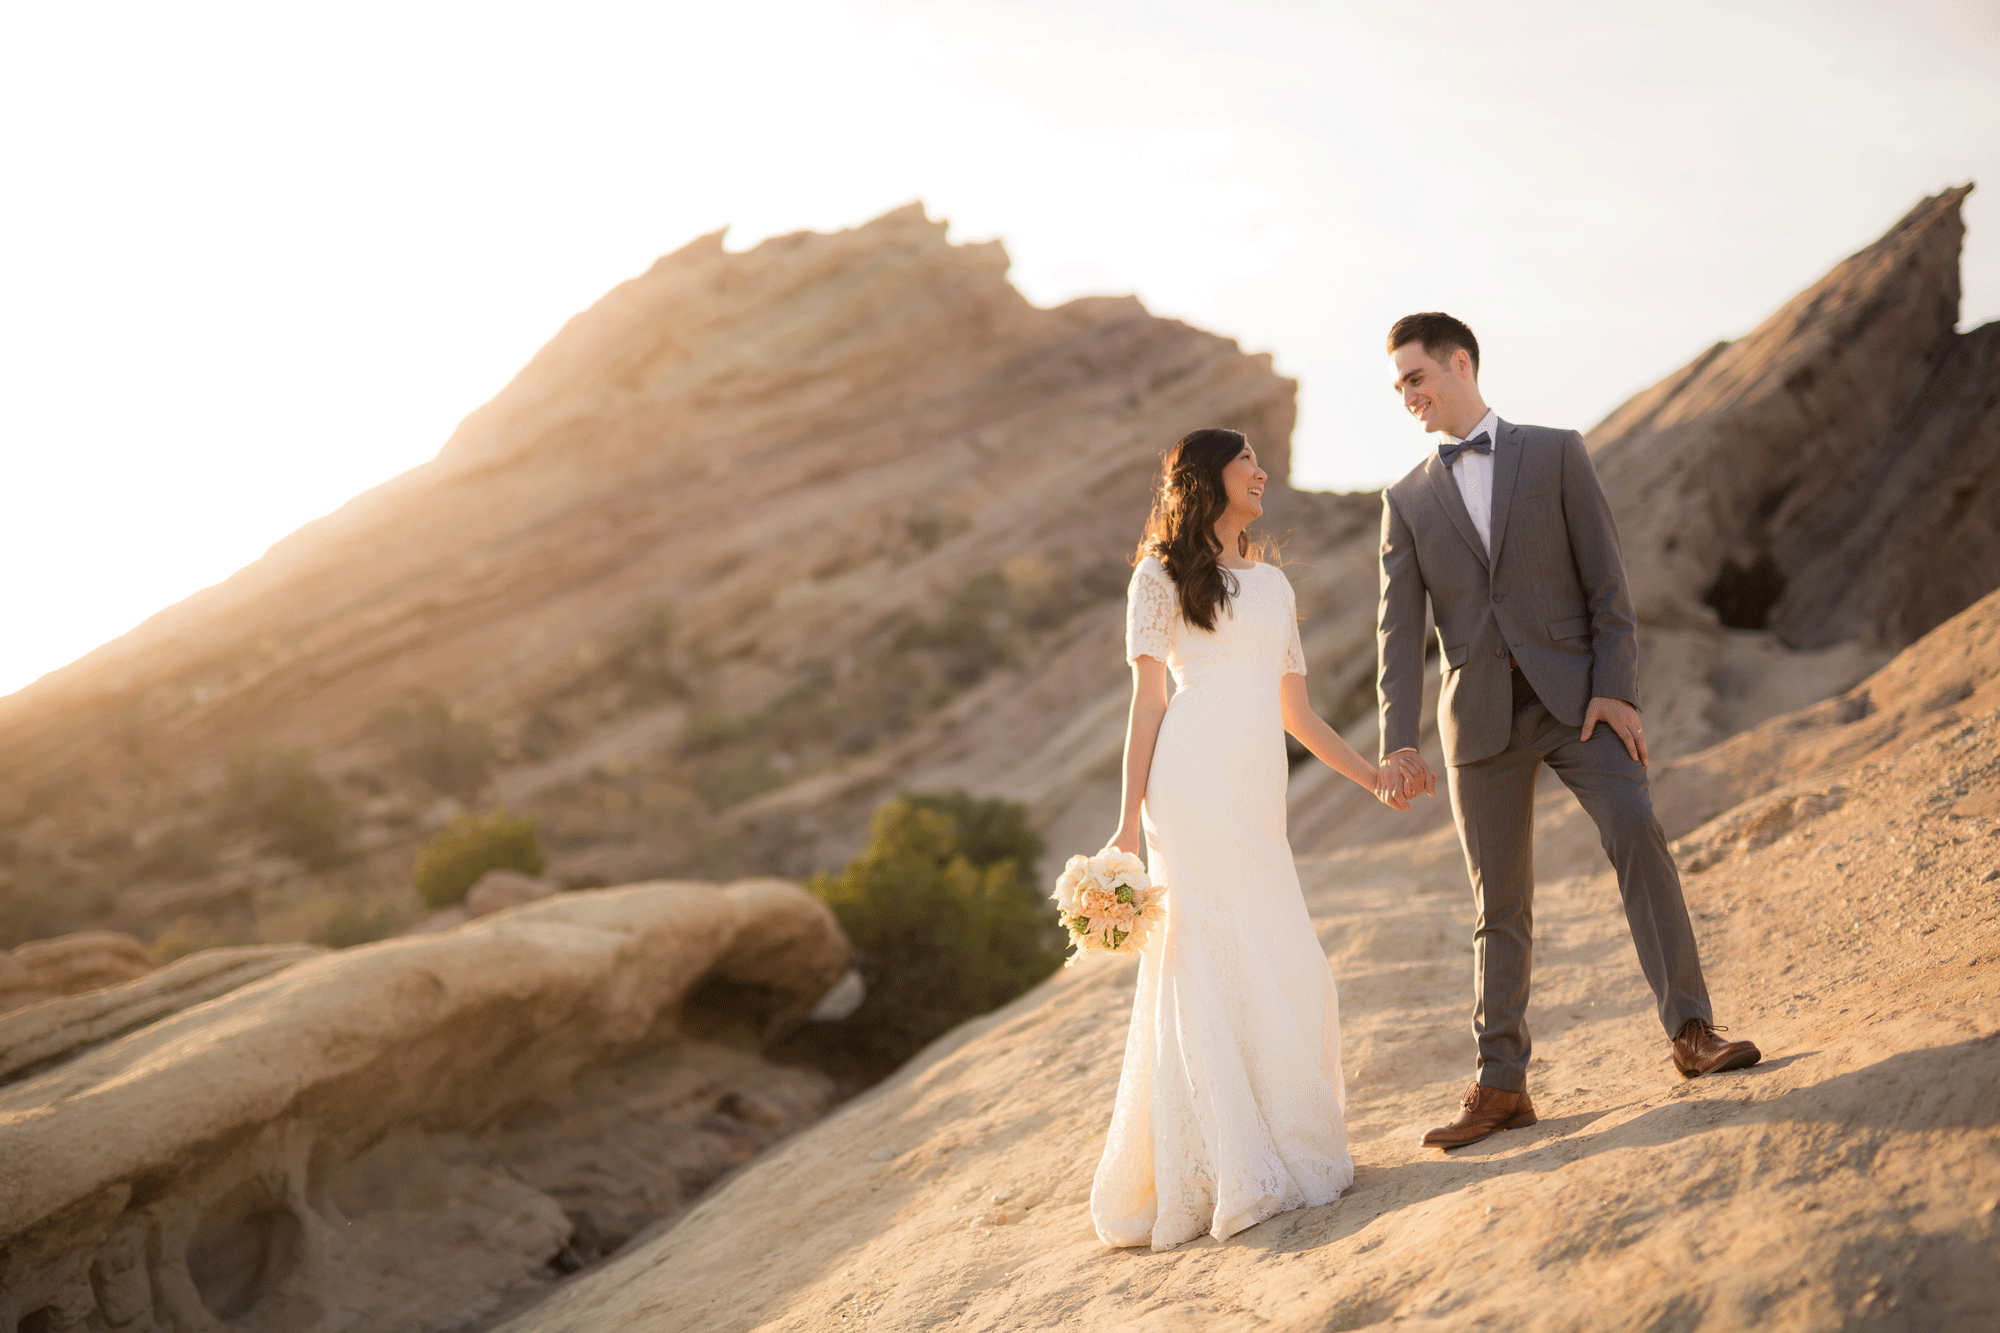
Long before it became a signature element in J.J. Abrams’ films, lens flare lent an artsy edge to photos and upped their visual appeal. Although multi-coated filters and felt-padded hoods work well for reducing lens flare, which many people seek to do, these leaky streaks and circles of light have become a staple in golden hour photos.
Here are three basic characteristics of a lens flare:
- Lack of contrast
- Washed out colors
- Warm hues & color shifts
A Note On When To Use Lens Flare
When including or adding flare into an image, it’s important that you not overlook the basic elements that make a great image in the first place, including strong composition, posing, and expressions. The flare should only enhance an already strong image.
A Note On Handling And/Or Adding Lens Flare In-Camera
There are a number of techniques you can use to add flare when the existing light is less than ideal. By strategically placing and using flashes, for example, you can recreate sun flares and enhance them in post.
[Related Reading: Real Lens Flare – Done The Right Way]
“Fixing” Lens Flare During Post-Production
Given the basic characteristics of flare and its impact on photos, we often need to counter these effects when processing pictures with strong instances of flare to balance out the image and retain key details.
That said, here are some quick tips for handling lens flare during post-production.
1. Increase The Contrast

Without sufficient contrast, an image can look drab or muddy. Your subjects will likely struggle to pop and instead get lost in the photo. By quickly increasing the contrast, however, the details in the image become more defined and allow the lens flare to complement the image rather than distract from it.
2. Deepen The Blacks

Deepening (or “crushing”) the blacks in the image will add further contrast and reveal more detail in an image with an abundance of lens flare. While you can use other methods to adjust exposure, such as a radial burn, which helps direct focus to a specific (and usually bright) area in the image, such an adjustment might under or over expose certain areas of your subjects. In the image above, for example, placing a radial burn over the couple made her legs appear very dark compared to the rest of her skin (see the example below).

To resolve this issue, a gradient was used to lightly burn the right side of the image while the blacks were “crushed” uniformly for purposes of adding extra contrast across the entire image.
3. Adjust The White Balance & Color Hues

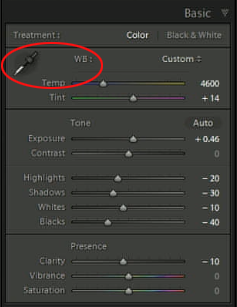
In portraits that incorporate lens flare, the subject’s skin tone often takes on the warm hues of the lens flare. A quick fix in Lightroom involves adjusting the white balance with the WB dropper tool, located in the “Basic” panel in Lightroom (see below). In case you’re unfamiliar with how to use this tool, simply click on the dropper and then choose a neutral area in the image to click on (usually a white or grey shade of color).
 Another way to control a hue shift in an image (say the skin tones appear too yellow) is to make adjustments using the HSL Slider in Lightroom. In the case that the skin tone is too warm (or yellow), you can simply select the slider with “Saturation” selected and place it over the area of the image that needs adjusting. Next, click and drag the slider down. You should see the colors begin to shift, and you can adjust to your liking.
Finally, you can help control white balance by using something like the Datacolor SpyderCHEKR 24 Color Chart to achieve a proper color balance. You can find more information about the checker and how to use it here.
4. Add More Flare (If Desired)

If your image would benefit from additional flare added in post, make sure to provide enough light in camera and match the lighting direction to make the effect look believable. You can find lens flare or sun flare brushes in various presets and actions, which offers an easy fix, but you can also create the effect yourself.
[Related Reading: Get A Natural Sun Flare With One Click In Lightroom]
Conclusion
Lens flare is a popular creative effect that can be easily captured in-camera and usually (if necessary) “fixed” in post, at least under most circumstances. Of course, blown out highlights can be tough or even impossible to recover, so be sure to utilize this technique with the final outcome in mind and control the light as best you can when capturing the shot. It’s also worth noting that each of us will have a different opinion on what looks “right,” which is why we placed quotation marks around the term “fixes,” which should be made according to taste. You may want the image to appear warmer than what the “true” white balance should be, for example, and that’s fine. Part of the charm in lens flare images is in their warmth, and removing too much of it will definitely affect the impact the image has on the viewer.
That said, here’s a recap of the tips we provided above for “fixing” lens flare during post production:
- Increase The Contrast
- Deepen The Blacks
- Adjust The Hue
- Add More Flare (If Desired)
If you would like more in-depth information on how to handle different lighting scenarios, check out our From Shoot To Post workshop, which is available to Premium members, as well as our Lighting workshops, which are available for purchase in our store. For Lightroom-specific training, don’t miss our collection of Lightroom courses.


Get Connected!