Like window displays from the days of brick & mortar, the photos that companies use to sell their products have been purposefully designed to make a positive first impression. Afterall, within the realm of marketing, appearance definitely matters. In fact, a study from a few years back found that “93% of consumers consider visual appearance to be the key deciding factor in a purchasing decision.” For this reason, product photographers need to carefully consider everything from product photography backdrops to lighting, angles, and more in order to create a positive online shopping experience. To help you ensure that your product photography inspires more sales than bails, we’re going to look at some of the best product photography backdrops and share some tips on how to use them.
Tips on How to Use the Best Product Photography Backdrops
- Make a Plan
- Choose the “Right” Product Photography Backdrop
- Compose the Shot
- Dial in the Lighting
- Mix Up the Surfaces
- Edit for Success
Tip 1. Make a Plan
Before ever picking up your camera, it’s a good idea to put together a plan that you’ll use to guide your session from set prep to editing. This holds especially true if you plan to photograph multiple products and need to maintain consistency across the complete set of images. Establishing clear guidelines from the beginning will also help ensure you shoot consistently over several sessions, an important factor when shooting for brands.
Here are some things to consider when creating a plan for your product photography shoot:
- Scene/Backdrop
- Lighting style and setup
- Composition, which includes focal length, angles, depth of field, amount of negative space around the featured product, and picture dimensions/size and orientation (landscape vs. portrait), among others
- Editing style and presets for consistency
We’ll discuss these points in more detail in the tips below.
Tip 2. Choose the “Right” Product Photography Backdrop
Once you’ve made a plan for your product photography session, you can start setting the scene for your shots. When photographing products, you’ll typically approach and set up your scene in one of two ways. You’ll either capture straightforward product-only shots, such as placing our product in front of a plain white backdrop, or you’ll opt for lifestyle shots that feature the product in the context in which it’s used, like a person wearing a shirt that is being advertised.

What is “right” for your shoot will vary based on which products you’re photographing, how big they are, the color of the products and backdrops, as well as the style and preference of the brand. For the purposes of this article, we’ll stick to small to medium-sized product-only shots, and we’ll opt for product photography backdrops that also give the illusion that the “set” is real and not just a backdrop for product shots. This kind of gives us the best of both worlds.
We’ll discuss lighting scenarios later that will help determine exactly where you should place the backdrop.
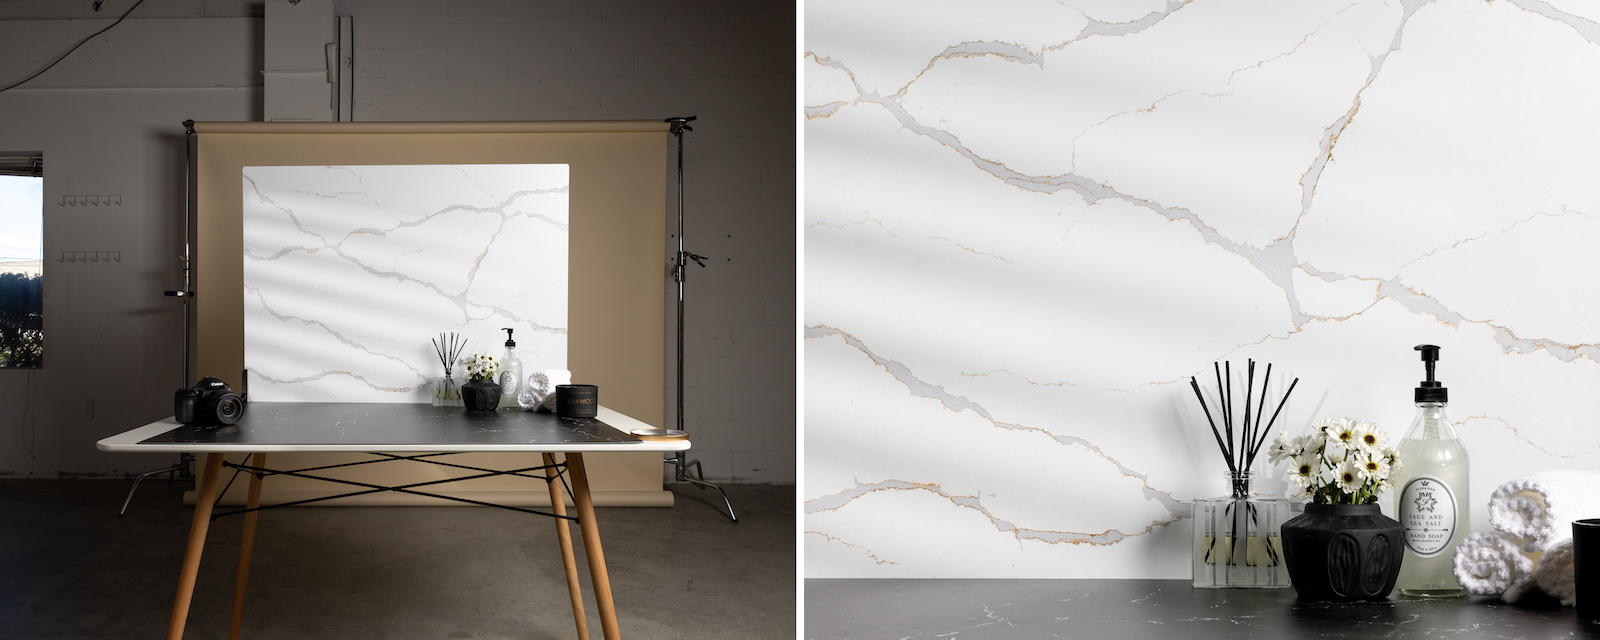
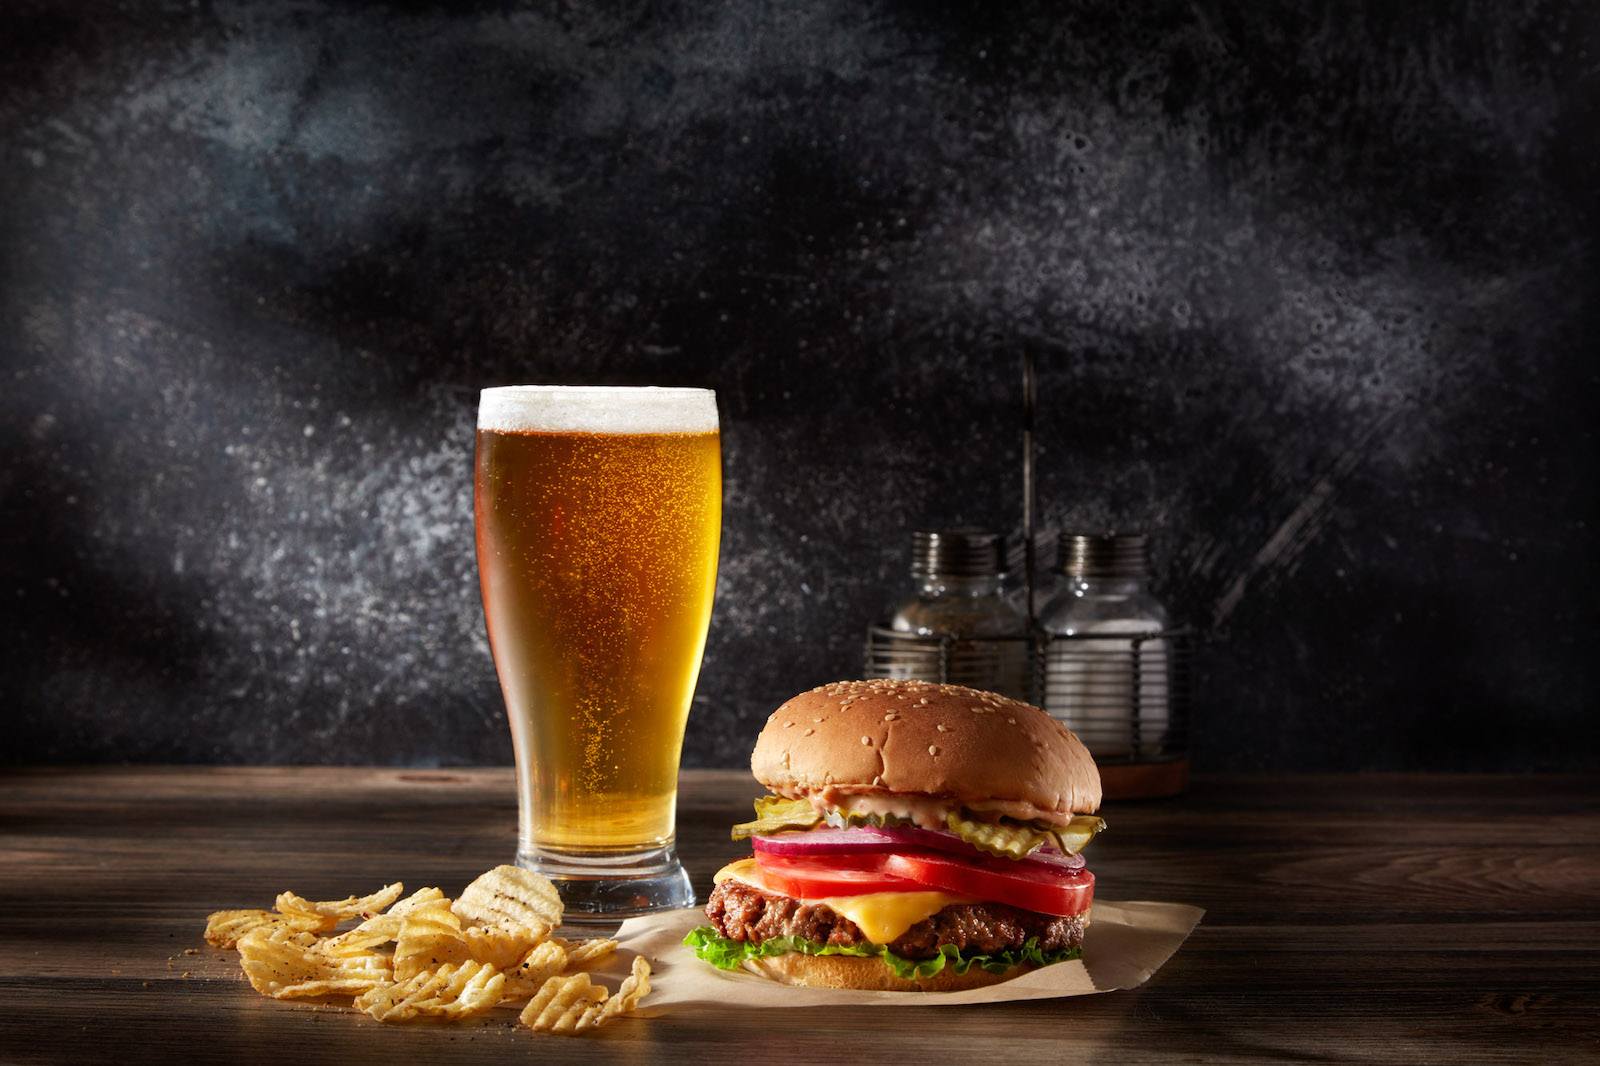
Match the Product to the Backdrop
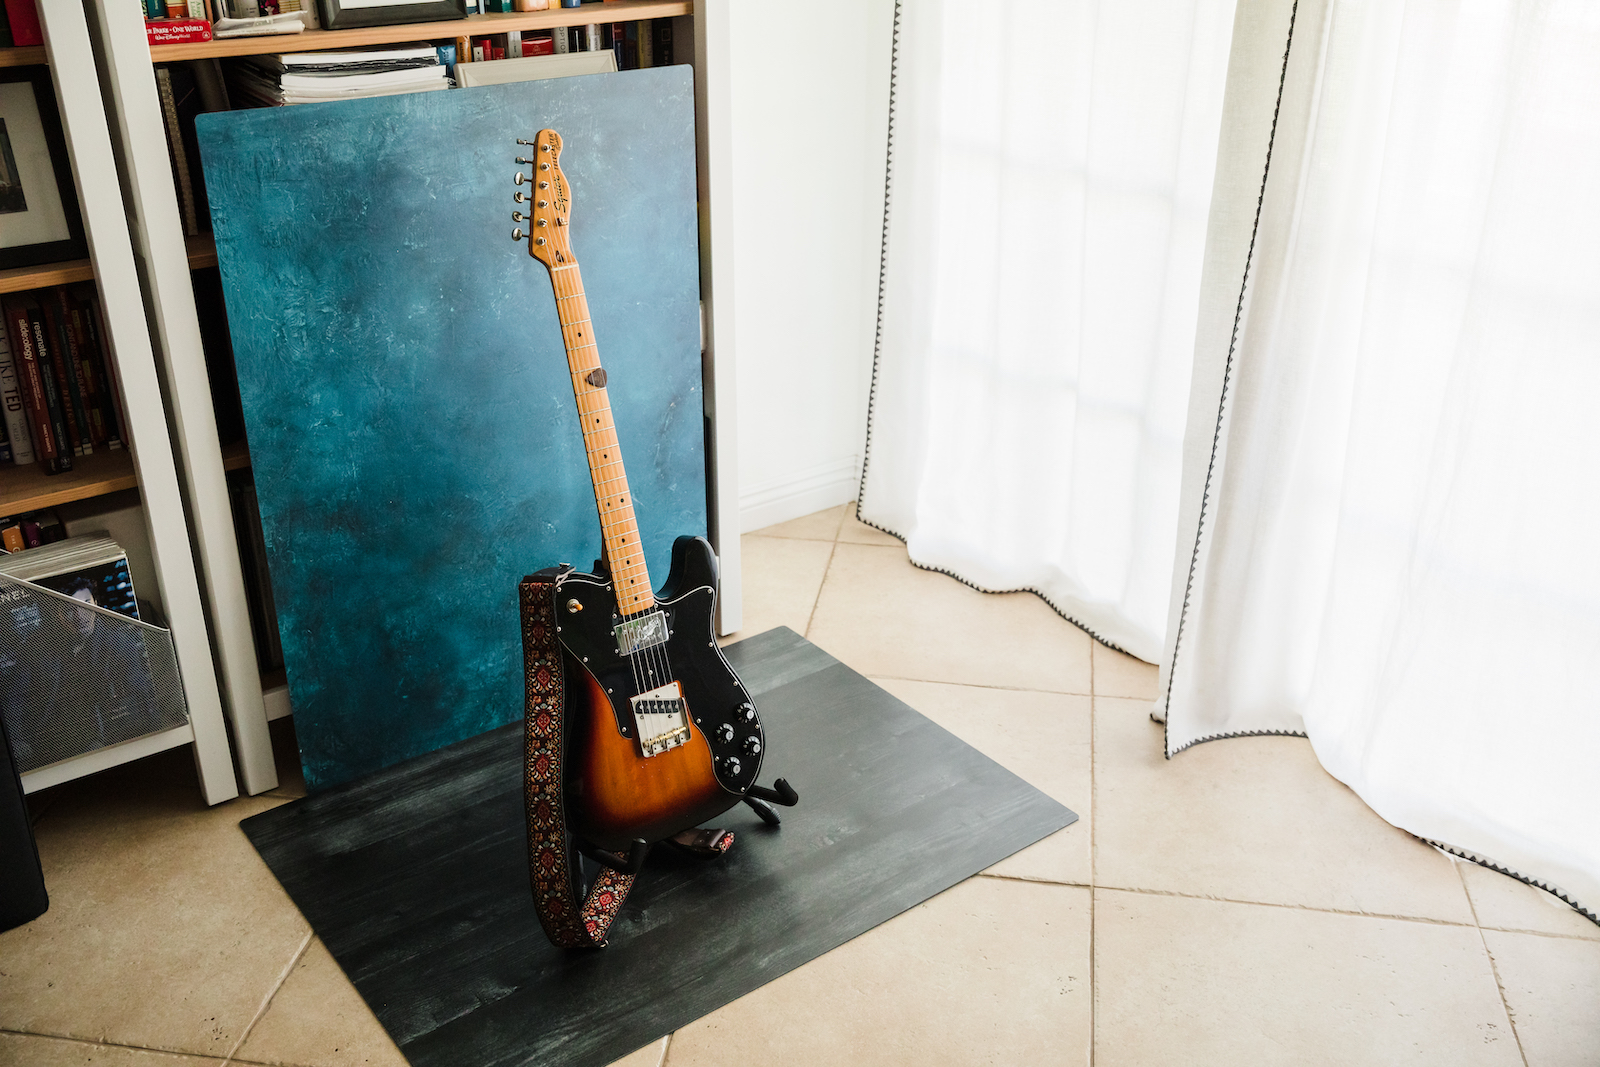
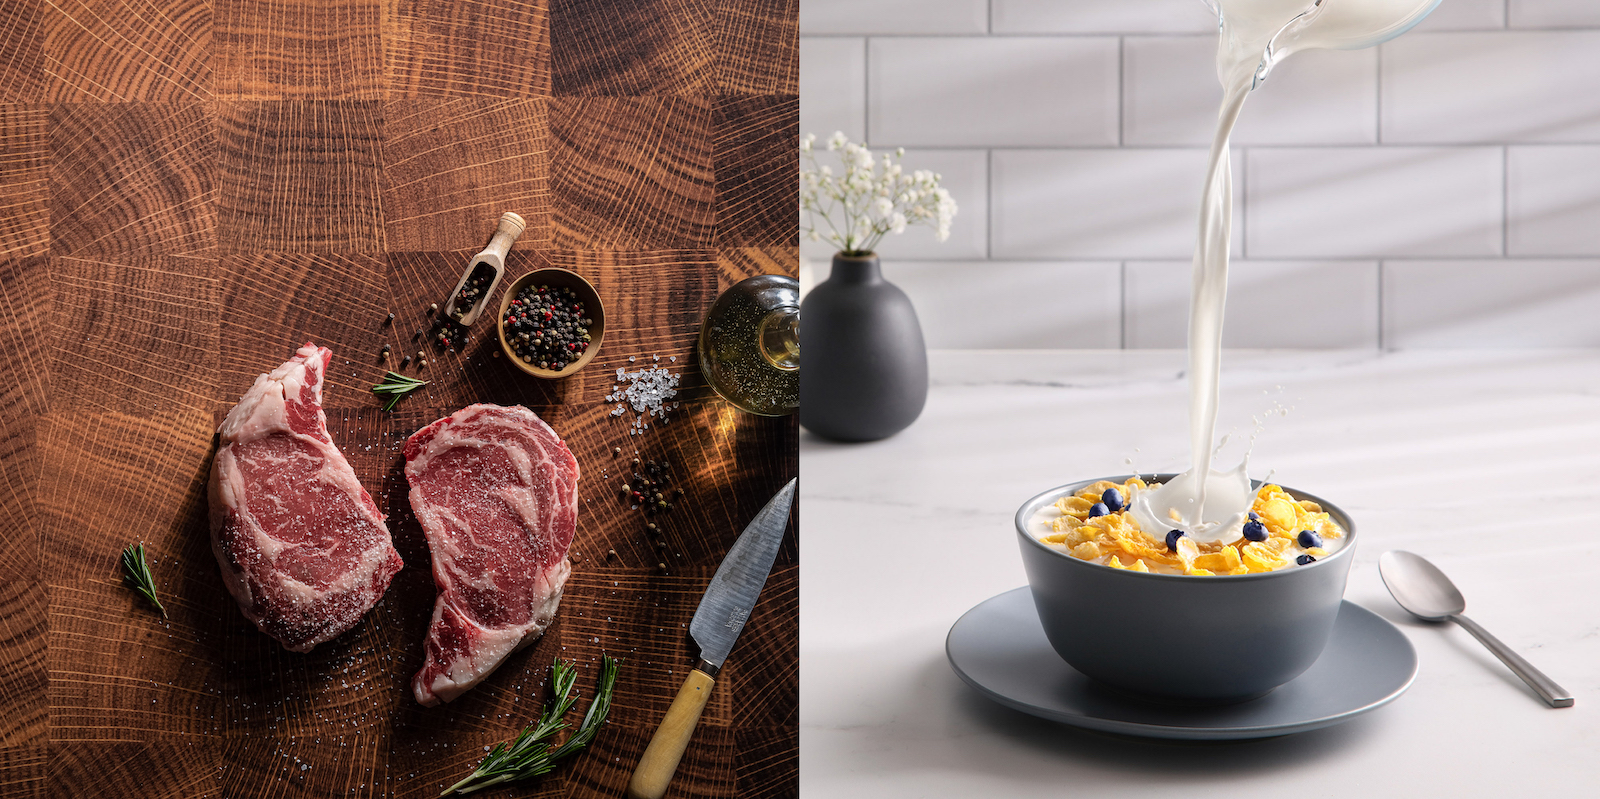
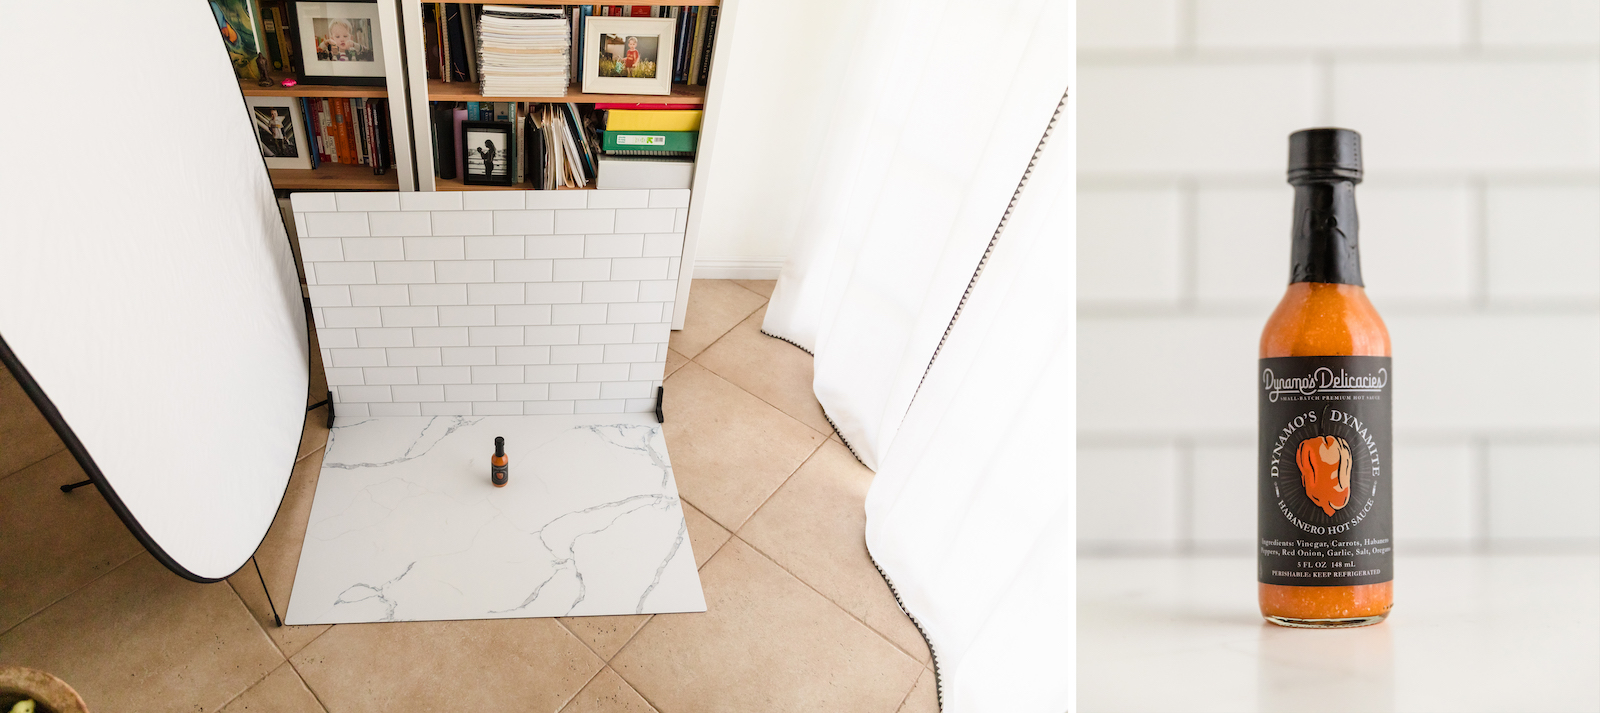
To create a more visually appealing product photography shot that convincingly blends product-only photos with lifestyle or in-context imagery, choose a backdrop that complements the product. For example, placing a food photography shot on a surface like one you’d find in a kitchen, complete with a tiled backsplash, will make it look like the photo was captured in a working kitchen, even if it was really captured in your living room.
You can find a variety of photorealistic backdrops to suit your needs. One of our favorite go-to backdrops are the Duo Boards from V-Flat World, which feature an array of colors and textures designed to complement the vibe of the shot, whether it be elegant, rustic, or other. Available textures include marble, subway tiles, concrete, plaster, hardwoods, and more. These boards also include imaging on both sides (hence the name “Duo Board”), which gives you two options for board. The goal is to find and use colors and textures that look great but don’t distract from the product, which is the real star of the show.
Know the Rules for Where the Photos Will Live
Choosing a backdrop also depends in part where your product images will live. For example, Amazon requires that the main image for a product be photographed against a pure white background, although they do allow backgrounds and environments in other shots that give context to the product being sold. If you need a plain white backdrop, you can use a simple sheet of white card, a foam board, or even a traditional v-flat if you have one on hand.
Consider the Backdrop’s Portability

Depending on where you plan to physically capture your product images, portability may also factor into your decision of which product photography backdrops to use. For example, if you’re traveling to a location to capture product-only photos, you’ll need to bring a backdrop with you. In such instances, you’ll want a backdrop that is easy to transport & carry, set up, and break down. Again, this is a situation in which something like the Duo Boards will come in handy, especially because you can also pick up a specially designed bag to transport them.
Portability becomes less important for in-studio (or at-home) sessions, which offer more flexibility. In a studio, you can set up permanent or semi-permanent shooting stations and have your backdrops and lighting gear ready to go.
Tip 3. Compose the Shot
With the backdrop in place, it’s time to compose the shot.
Single Item Product-Only Shots
For a product-only photo featuring a single product and no props, composing your shot should be quite simple. First, whatever composition you choose, be sure to keep your labels centered in relation to the camera’s point of view. Next, focus on image orientation (portrait vs. landscape) and the ratio of white space you want to maintain around the product, which will most likely be placed in the center of the frame. For Amazon’s feature image, which must use a plain white backdrop, they ask that the product fill at least 85% of the photo. If you’re shooting for a magazine ad or an online banner, however, you’ll need to know the orientation of the ad and how much negative space is needed to add text. It’s probably a good idea to get a variety of images to cover multiple scenarios so that the people using the photo to create the ad will have options.
Multiple Product or Prop-Enhanced Shots
For more complex shots, such as those with multiple products or props alongside the main product, start with your featured product and build around it. You can add props as needed, such as ingredients around the main dish for food shots, or whatever else will complement the featured product and enhance your image. Experiment with different layouts until you find one that will work for your product.
Angles
Try capturing your product from multiple angles to give your viewers an opportunity to see the product from different perspectives. This includes shooting at eye level or from higher angles, lower angles, and top-down angles. It also refers to shooting close-ups, medium shots, and wider angle shots, depending on the backdrop and its size limitations. Offering your viewer more angles will help them get a better feel for the product and can have a greater impact on whether or not they make a purchase.
To help you capture a variety of angles with ease, consider getting and using a portable table. If you place your small to medium-sized backdrop on a table, you can more easily get lower angle shots of the products you’re photographing. If you don’t have a table, you may have to either lie on the floor or else stick to slightly higher angles. Of course, this won’t be an issue if you’re shooting top-down shots. In fact, placing the backdrop on the floor may work better for such angles.
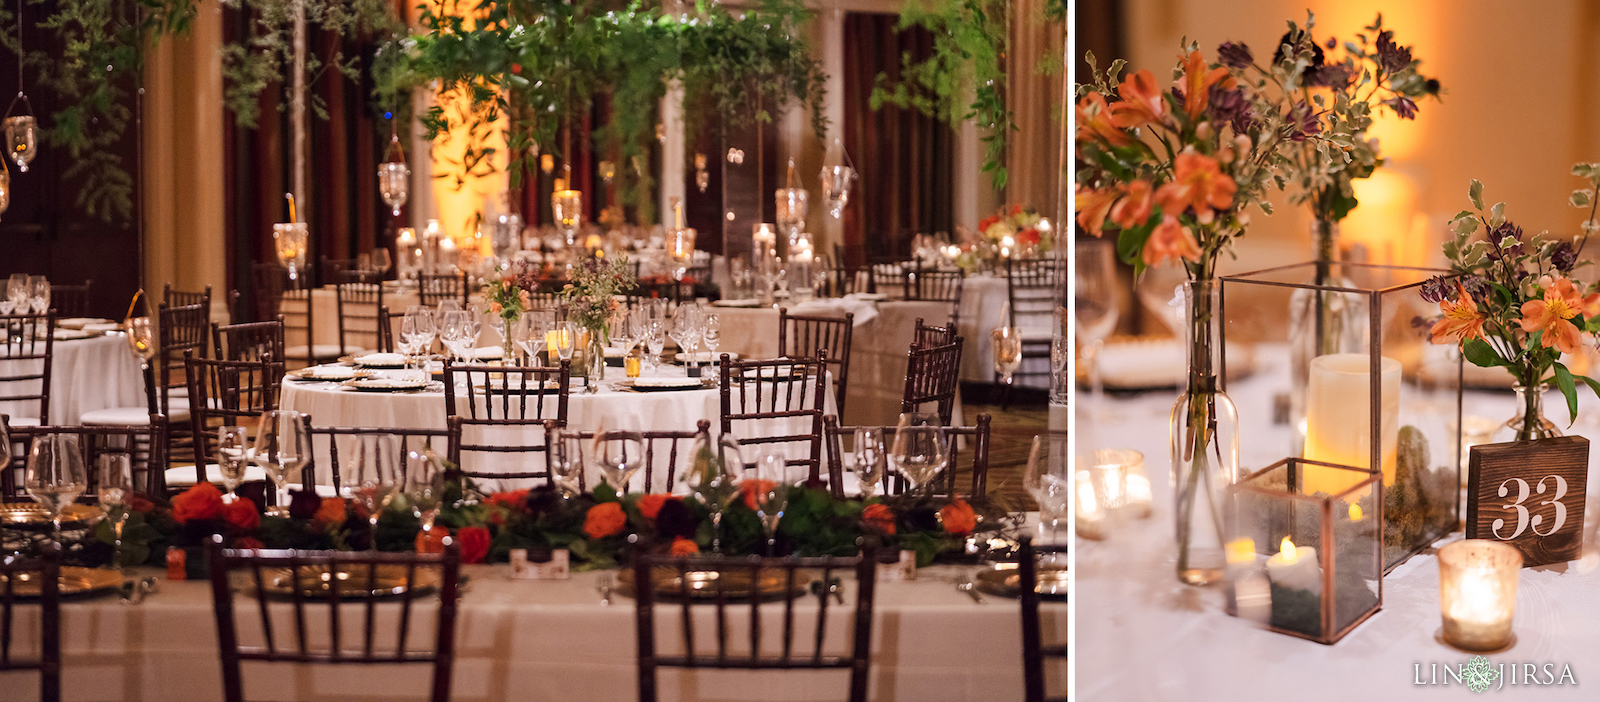
I recommend trying some creative angles as well, such as adding foreground objects to give added depth. Wedding photographers use this technique regularly when photographing wedding and reception details.
Tip 4. Dial in the Lighting
The quality of your lighting can make or break your product photography, so make every effort to get this part right. You can choose to use natural ambient light, which you can still modify, or you can add light with strobes. Either way, be sure to dial in your exposure and balance it with the light source to match the lighting style you want (bright and airy vs. dramatic and moody). Here are some tips to help you make sure your lighting setup works for you.
Natural Light
To begin, I recommend that you try to avoid using direct sunlight in your product photography. While hard light has its place in photography, it’s not usually a great option when photographing products. If you have to shoot outdoors, look for open shade. Otherwise, take the show inside.
When going the natural light route indoors, look for a large window to set up your station near. If the window has sheer curtains, even better. If not, you can always place a scrim from a 5-in-1 reflector between the window and your product. Also, move your station far enough away from the window to adequately light your scene while maintaining softer shadows. And finally, turn off any ambient lights to avoid mixed lighting.
Positioning Your Product Photography Backdrops
If you’re unsure how to position your backdrop in relation to the window, you can set up your backdrop at a 90-degree angle from the window and place a bounce on the opposite side of the product. Other options include setting the backdrop at a 45-degree angle in relation to the window, or even having the backdrop directly face the window if you have enough room between the window and the product to shoot. The angle you choose is up to you. These are just some basic options to help get you started.
Flash and/or Constant Light
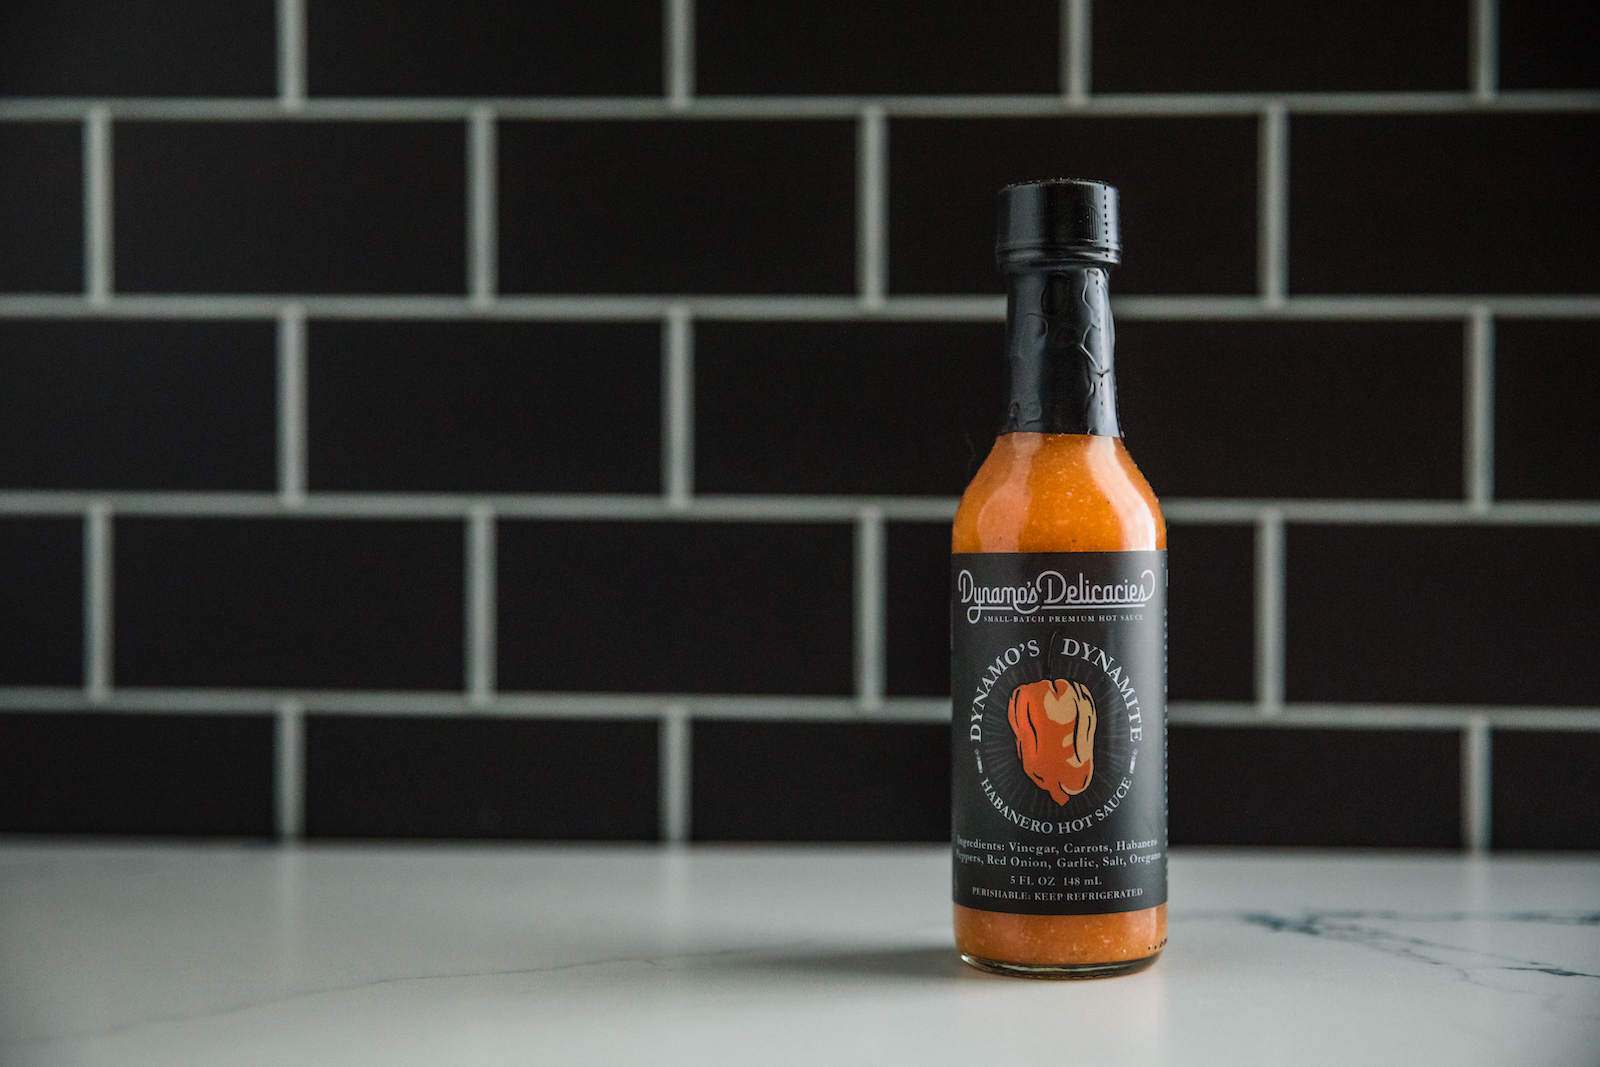
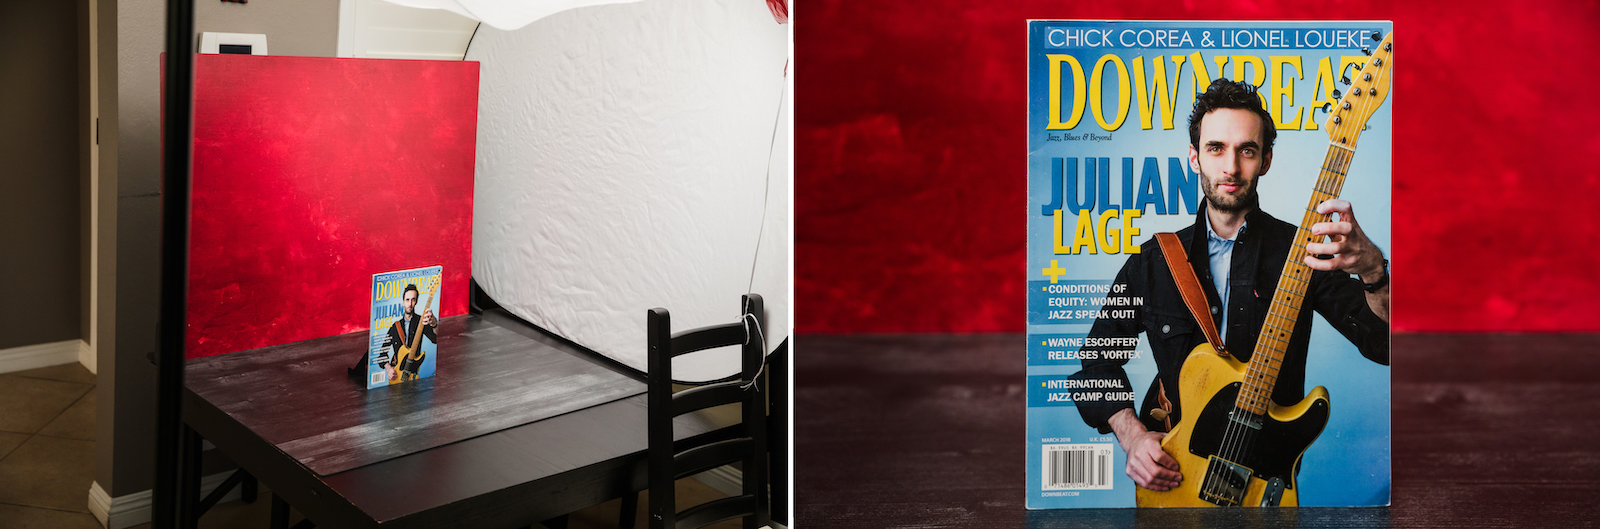
If the ambient light on location is too dim or you want to capture more dramatic shots, try using flash or constant light. Many of the same principles of shooting in natural light will still apply, but you have even more control over lighting when using flash. You can take the more traditional route and use an umbrella or softbox to get a natural light look, or you can get creative with how you use light to feature your product.

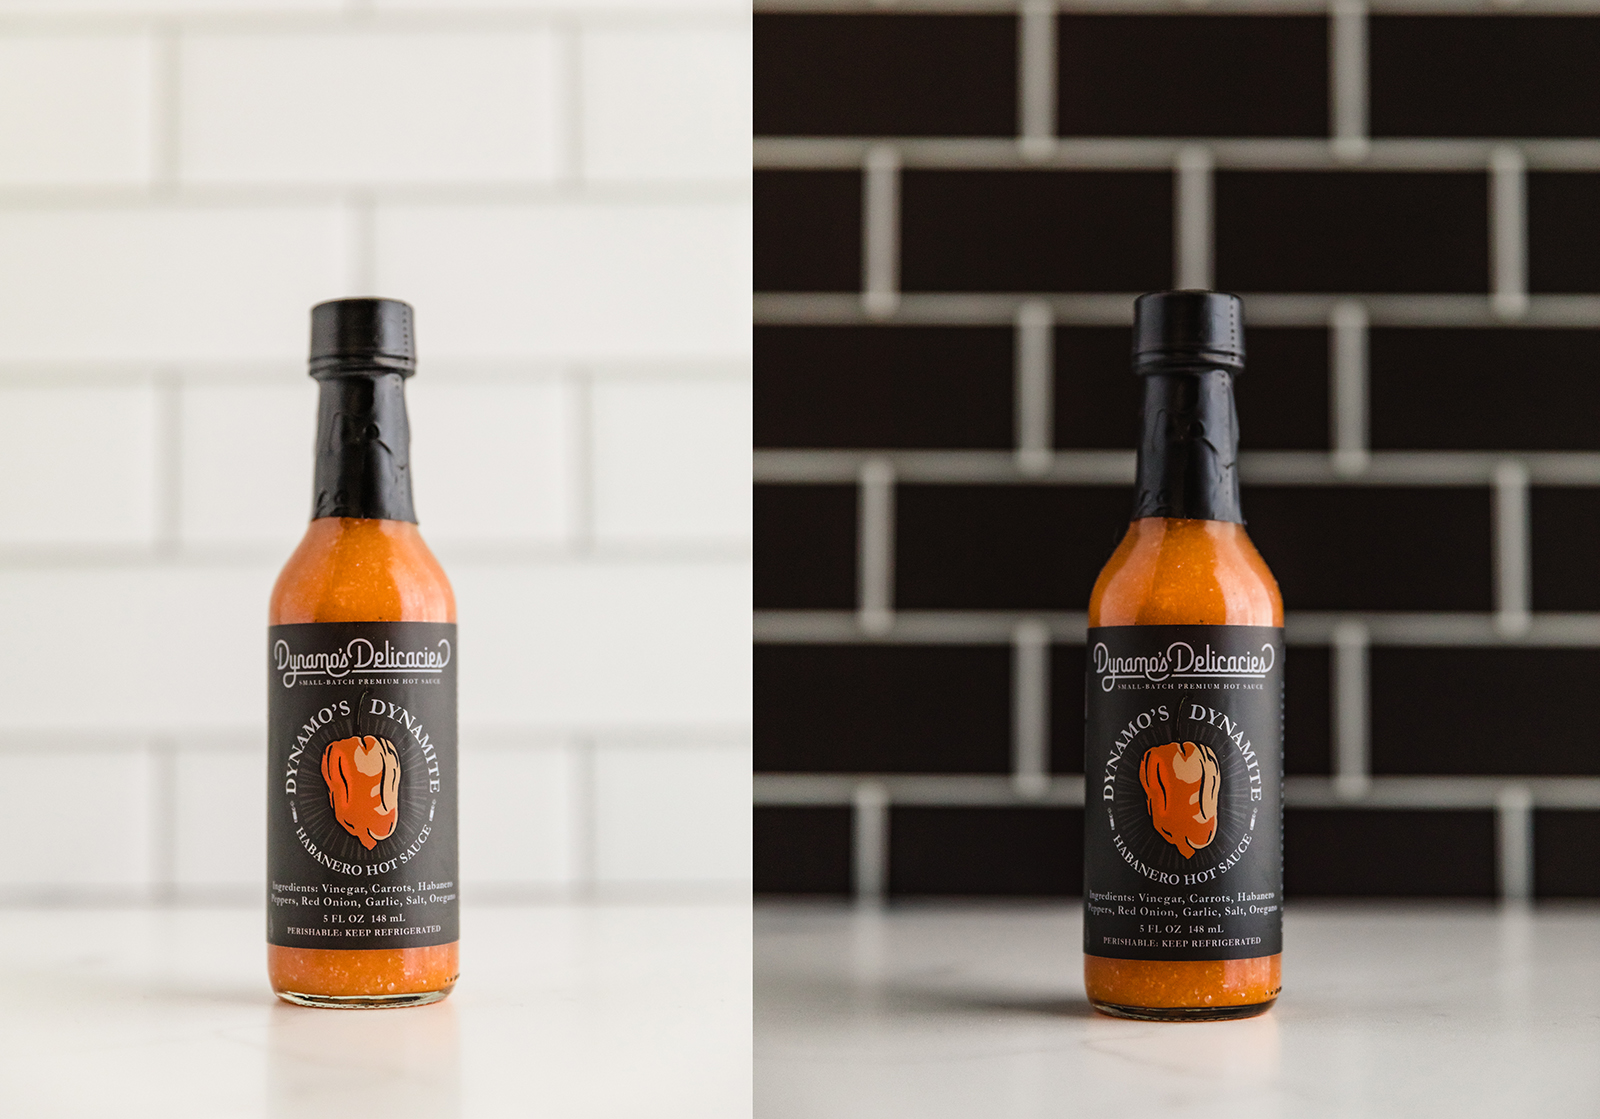
In the example above, I lowered the ambient light in-camera and placed a small LED light behind the hot sauce bottle, facing away from the bottle and toward the Duo Board backdrop. This created a sort of halo around the now silhouetted bottle. Then, to light the front of the bottle, I placed a small off-camera flash (Flashpoint V1, about 76 watt-seconds) camera-left and shot through a translucent umbrella. I also placed the white side of a 5-in-1 reflector camera-right to add a little fill light back onto the bottle. There are other ways to light and shoot this type of shot, but this is the method I used.
Lighting in Relation to Editing Style
To make everything easier during post-production, which we’ll get to shortly, try to light and shoot for the editing style you plan to use to finalize your images. For example, if you want bright and airy (or light and airy) product shots, you’ll want to shift your exposure more to the right of the histogram. Run your highlight alert when shooting on the brighter side to ensure that you don’t blow out any details on your subject. On the other side of the spectrum, when shooting more dramatically lit images, you’ll want to expose more to the left side of the histogram while still making sure to maintain shadow details.
[Related Reading: Product Photography | Why Everyone Knows You’re Not a Professional Product Photographer & How To Change]
Tip 5. Mix Up Surfaces for Product Photography Backdrops
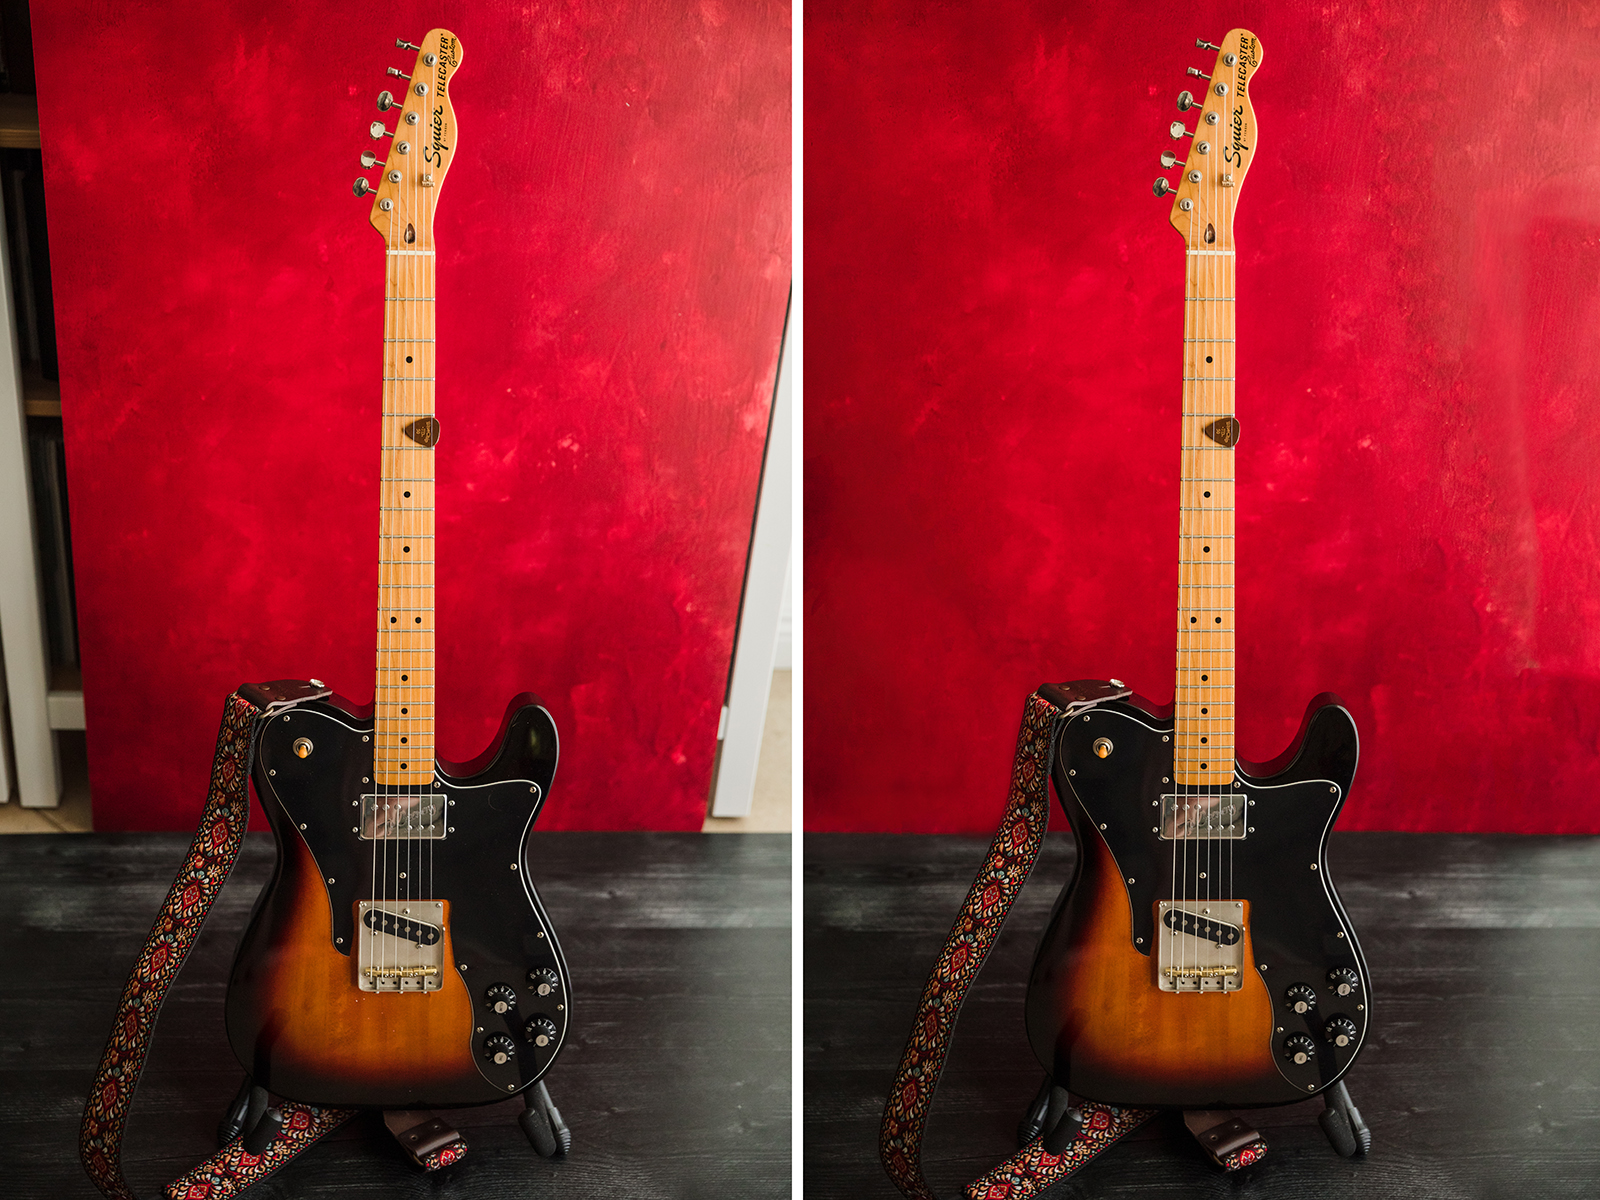
I mentioned earlier that product photography backdrops like the Duo Boards offer a variety of textures for product photographers, including subway tiles, hardwoods, cement, and more. If you’re not limiting yourself to plain white backdrops, go ahead and experiment with a diverse range of backdrops for each product (using different textures or colors for a single product) as well as between products (using different textures or colors across multiple products).
Keep in mind that different backdrop colors and textures lend themselves more easily to certain lighting and editing styles. For example, if you plan to shoot a series of bright and airy images, you might opt for lighter colored product photography backdrops to complement the brighter style.
Tip 6. Edit for Success
At some point before you deliver the photos, you’re going to need to edit and possibly retouch them. Two common editing styles, which we’ve mentioned above, include bright and airy or dramatic and moody. Of course, your edits may fall somewhere in between. To help ensure you’re getting the results you need for a smooth edit during the shoot, you might consider tethering your camera to your computer so that you can see exactly what you’re working with. You can learn more about how to do that here.
Presets
We also recommend using presets during the editing process to help streamline your workflow and minimize the time you spend in post. Editing software like Lightroom will let you batch edit your photos as well, which will save you additional time.
Retouching
As for retouching your photos, the level or extent to which you retouch is up to you, and it should be agreed upon with your client before the shoot. At the very least, you’ll need to clean up any details that were overlooked during the shoot, such as dust or dirt on the product or the product photography backdrops. You might also have to use additional tools to fill out the frame in the event that your product is larger than the backdrop.
Sizing
Size the images for their intended destination and possibly compress them for online usage to keep loading times short on websites. If you plan to use the shots in ads or banners, know the container size needed and resize your files accordingly. Whatever the case, adjust the file size for your clients up front. This will help and your clients avoid any funky crops or web-loading issues.
Conclusion
I hope you found this look at the best product photography backdrops and tips on how to use them helpful. With a little planning, the “right” backdrop for the job, and a solid workflow, you can capture consistently better product photos.