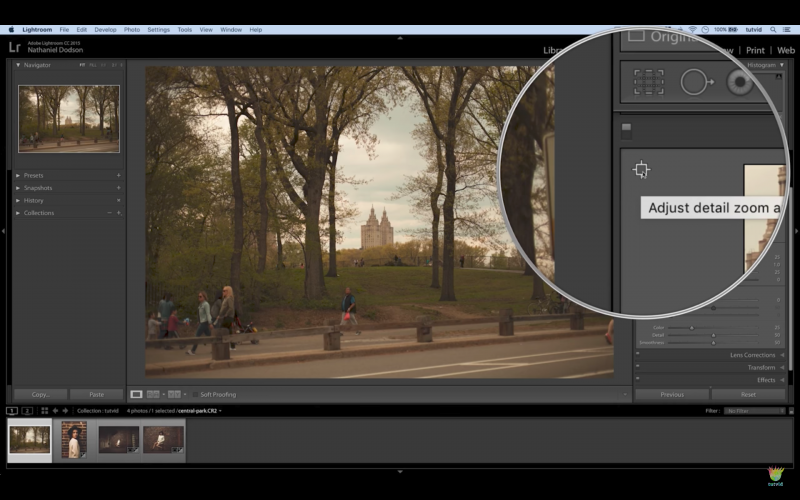
Every photographer loves a sharp image. So much attention is given to choosing the gear that can make the sharpest photos, but so often photos will need just a little finessing in post to achieve maximum sharpness. There are many ways to satiate your hunger for sharpness, and Lightroom probably isn’t the first program you think of to complete the job. It possesses the necessary tools for sharpening, but usually, serious photographers will pass them up in favor of using a sharpening filter in Photoshop like Unsharp Mask, Smart Sharpen or sharpening with a High Pass filter.
Sharpening in Lightroom can be perfectly adequate in many situations, though, with the right know-how. With help from Nathaniel Dodson of Tutvid, we’ll take a walk through Lightroom’s sharpening options.
Sharpening With The Details Panel
In Lightroom’s ‘Develop’ module, which can be accessed via the keyboard shortcut “D,” nestled within the panels of tools to the right of the program is a ‘Details’ panel. The keyboard shortcut command (Mac) or control (PC) plus ‘5’ will take you right to the panel.
In this panel, you’ll find a square “loupe” which offers a window into the fine detail of a small portion of the photo and sets of sliders for sharpening and for noise reduction.
Lightroom’s sharpening tends to not offer the most attractive results if you crank it up. It’s reminiscent of the less refined sharpening of earlier Photoshop versions – antiquated and lacking refinement. It is adjusted with a slider marked ‘amount.’ There are sub-sliders, however, to minimize sharpening issues. They are ‘radius,’ ‘detail,’ and ‘masking.’
The ‘radius’ slider determines the size of the edge as it pertains to sharpening – will the outlines in an image be thick or thin?
‘Detail’ focuses on how the sharpening is applied to fine details in the image, as can be surmised from its name.
‘Masking’ is a slider that creates a mask around the sharpened portions, blocking areas that aren’t meant to be sharp from being affected by sharpening artifacts.
An interesting and helpful feature which isn’t immediately apparent is how the modifier key ‘alt/option’ can change the view temporarily to help you see exactly what you’re doing when you move the sliders. When used with the sliders, it switches temporarily to a monochromatic one which highlights different things depending on which slider you’re using.
Other Sharpening Options
Though offering fewer refinement options, there are other ways to sharpen a photo using Lightroom. In the export dialog, there is a checkbox for sharpening on export and if you tick this box, there are options for the type and amount of sharpening to be applied.
[REWIND:] LIGHTROOM FASTER | USE SMART COLLECTIONS TO ORGANIZE, SEARCH, & CULL BETTER
The print module offers a similar feature and allows you to choose sharpness tailored to different types of photo paper.
Sharpening can be applied to select portions of an image with Lightroom’s adjustment brush, but it lacks the refinement options of making the adjustments to the overall image.
Conclusion
Photoshop still offers better sharpening results, but Lightroom is the clear winner for ease of use. Photoshop’s learning curve is steeper, and Lightroom’s simple slider based approach is more user-friendly for a beginner. The results achieved in Lightroom are still perfectly good, and newer users
will find it easier to achieve the desired results in Lightroom.
Watch Nathaniel’s video for a deeper explanation of the methods and to see it all in action on different types of photos.
And if you really do and want to absorb lots of this kind of information, and go really into detail suggest you take a look at the Lightroom Organization & Workflow workshops. They’ll get you up to speed, and fast, allowing you to get the most out of this program we spend so much time with.


Get Connected!